Xetfer User Guide
Welcome to the Xetfer user guide! Here you’ll find step-by-step instructions and tips to help you navigate Xetfer’s features efficiently.
Xetfer lets you migrate data between Salesforce orgs (production, sandboxes, scratch orgs, or developer orgs), using reusable migration/import templates. It also lets you back up an org’s data with dedicated Backup templates.
Getting Started
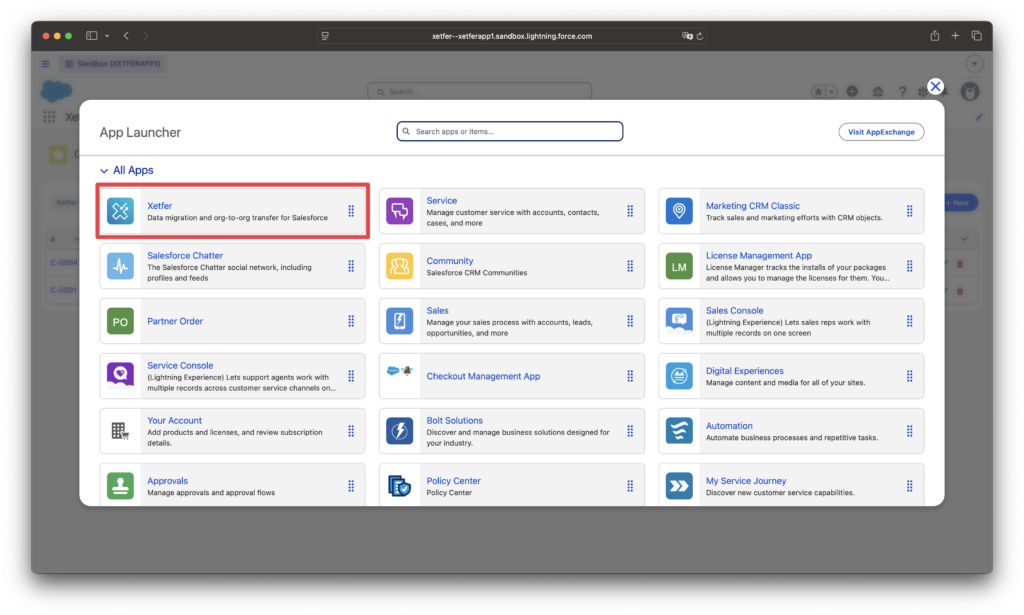
After installing the application, locate Xetfer in the App Launcher, under All Apps.
Xetfer has 6 tabs:
- Connections — connect the Salesforce orgs you’ll migrate data between
- Templates — define what gets migrated and how
- Jobs — pair a template with a destination connection
- Runs — track migration progress and results
- Files — upload or generate CSV files for import and anonymization
- Settings — customize technical settings
Typical workflow:
- Connect your Source and Destination orgs on the Connections tab.
- (Optional) Upload or generate a CSV file on the Files tab, if you plan to import data from a file or anonymize using file-based values.
- Create a Template describing what to migrate — from a Source Org, from a File, or a mix of both across different objects.
- Create a Job that pairs the template with a destination connection.
- Run the job and monitor it on the Runs tab.
Connections Tab
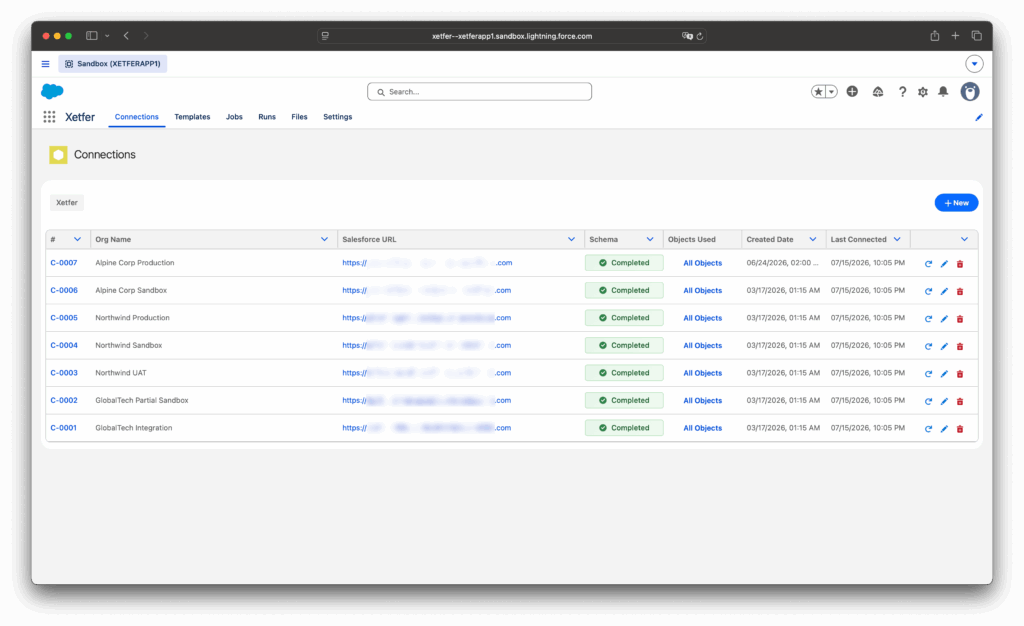
The Connections tab lets you connect any type of Salesforce org — production, sandbox, scratch org, or developer org — to Xetfer. Each connection record stores the information Xetfer needs to access that org during migration. Once a connection exists, you can use it as a Source or Destination in any template or job.
Adding a New Connection
Before adding a Source or Destination connection, the Xetfer Connector package must be installed in that Salesforce org. This connector enables secure communication between Xetfer and the org.
- Open the Salesforce org you want to use as a Source or Destination.
- Install the Xetfer Connector package in that org, using the installation link below.
- Once installation is complete, create the connection in Xetfer.
/packaging/installPackage.apexp?p0=04tQO000001DAaTYAW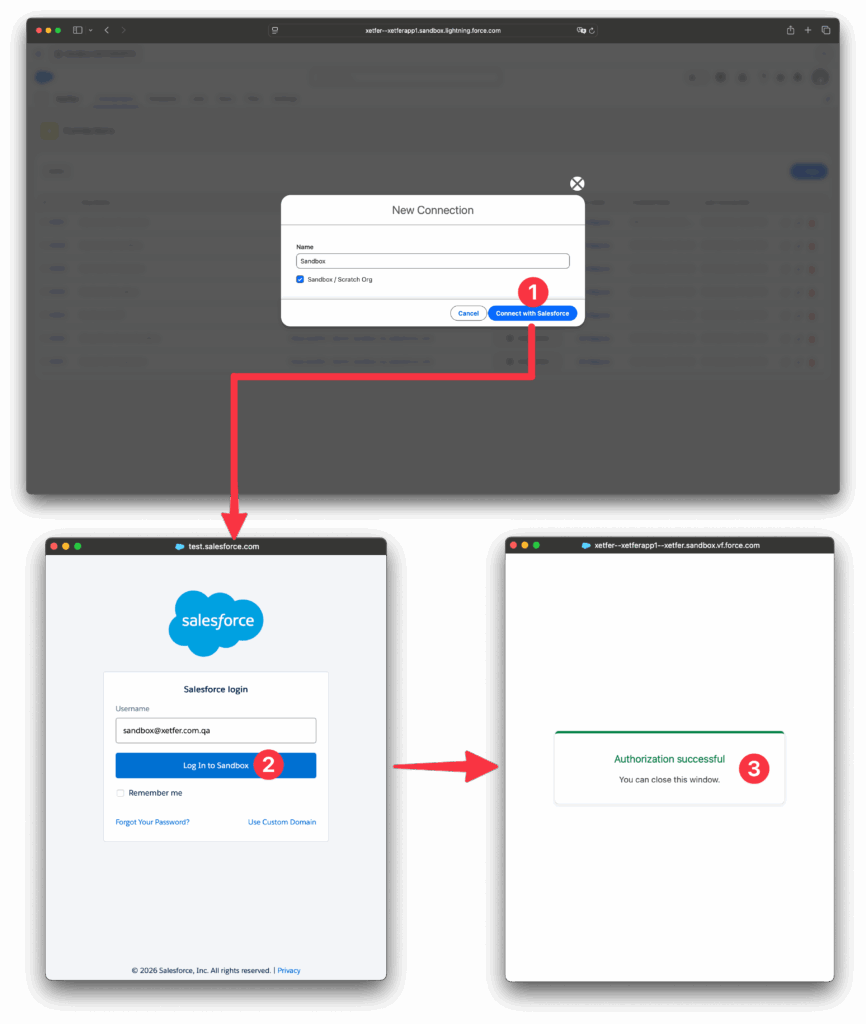
Templates Tab
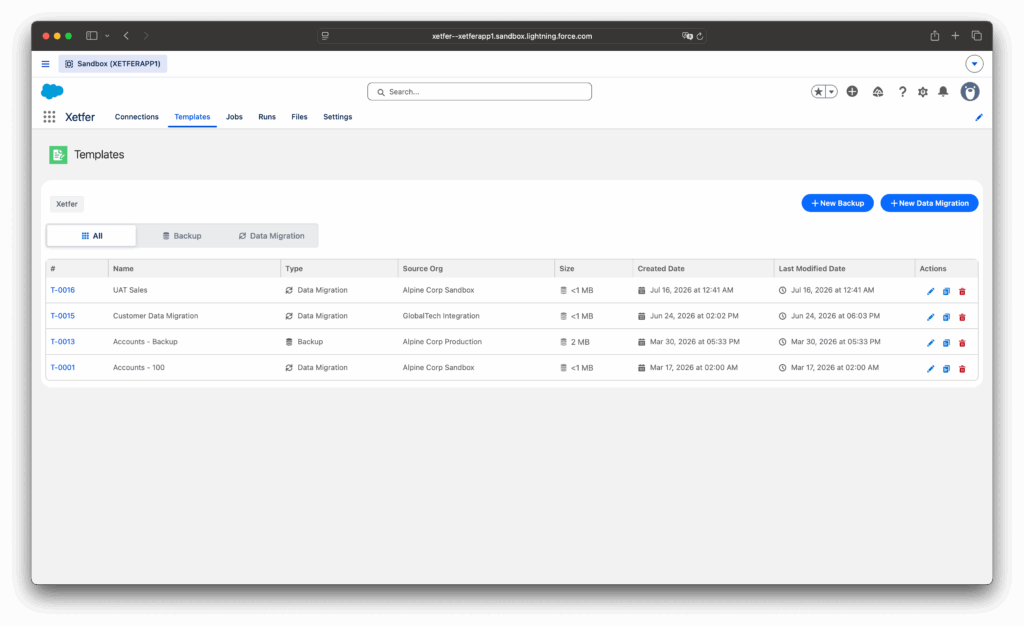
The Templates tab is where you define what data gets migrated (or backed up) and how. There are two template types, created with separate buttons — New Data Migration and New Backup:
- Migration Template — moves data from a Source Org to a Destination org.
- Backup Template — snapshots data from a Source Org for safekeeping, without migrating it anywhere.
Creating a Template
- Click New Data Migration on the Templates tab and give the template a Name.
- Select the Source Org — Xetfer uses its schema to load the available sObjects, fields, and relationships.
- Select the object(s) you want to migrate. Selected objects appear in the object tree, where you can also expand parent and child relationships.
- For each object, choose which fields to include on the FIELDS tab.
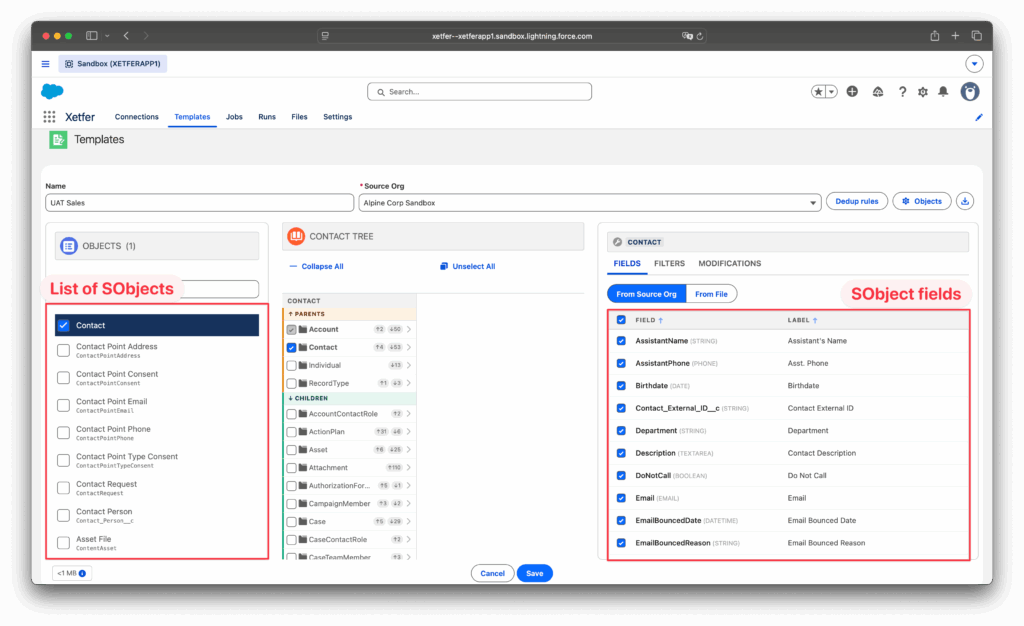
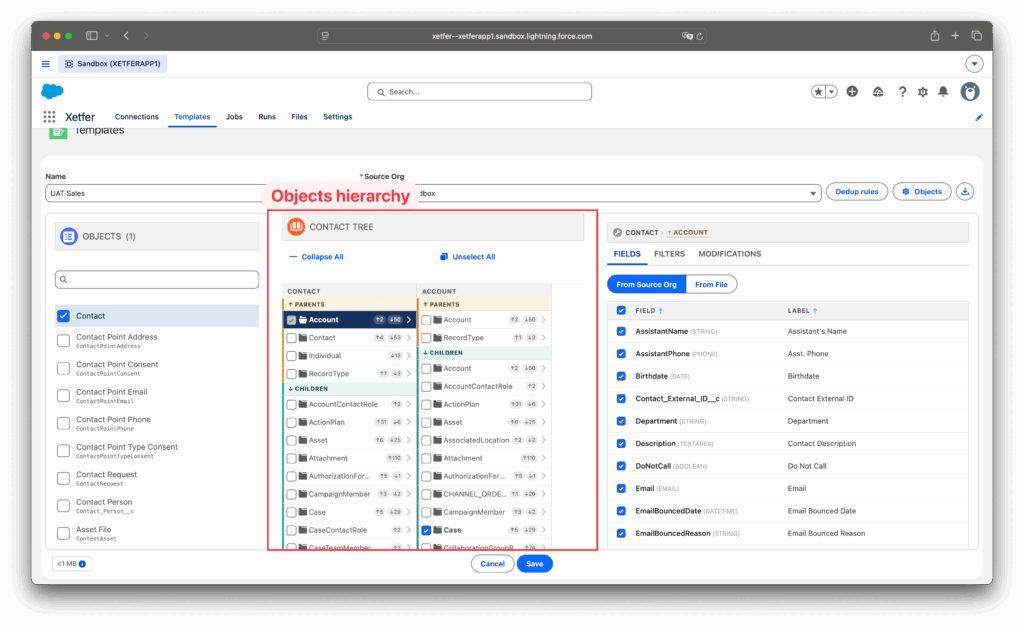
Within a template, each object can then get its data one of two ways:
- From Source Org — records are queried live from the Source Org (the default).
- From File — records are imported directly from a CSV file you uploaded on the Files tab.
Migration from Source Org
This is the default mode: for a selected object, the FIELDS tab is set to From Source Org, and field values are queried directly from the matching records in the Source Org. This mode supports criteria filters and Modifications.
Migration from File
Instead of querying an object’s data from the Source Org, you can import it directly from a CSV file you previously uploaded (or generated) on the Files tab — similar to a Data Loader import.
- Make sure the file you want to import is already available on the Files tab (see Files Tab).
- In the template, select the object you want to import data for.
- On the FIELDS tab, switch the toggle from From Source Org to From File.
- Choose the file to import from.
- For each Salesforce field you want to populate, map it to the corresponding column in the CSV file.
- Save the template.
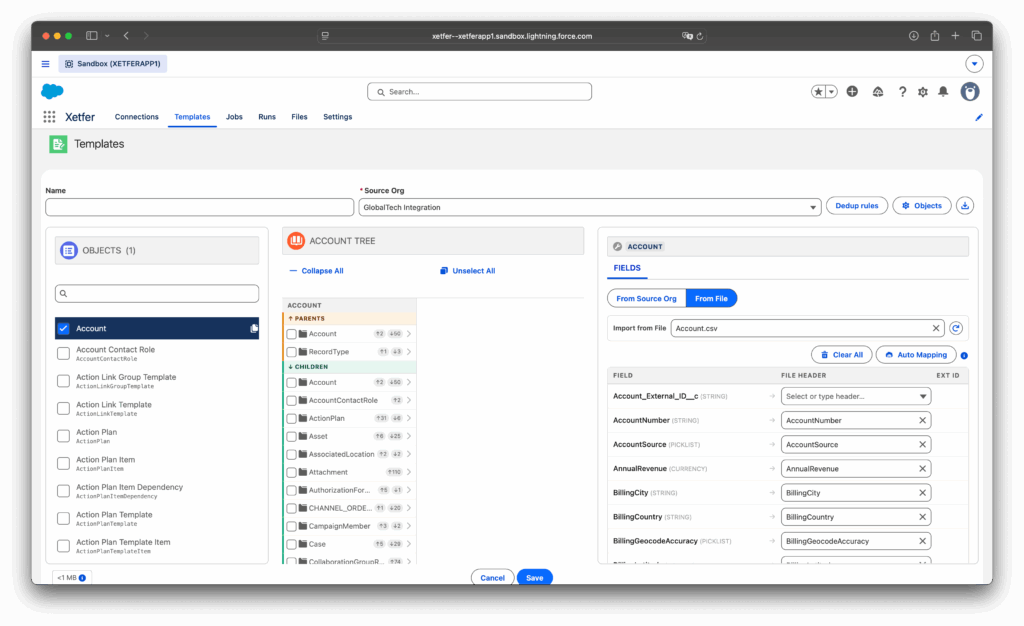
A Source Org is still required even when an object is set to From File — Xetfer uses it to determine the object’s schema.
Filtering Records
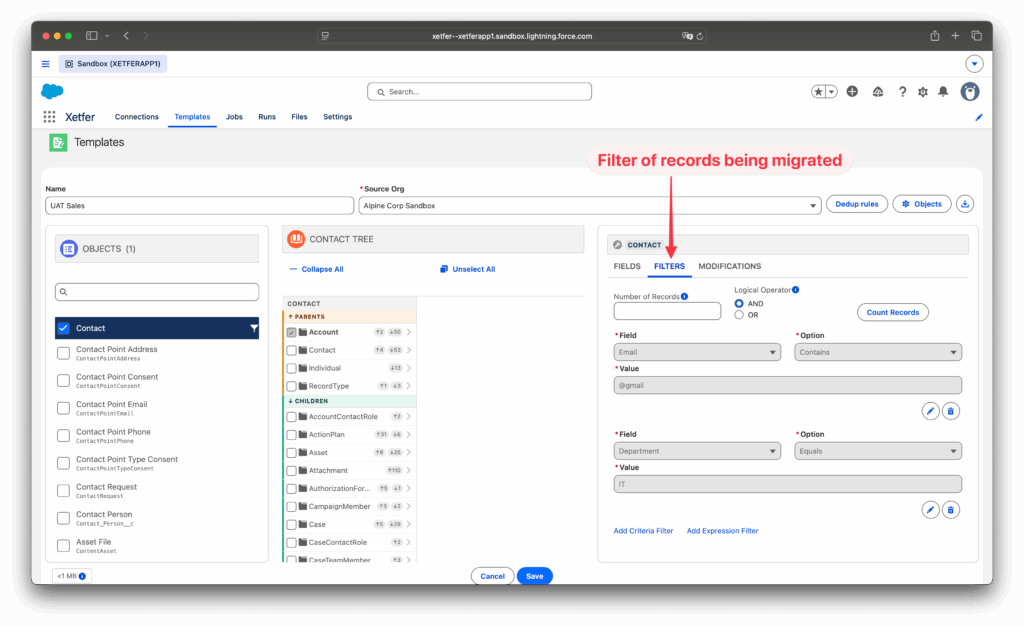
On the FILTERS tab, add criteria filters to narrow down which records get migrated — choose a field, an operator (e.g. Contains, Equals), and a value, then combine multiple filters with AND/OR logic. Use Count Records to preview how many records match before running the migration. For more advanced scenarios, use Add Expression Filter to write a custom SOQL condition instead.
Anonymizing Data
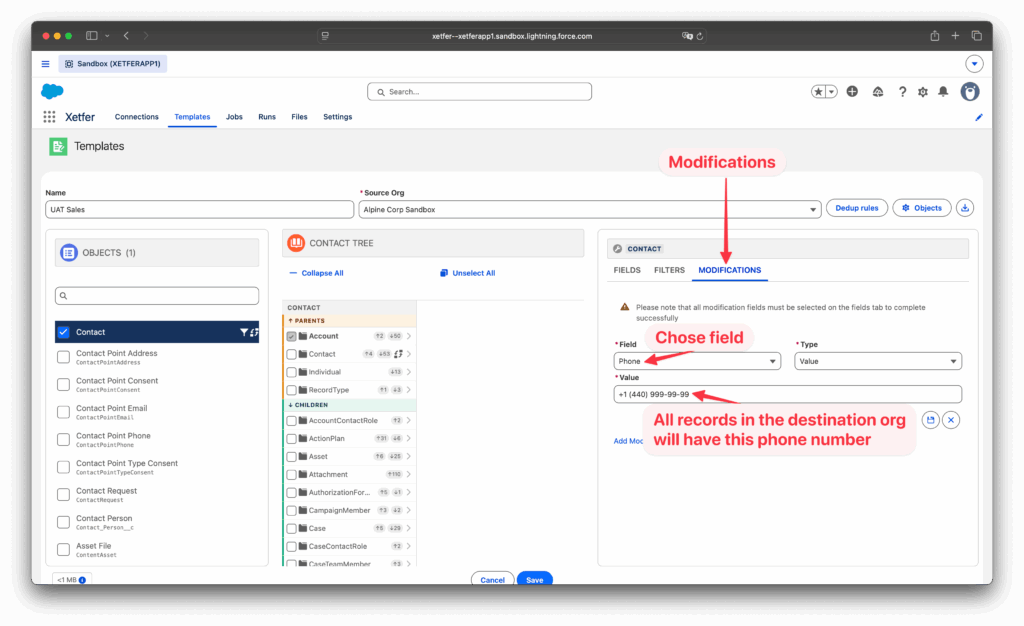
On the MODIFICATIONS tab, you can substitute values for sensitive fields — such as phone numbers, emails, or any other field — instead of migrating the real data.
- Choose the Field you want to modify (it must also be selected on the FIELDS tab).
- Choose a modification Type:
- Value — every migrated record gets the same fixed value you enter.
- From File — each migrated record gets a value pulled from a column in a file you uploaded on the Files tab, instead of a fixed constant. This is useful when you want realistic, varied substitute data (e.g. a list of fake names or emails) rather than one repeated value.
Creating a Backup Template
A Backup Template captures a snapshot of data from a Source Org, without migrating it to any destination.
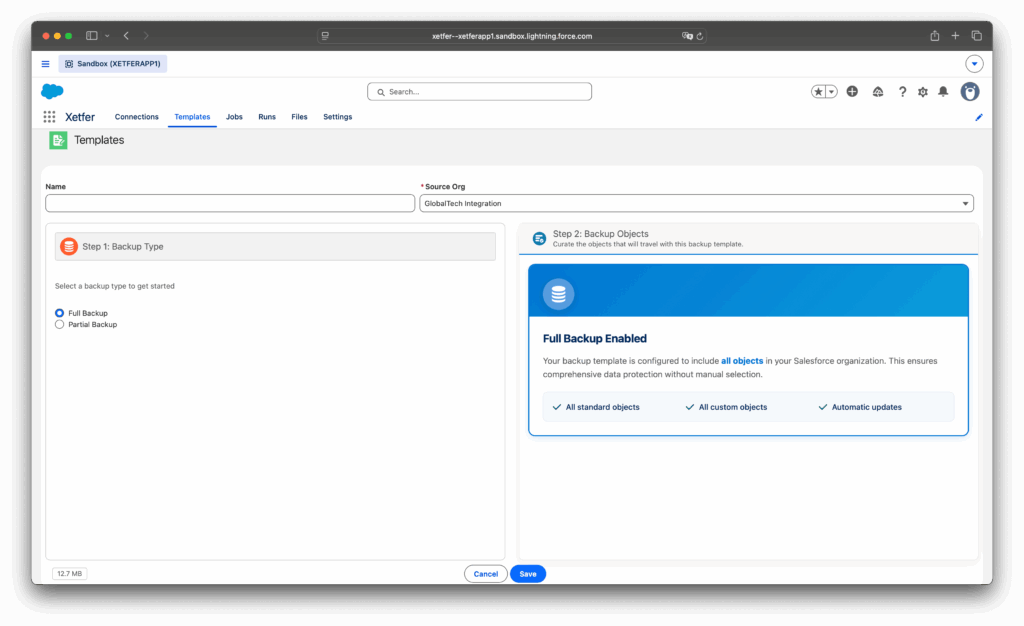
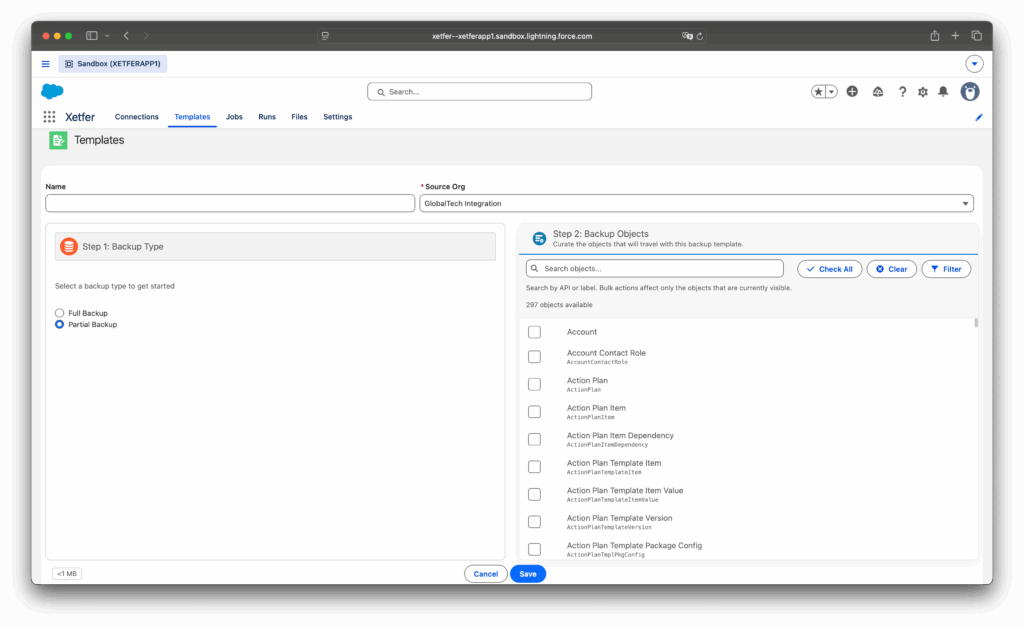
- Click New Backup on the Templates tab and select the Source Org.
- Choose a Backup Type: Full Backup (all standard and custom objects, updated automatically) or Partial Backup (manually select which objects to include).
Jobs Tab
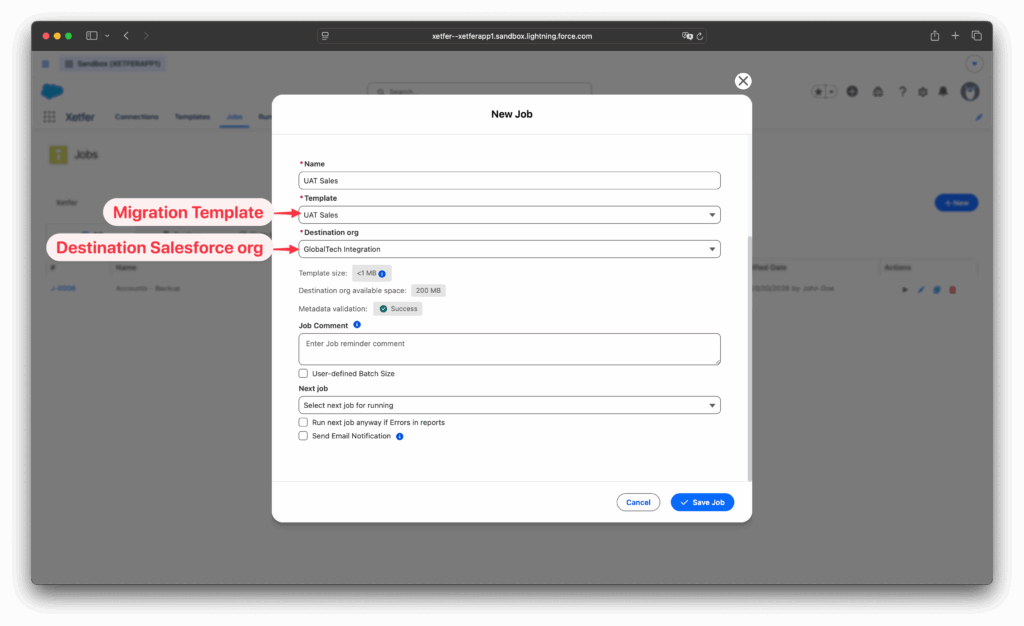
A Job pairs a Template with a Destination org, so Xetfer knows exactly where to migrate the data.
When creating a job, Xetfer shows the template size, the available space in the destination org, and validates the template’s metadata before you save. You can also add an internal Job Comment, chain a Next job to run automatically afterward (optionally only if the previous job succeeded), and enable an email notification when the run finishes.
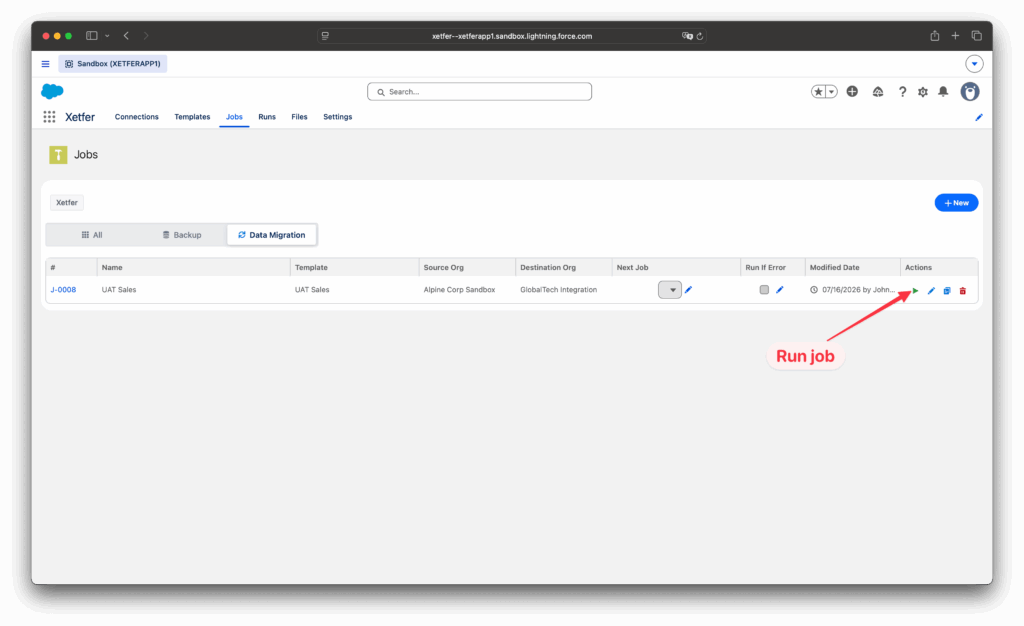
Once a job is saved, run it directly from the Jobs list using the run icon in the Actions column.
Runs Tab
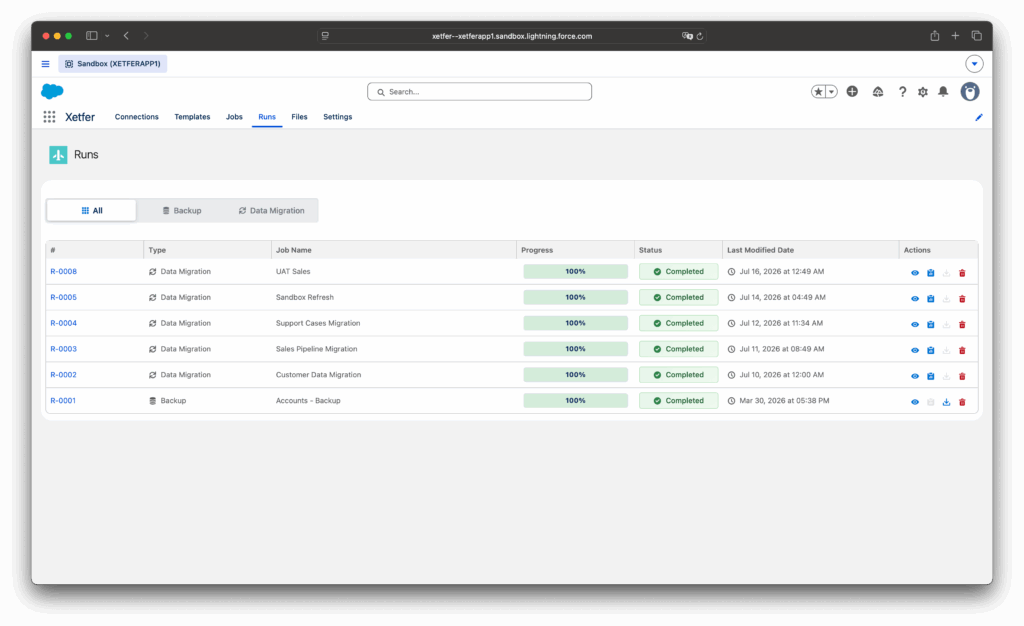
The Runs tab lists every job execution, with its type (Data Migration or Backup), progress, and status — In Progress, Completed, or Failed. From here you can view run details.
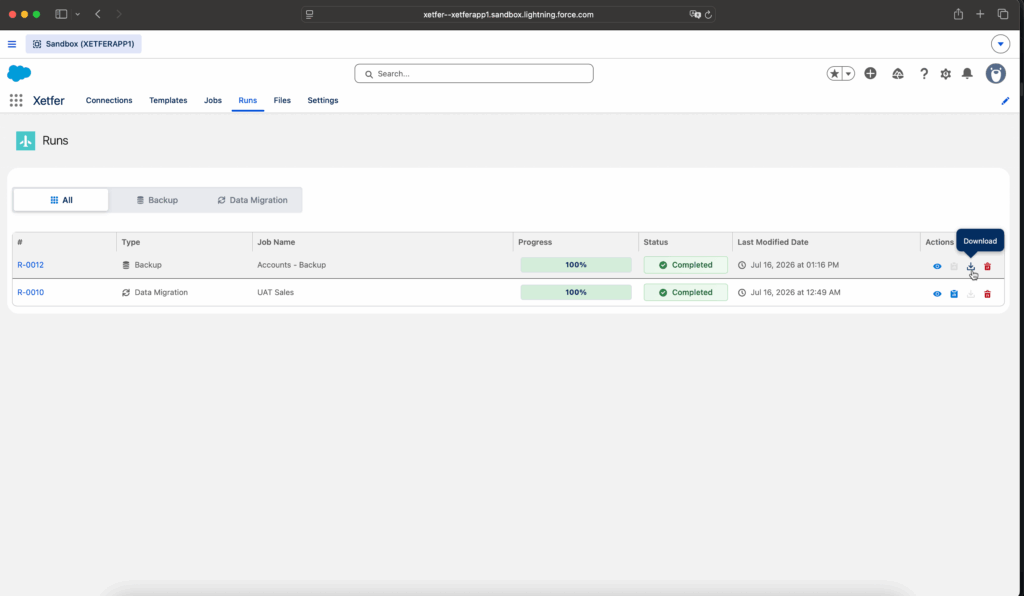
For a completed Backup run, use Download to get a .zip archive of the snapshot. Inside, you’ll find one CSV file per sObject, containing all its records and fields.
Files Tab
The Files tab lets you prepare CSV files for use elsewhere in Xetfer, either by generating synthetic data with the Xetfer Data Generator or by uploading your own CSV with Upload File.
Once a file is available on this tab, you can use it in two ways:
- As the substitute data source for a Modification of type From File, while the object itself still migrates from the Source Org.
- As the full data source for an object set to From File in a template — a direct CSV import, similar to Data Loader.
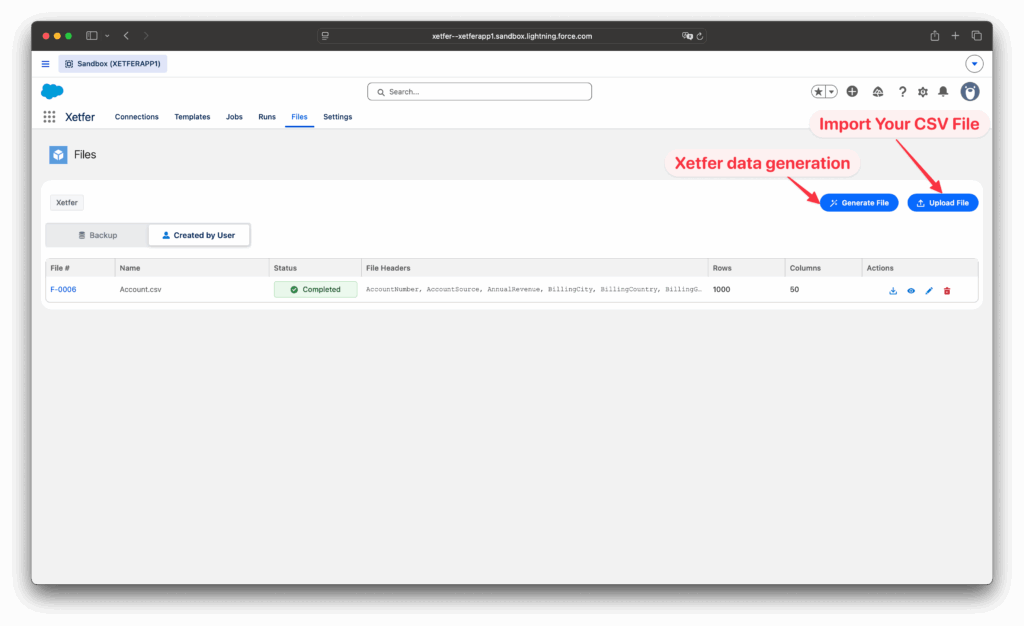
Xetfer Data Generator
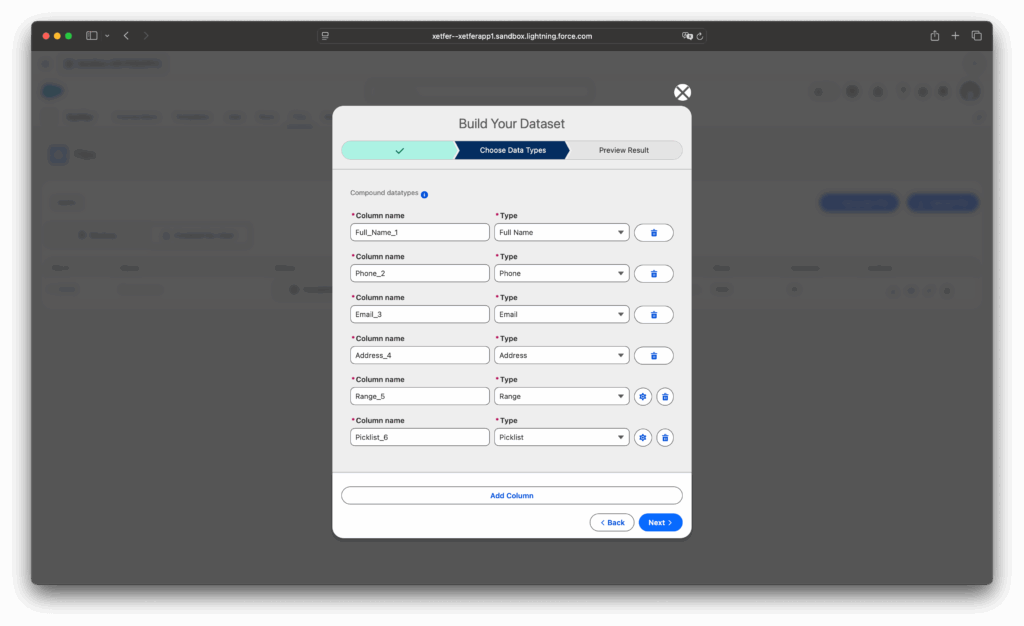
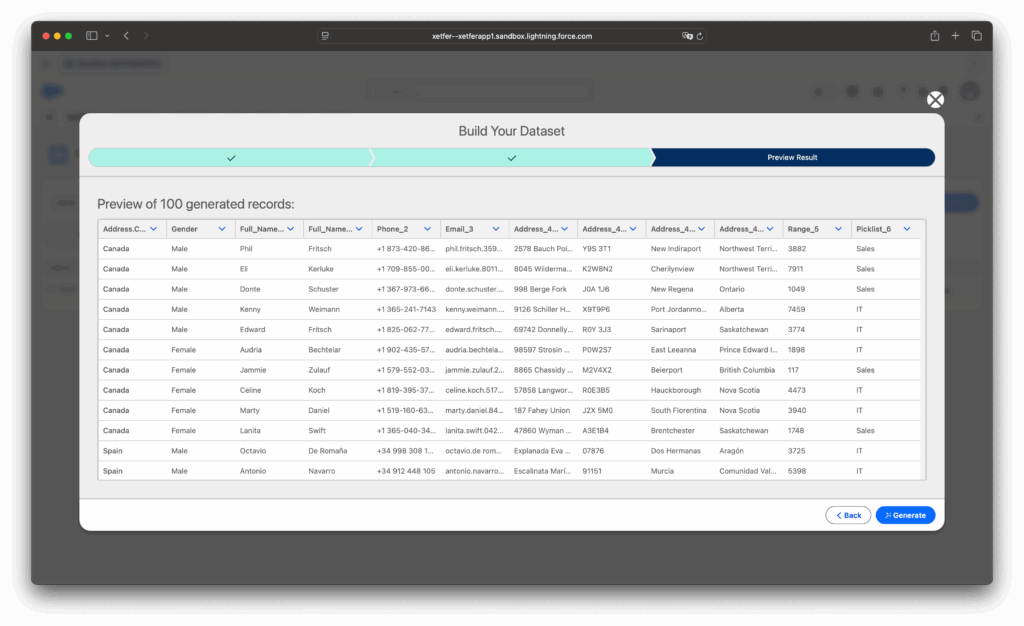
The Data Generator lets you create various types of realistic data for anonymizing your production data.
- Supported Data Types:
- Full Name
- Phone Number
- Email Address
- Address
- Range
- Picklist
- Dependent Picklist (based on another Picklist)
Settings Tab
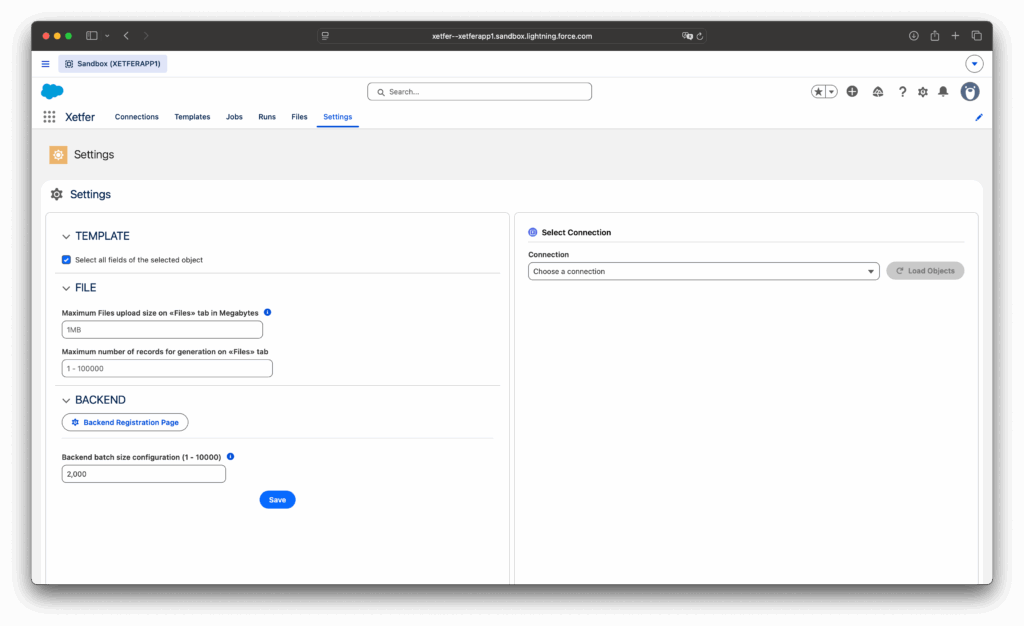
The Settings tab lets you configure technical options for the app.