Xetfer Installation Guide
Welcome to the Xetfer Setup Guide! Here, you’ll find step-by-step instructions to configure Xetfer for seamless integration with your Salesforce environment. Whether you’re installing, managing licenses, or optimizing settings, this guide will help you get started quickly, efficiently and obtain a free trial license.
Install Xetfer package
Get Xetfer by installing the package on your Salesforce Org (all editions are supported):
Installation link:
/packaging/installPackage.apexp?p0=04tQO000001DAU1YAOWe are in the process of publishing Xetfer on AppExchange.
Post-installation steps
A user with a System Administrator profile has to configure the following settings:
Set the Permission Set to the User with the System Administrator Profile for the Registration Page
- Open Setup → Users → Permission Sets.
- Choose Xetfer Registration User Access.
- Press Manage Assignments button.
- Press Add Assignments button.
- Check the user.
- Press Assign button.
- Press Done button.
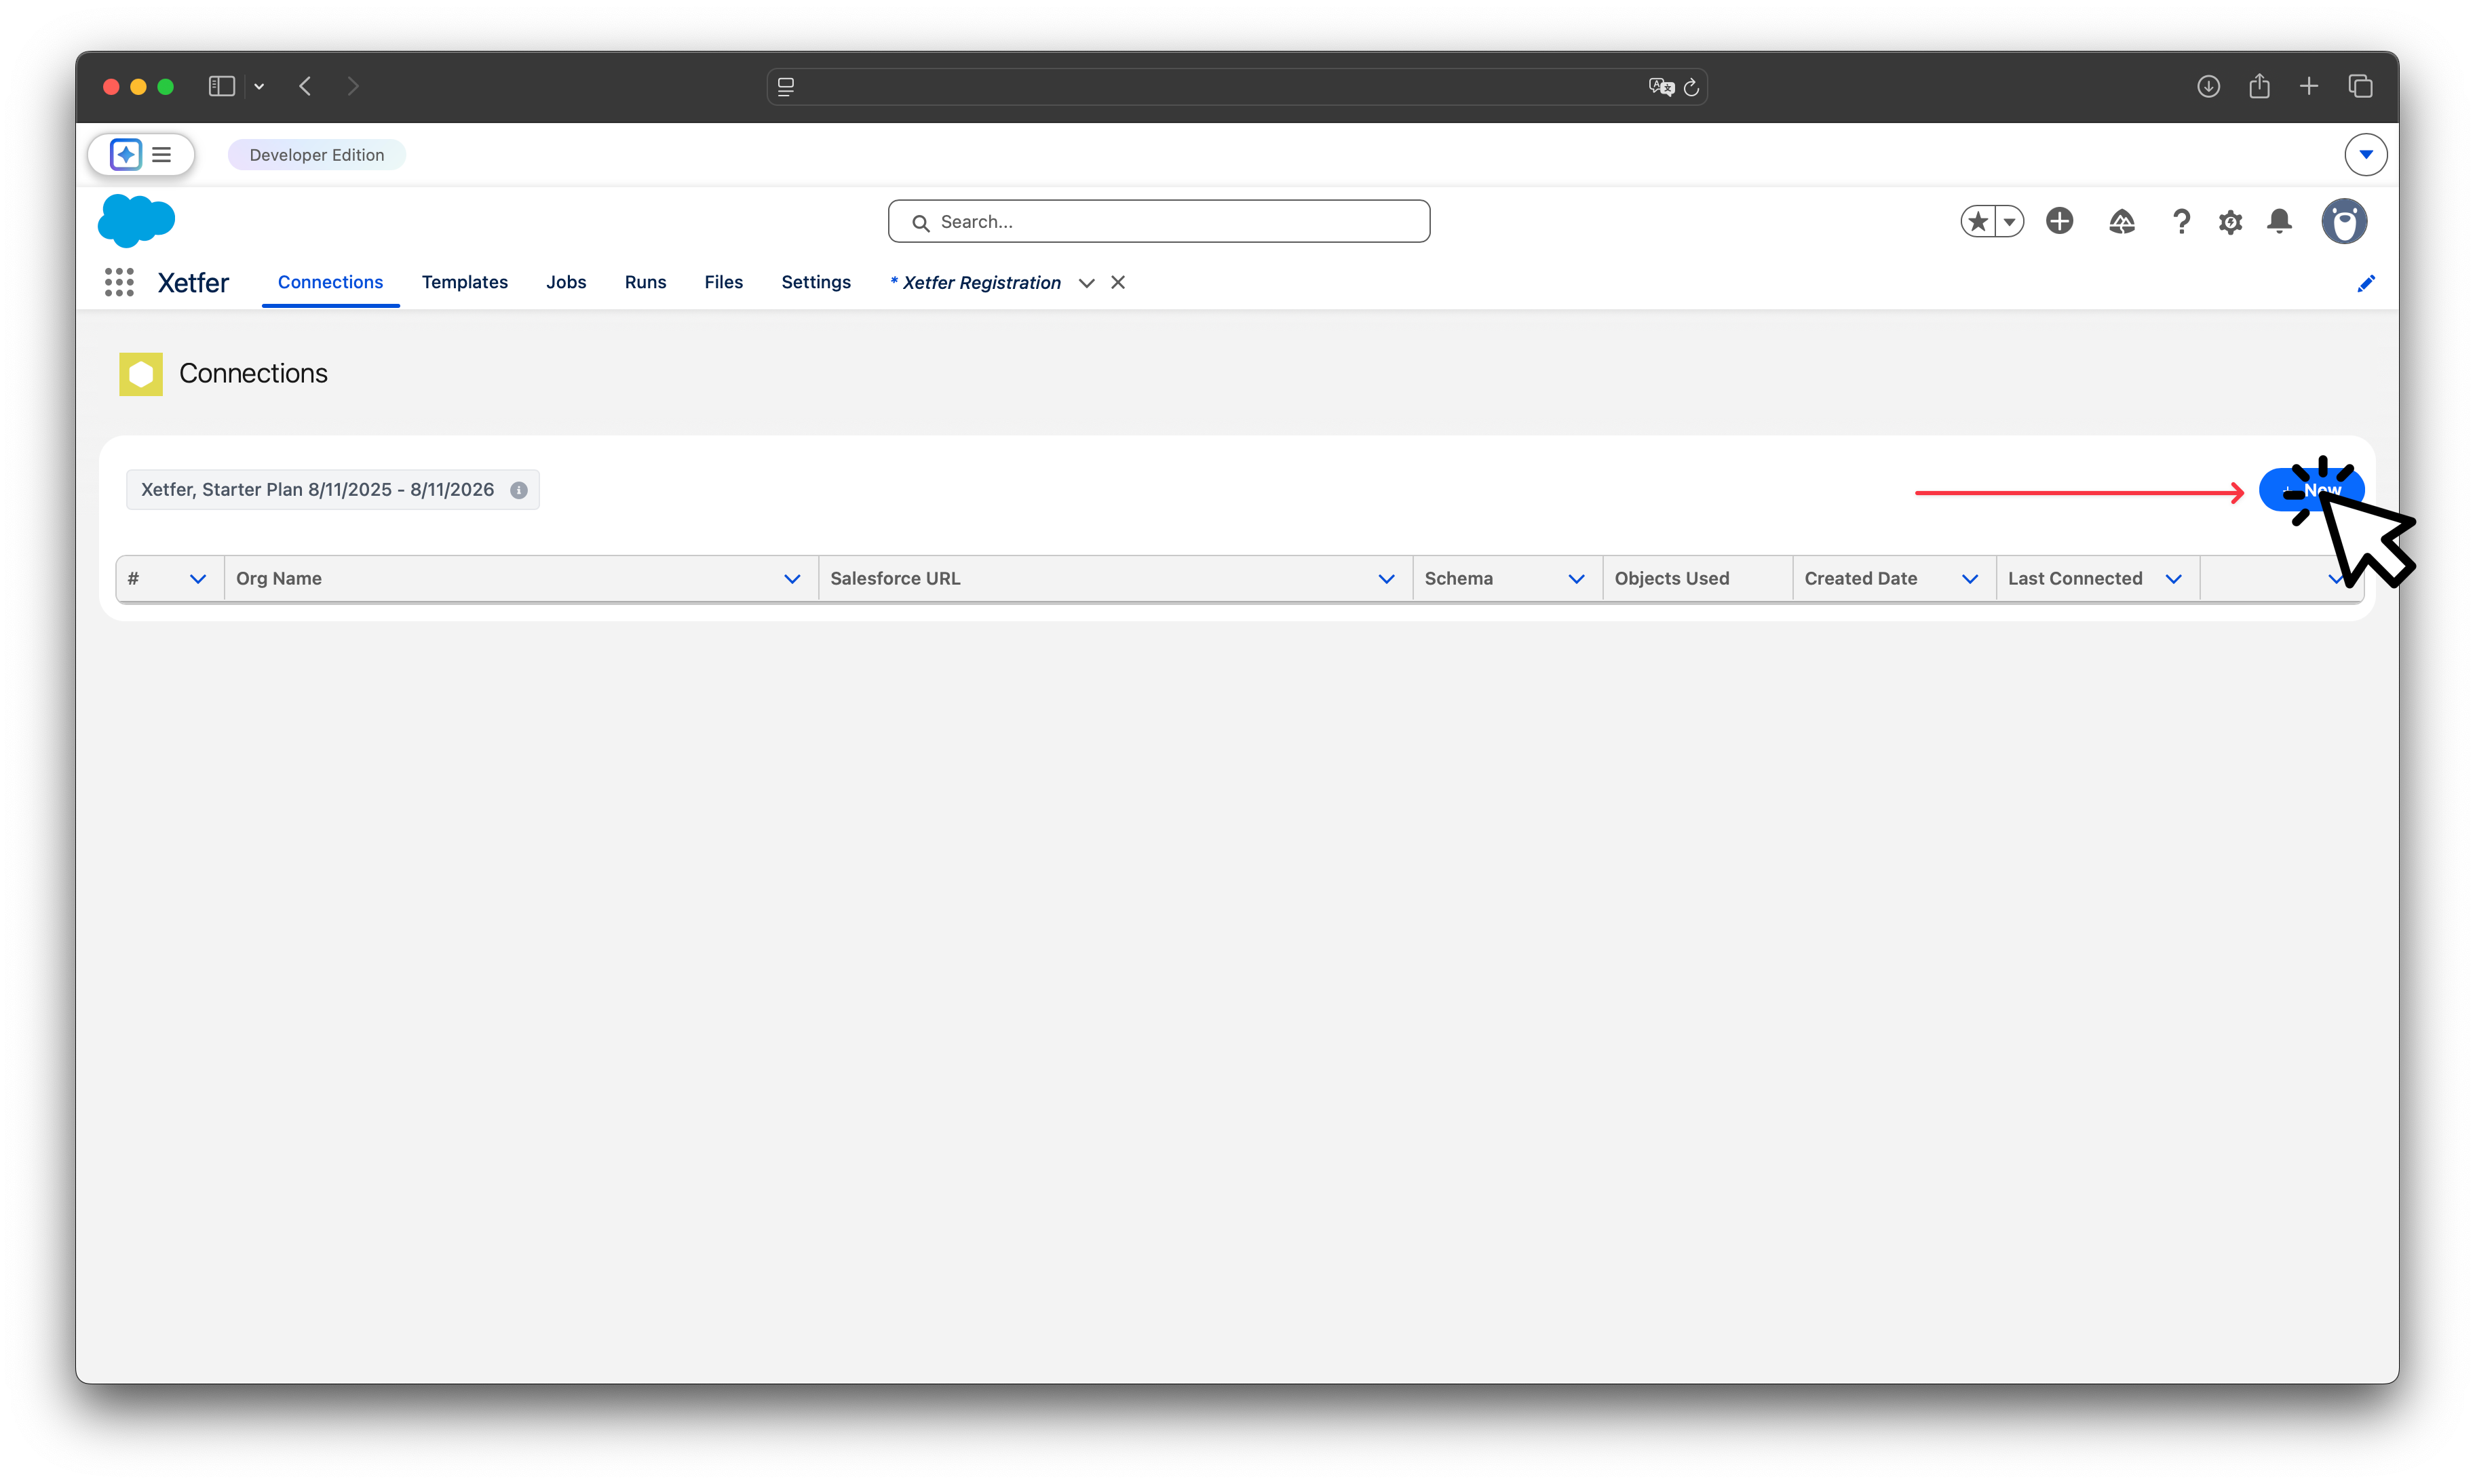
Set the Permission Sets to the other Users for the Access to the Application Depending on Your Needs
Full Access, Access to All Xetfer Records (Connections, Templates, Jobs, Files, Runs, allow to edit Settings):
- Open Setup → Users → Permission Sets.
- Choose Xetfer Admin Access.
- Press Manage Assignments button.
- Press Add Assignments button.
- Check the user.
- Press Assign button.
- Press Done button.
Restricted Access, Access to Only Own Records (Connections, Templates, Jobs, Files, Runs):
- Open Setup → Users → Permission Sets.
- Choose Xetfer User Access.
- Press Manage Assignments button.
- Press Add Assignments button.
- Check the user.
- Press Assign button.
- Press Done button.
Pass Registration
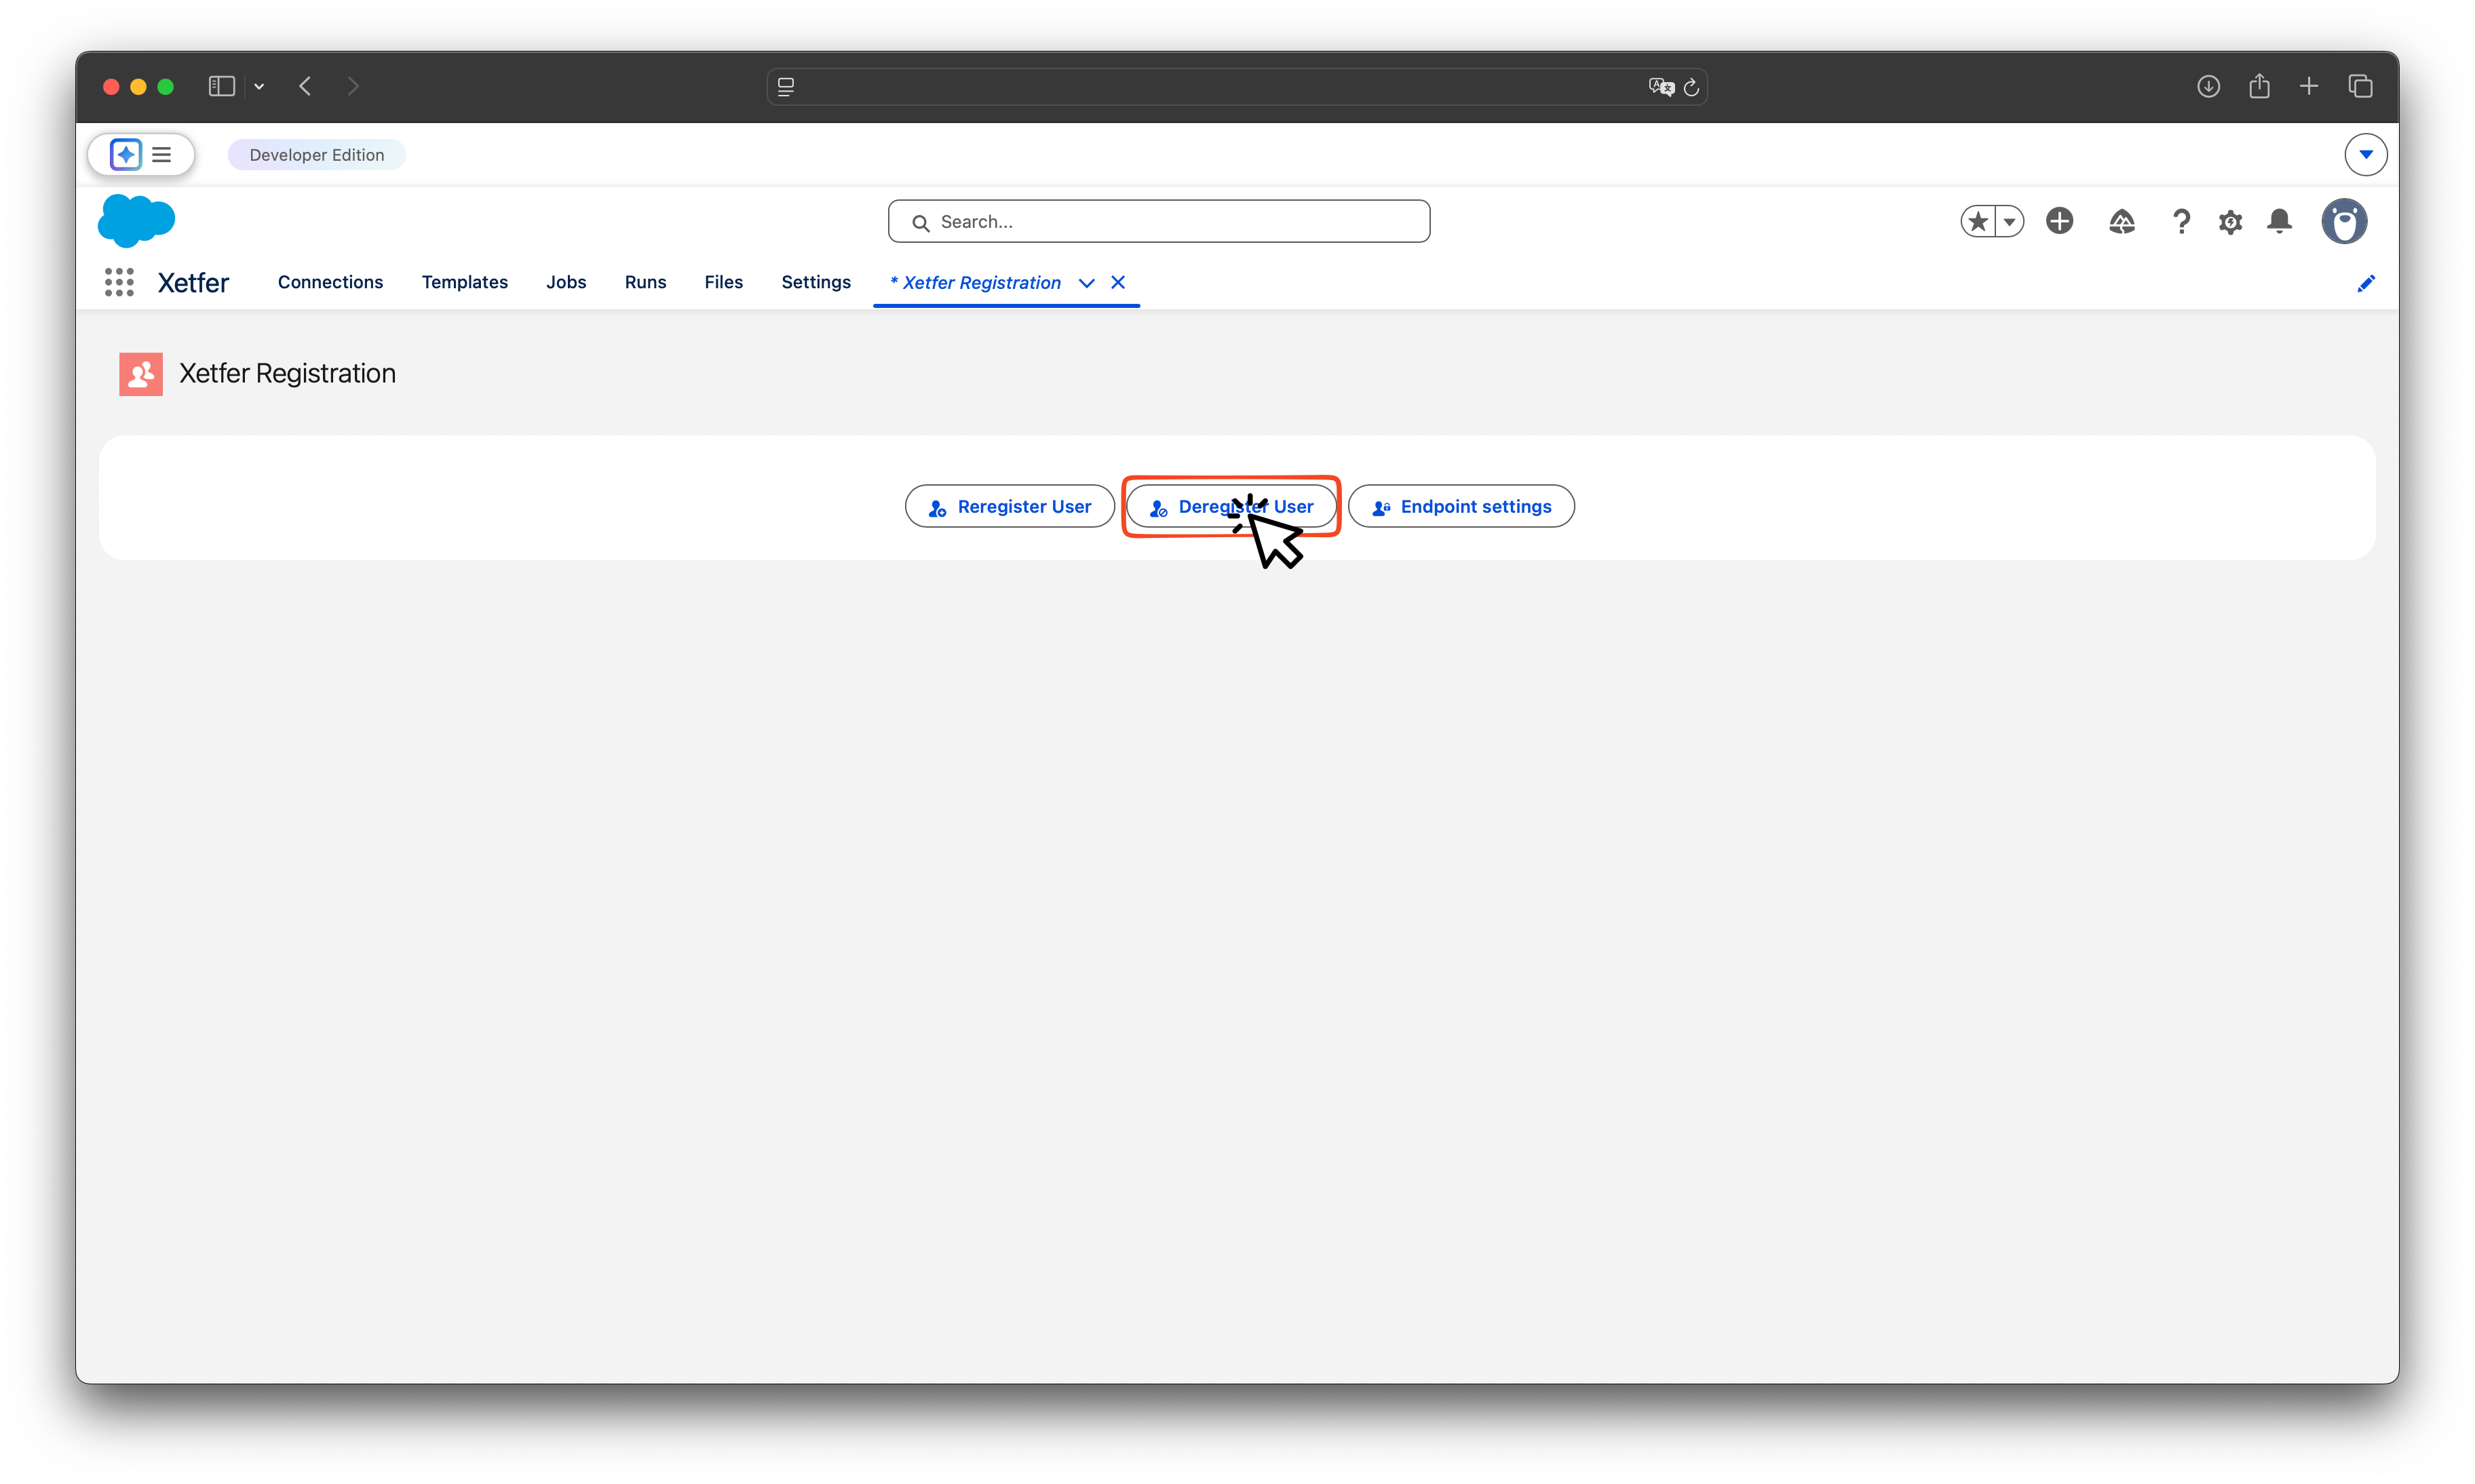
- Open App Launcher → Find and open Xetfer Registration page.
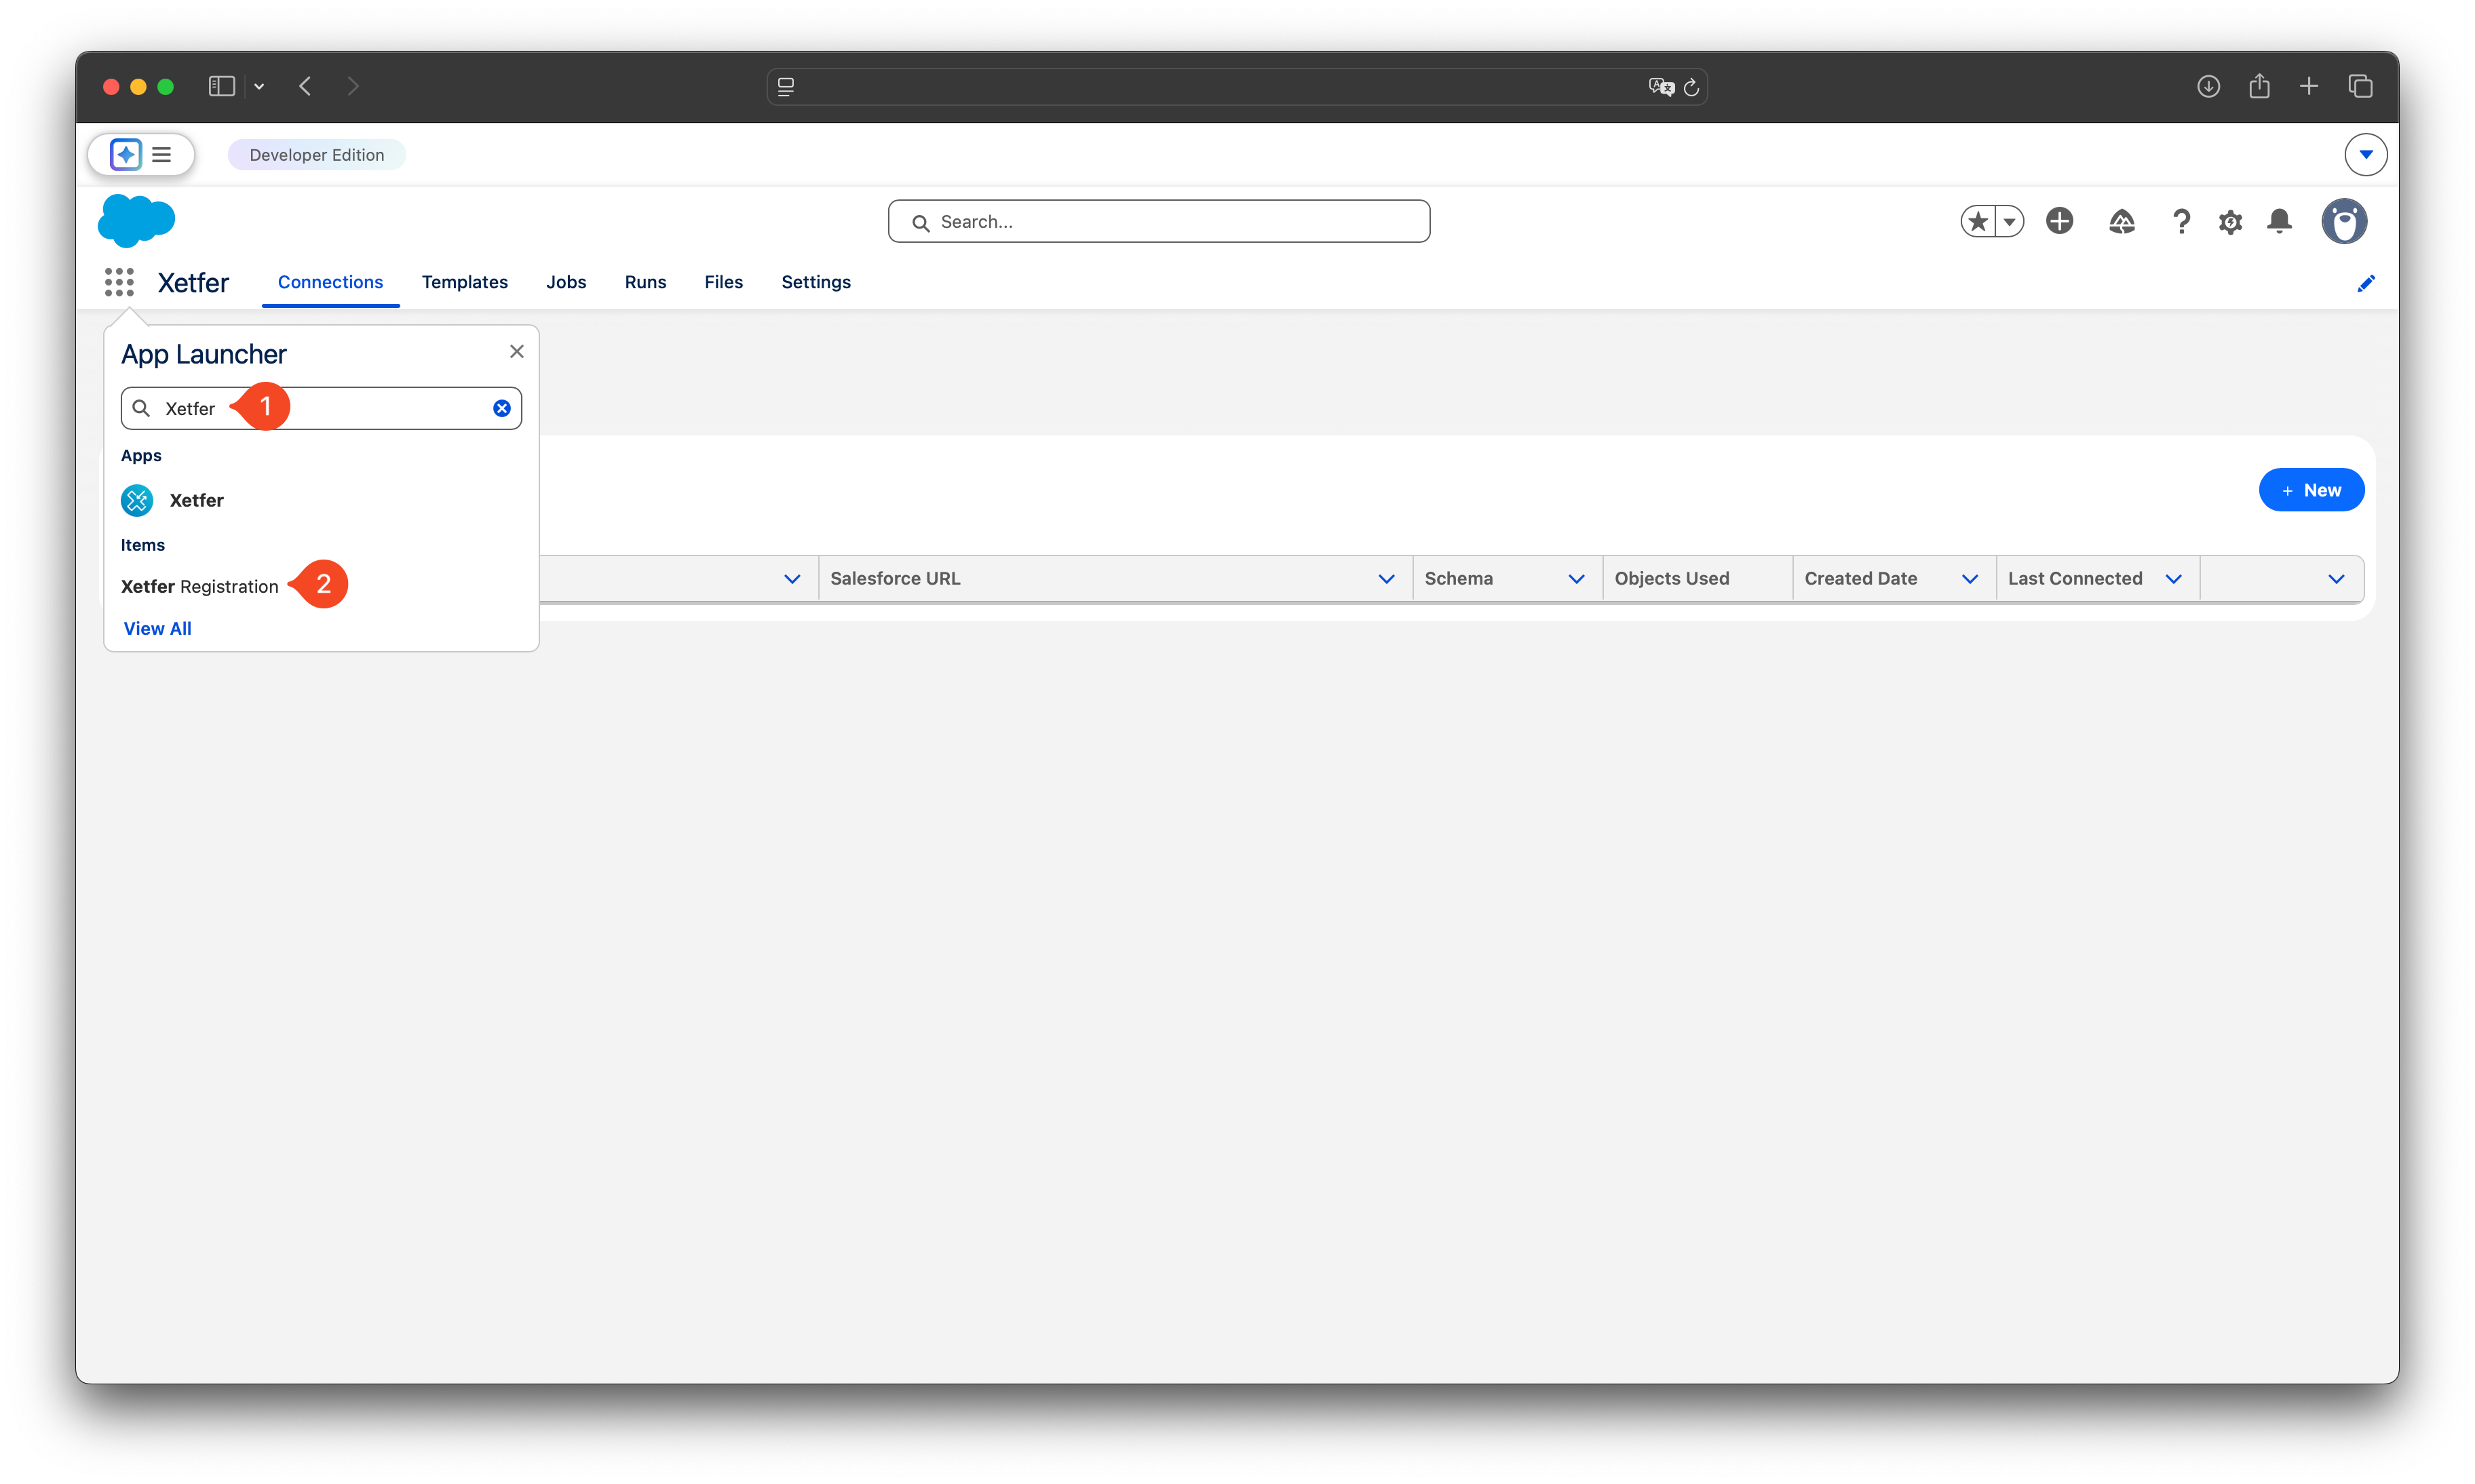
- Click Register User button
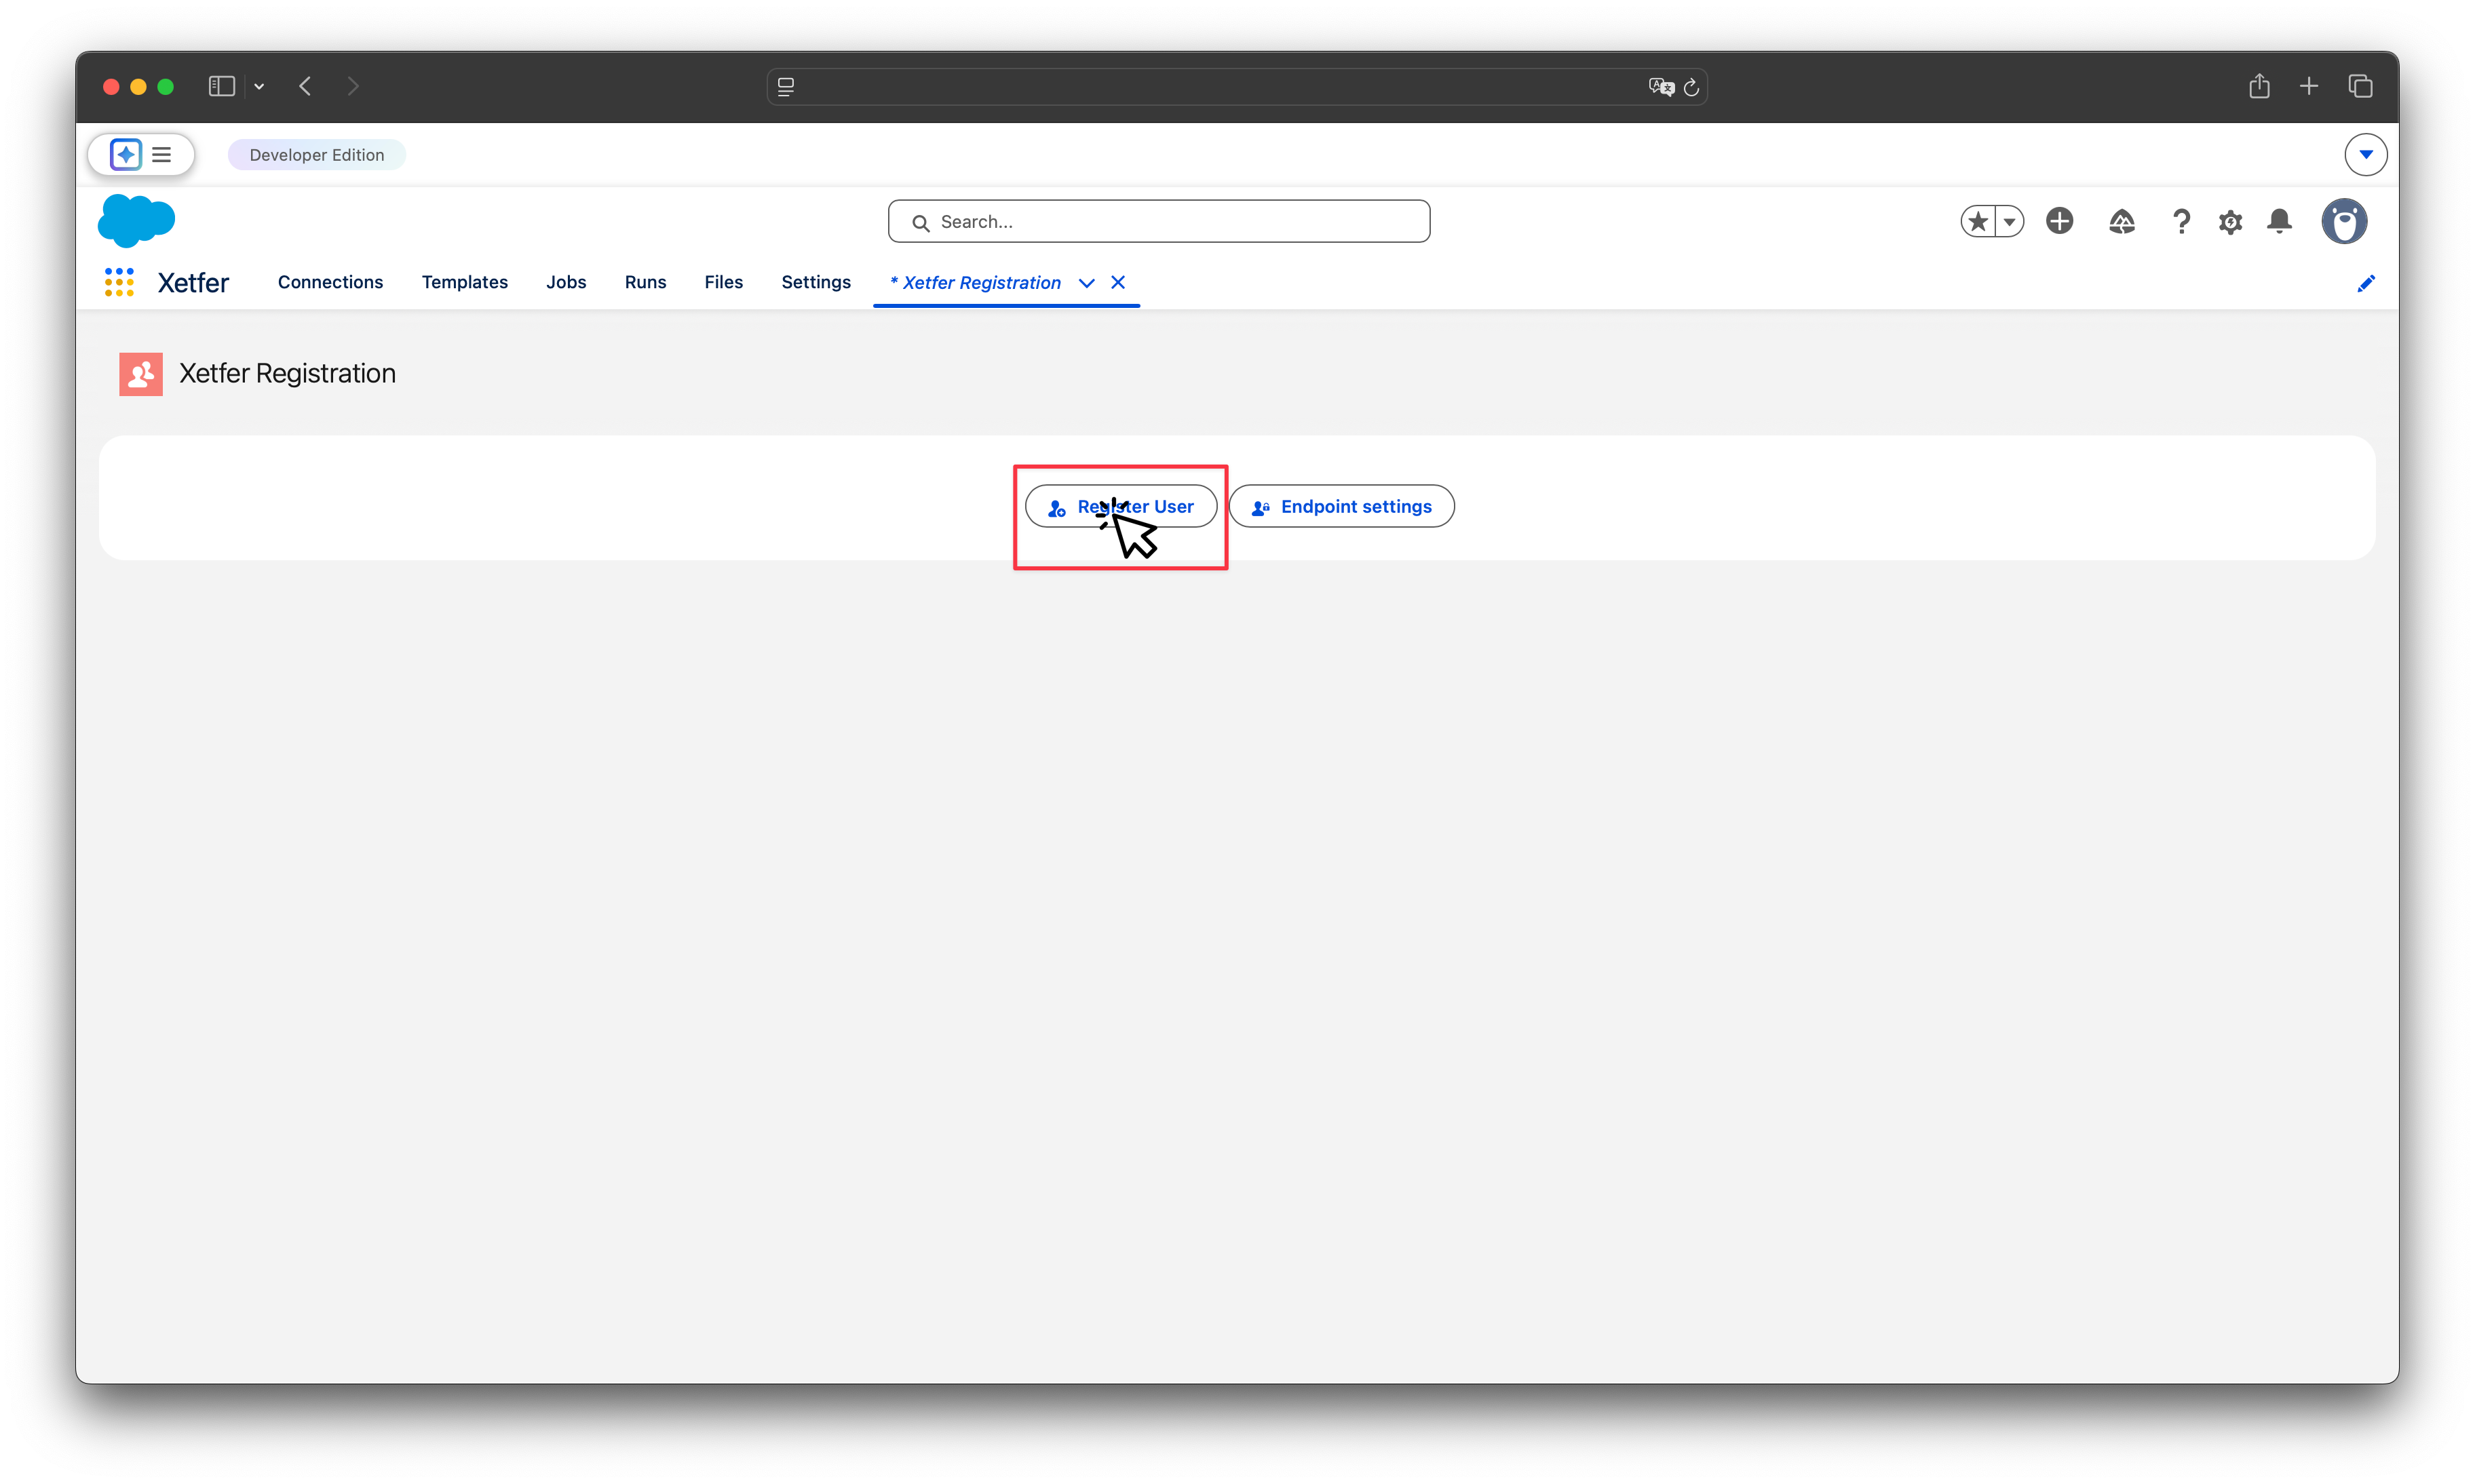
- Should appear a pop up!
- If your browser blocks it, then allow popups.
- Input your current org credentials (where the Xetfer package has been installed) to the form → Press Allow button.
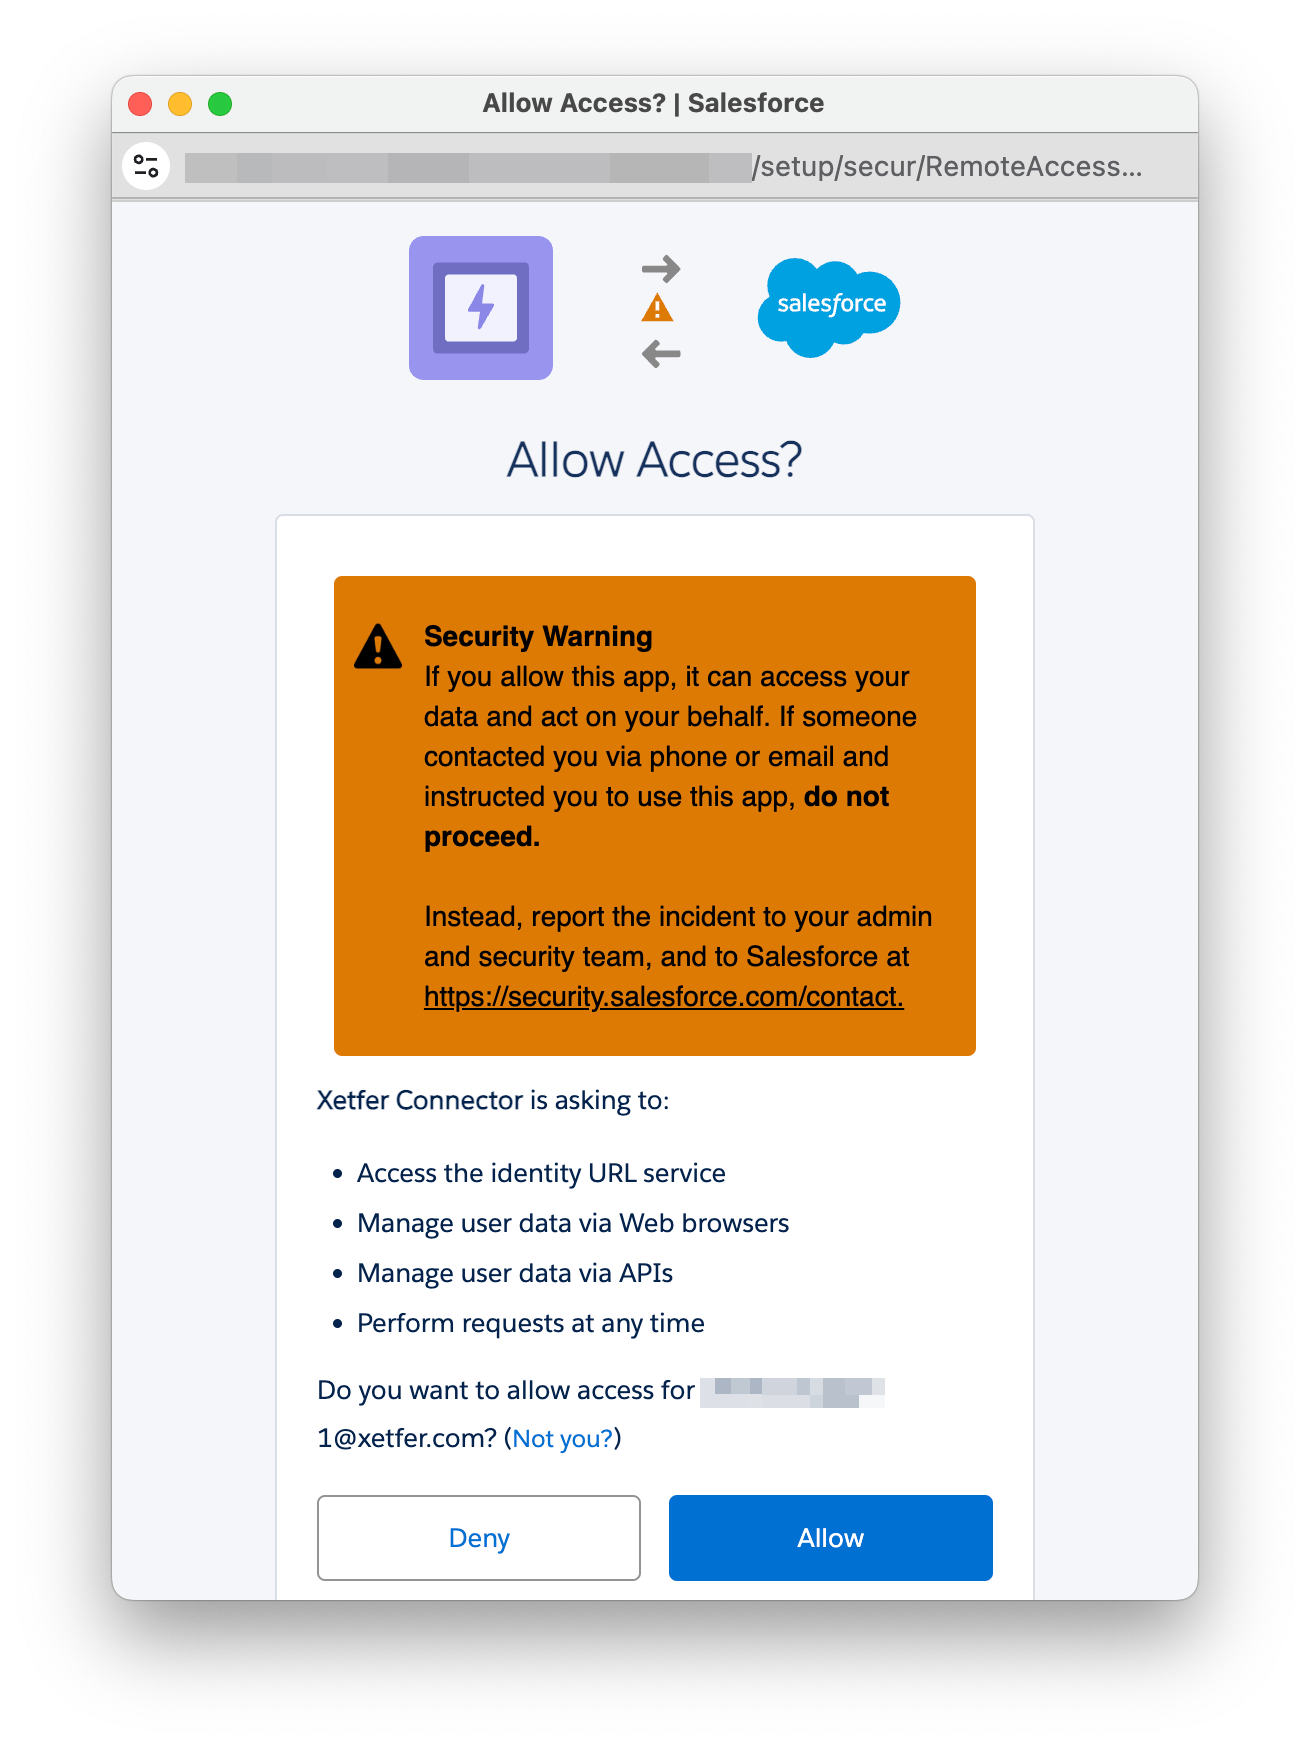
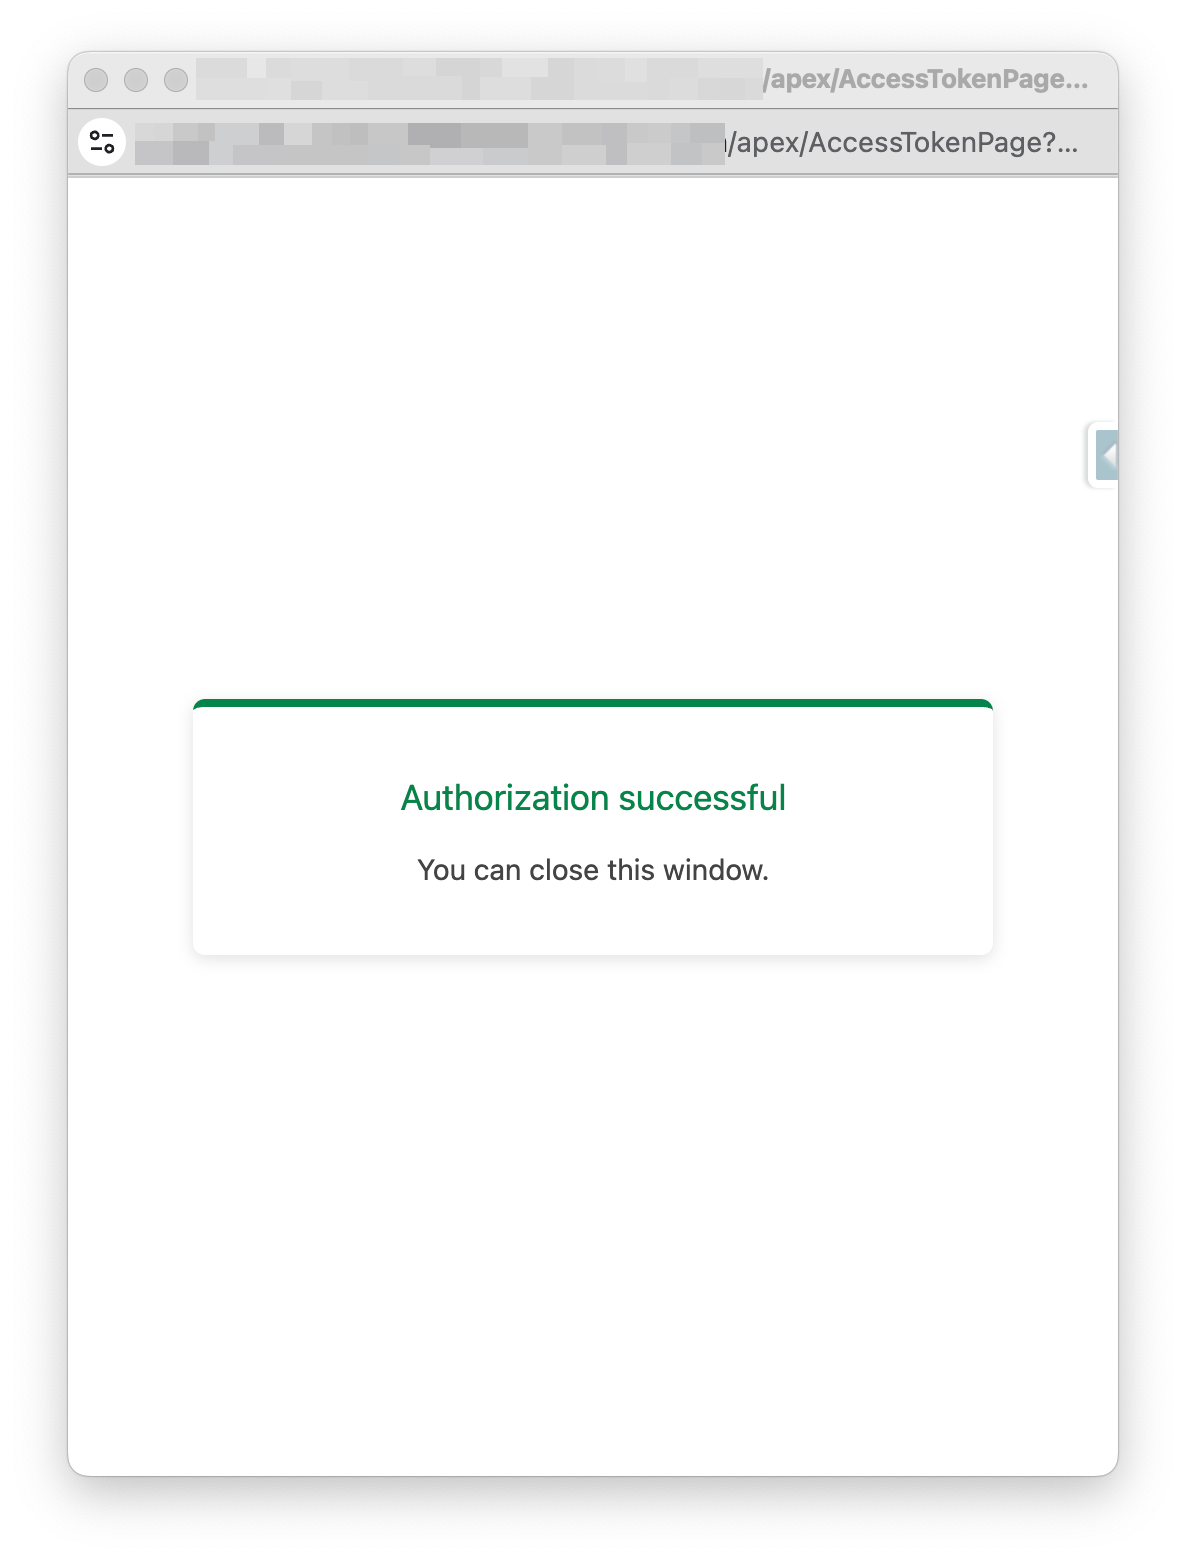
Verification:
- You should see the message «Successful authorization» ?
- Setup is complete.
Requirement for New Connections
When adding a new Source or Destination connection (Salesforce Org) in Xetfer, the Application «Xetfer Connector» must be installed in that org.
This connector enables secure communication between Xetfer and the Salesforce org used as a data source or destination.
/packaging/installPackage.apexp?p0=04tQO000001DAaTYAW- Open the Salesforce org that you want to use as a Source or Destination.
- Install the «Xetfer Connector» package in that org.
- After installation is complete, create the connection in Xetfer.
Note
Next time, if you press the Deregister User button on the Registration page, then all application records will be deleted.
- Additionally, please, do not use
xetfer__AppDatain Title field forContentDocumentsObject. This name is used by the Xetfer, and these files will be deleted after deregistration on the «Registration Page».