Installation Guide
Install Xetfer package
Get Xetfer by installing the package on your Salesforce Org (all editions are supported):
Installation link:
/packaging/installPackage.apexp?p0=04tfK000000ARerQAGWe are in the process of publishing Xetfer on AppExchange.
Post-installation steps
A user with a System Administrator profile has to configure the following settings:
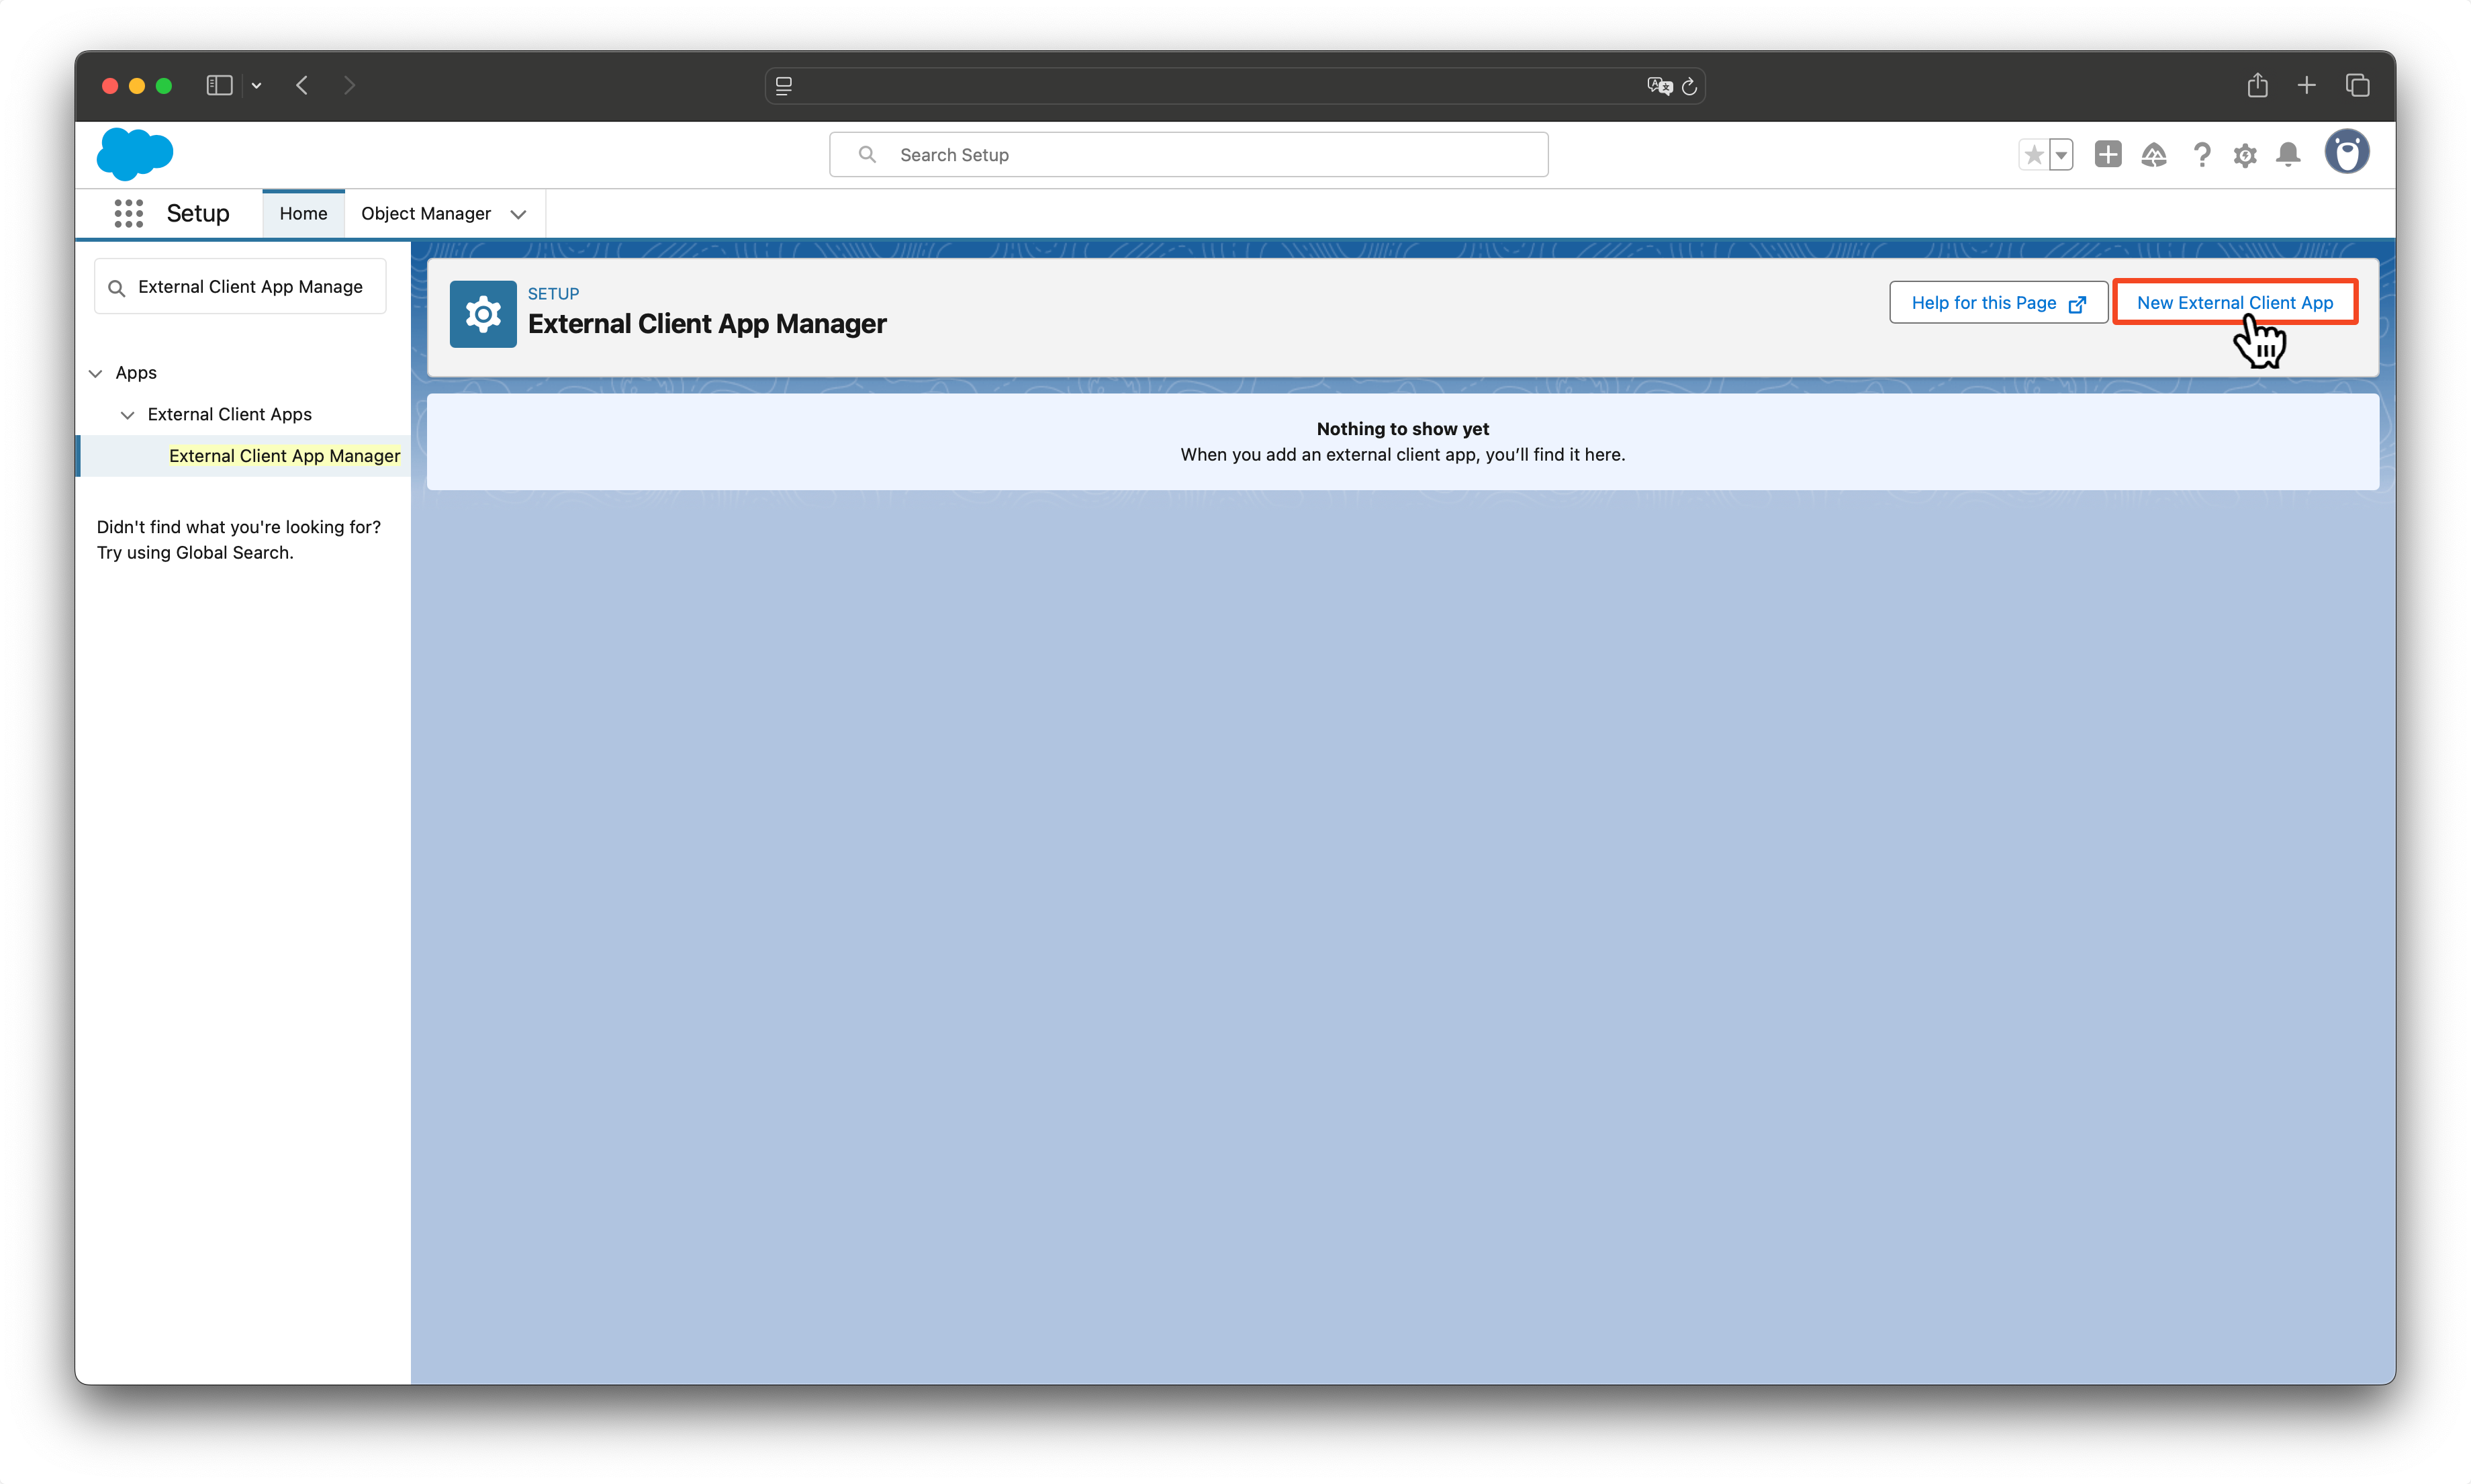
Create Connected App
Open Setup → Apps → External Client Apps → External Client App Manager
Press New External Client App
Fill in the required fields:
- External Client App Name;
- API Name;
- Contact Email;
- Distribution State (leave the default value – Local);
- Check Enable OAuth Settings.
Callback URL
https://your_domain/apex/xetfer__AccessTokenPageHow to find your_domain?
Example of the Callback URL:https://xetfer-dev.ed.develop.my.salesforce.com/apex/xetfer__AccessTokenPage
- In the Selected OAuth Scopes choose:
- Manage user data via APIs (api)
- Manage user data via Web browsers (web)
- Perform requests at any time (refresh_token, offline_access)
Uncheck any other checkboxes selected by default
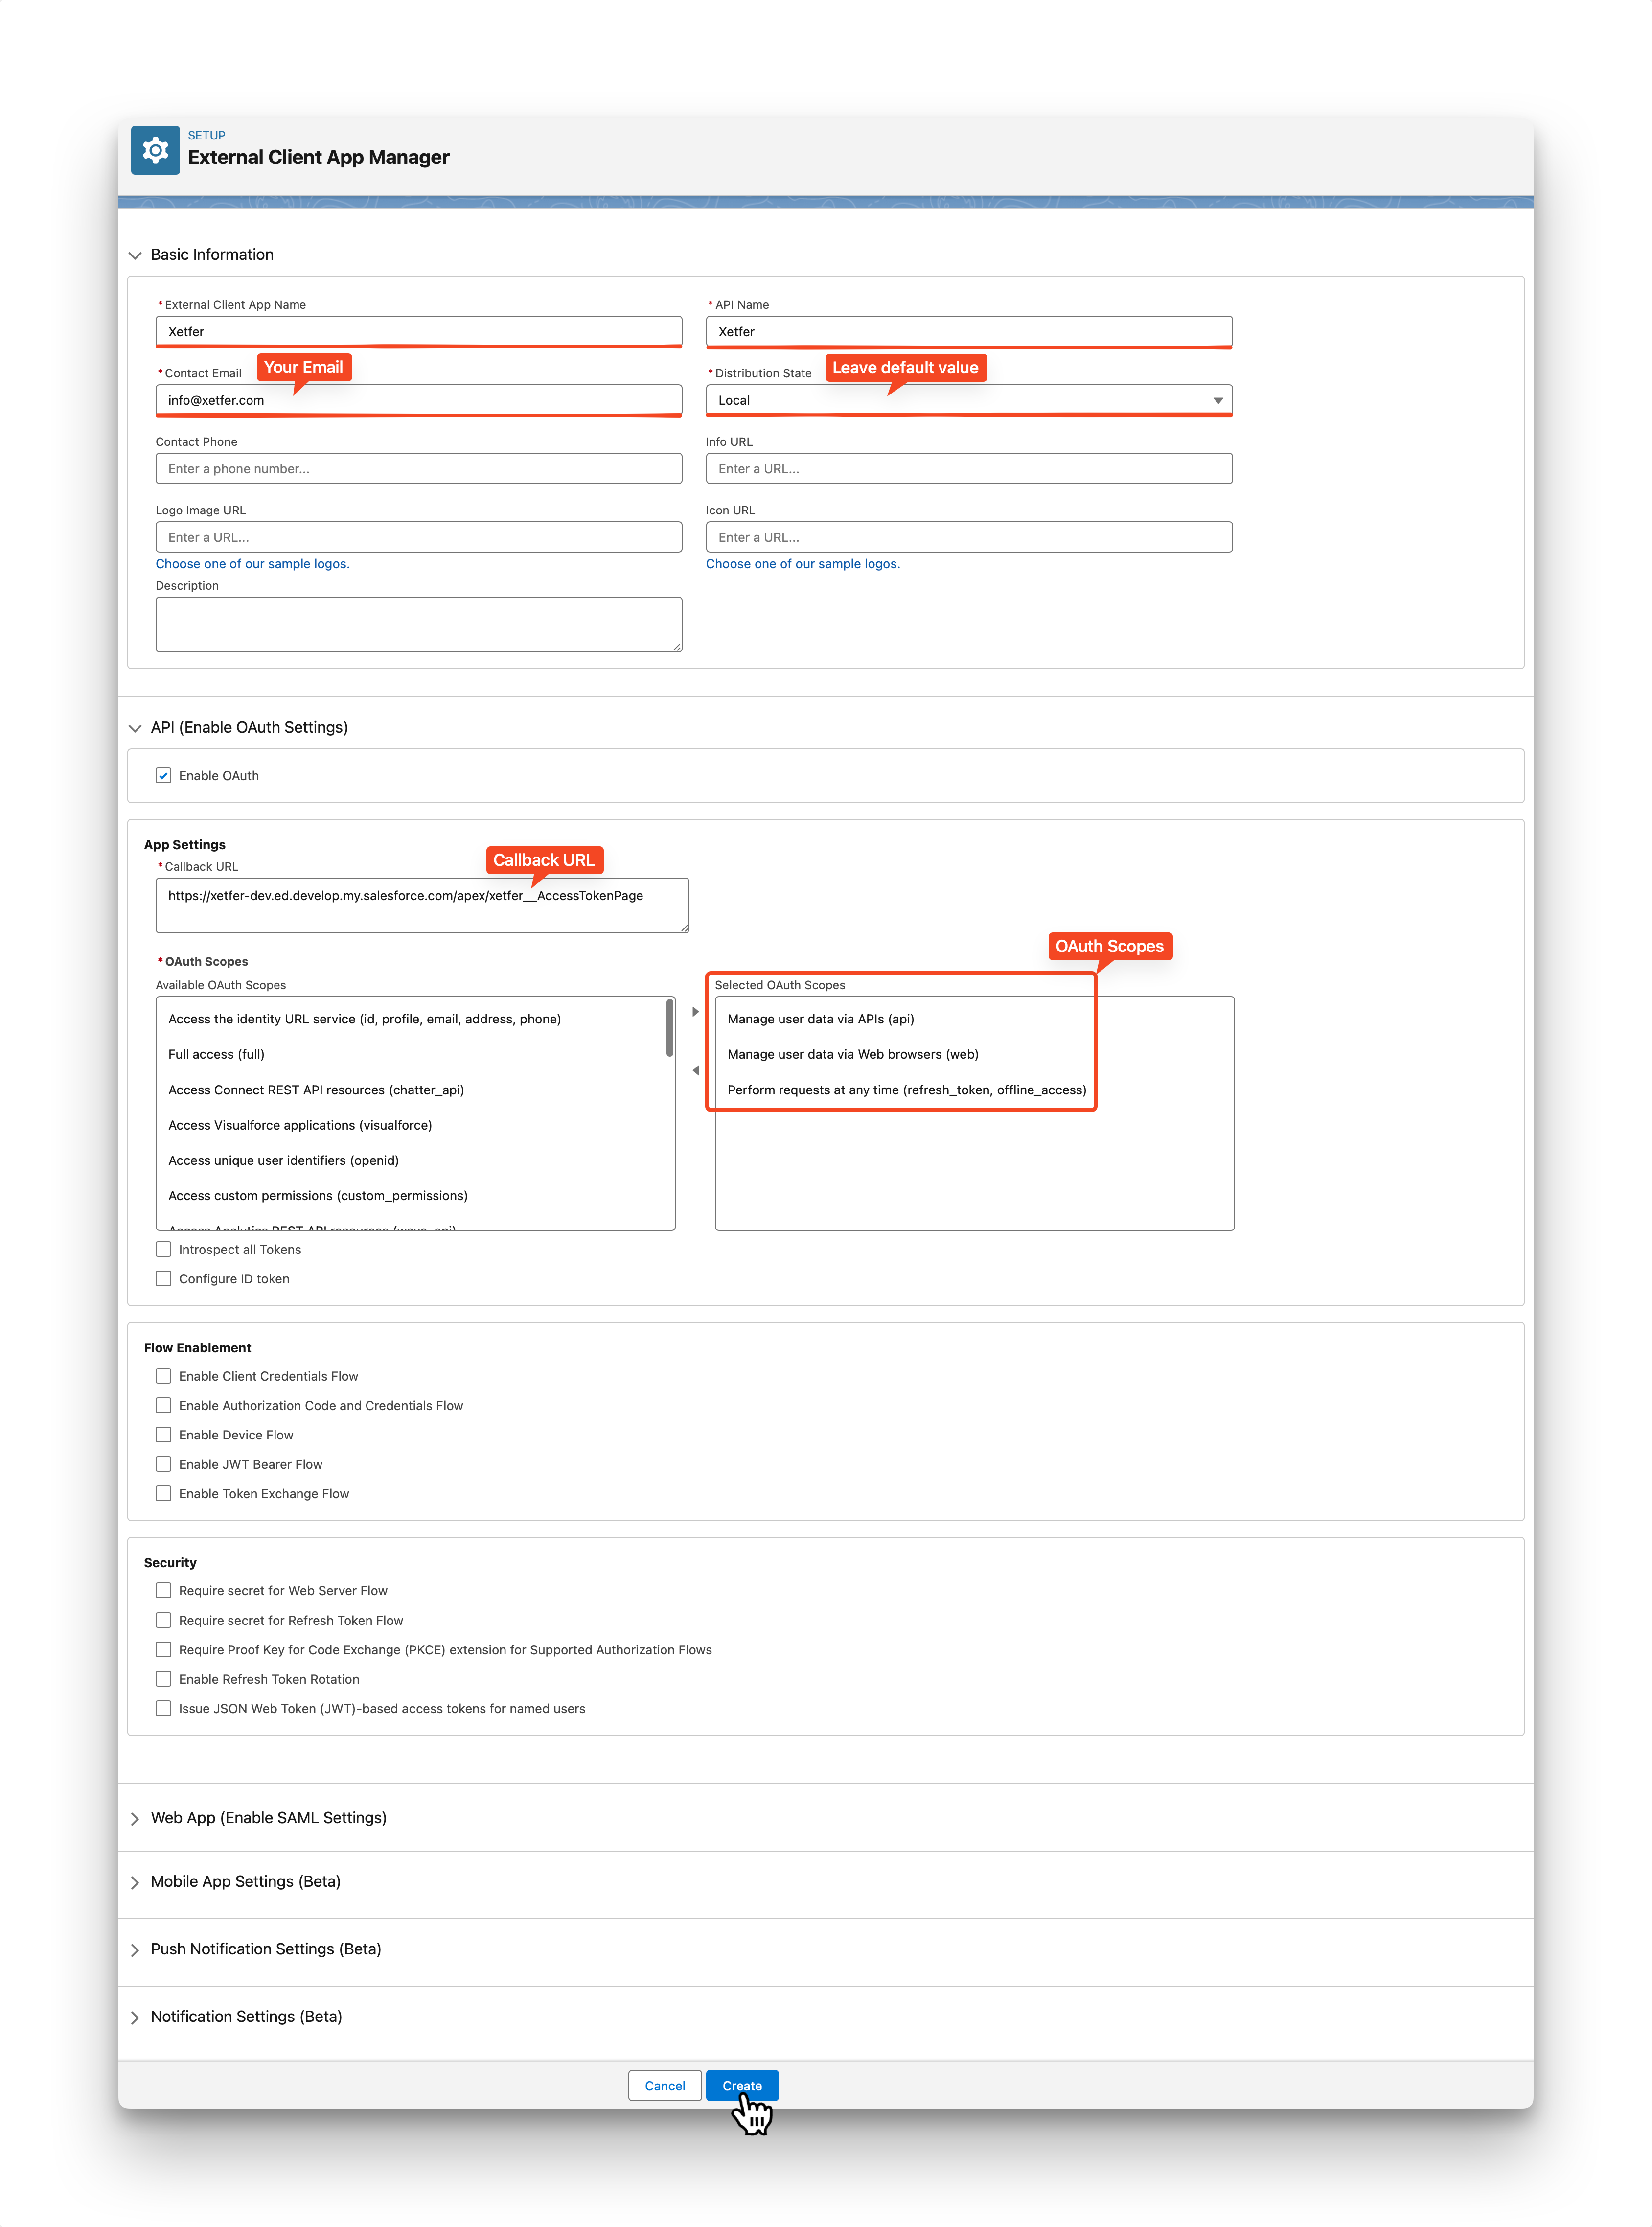
Press Create
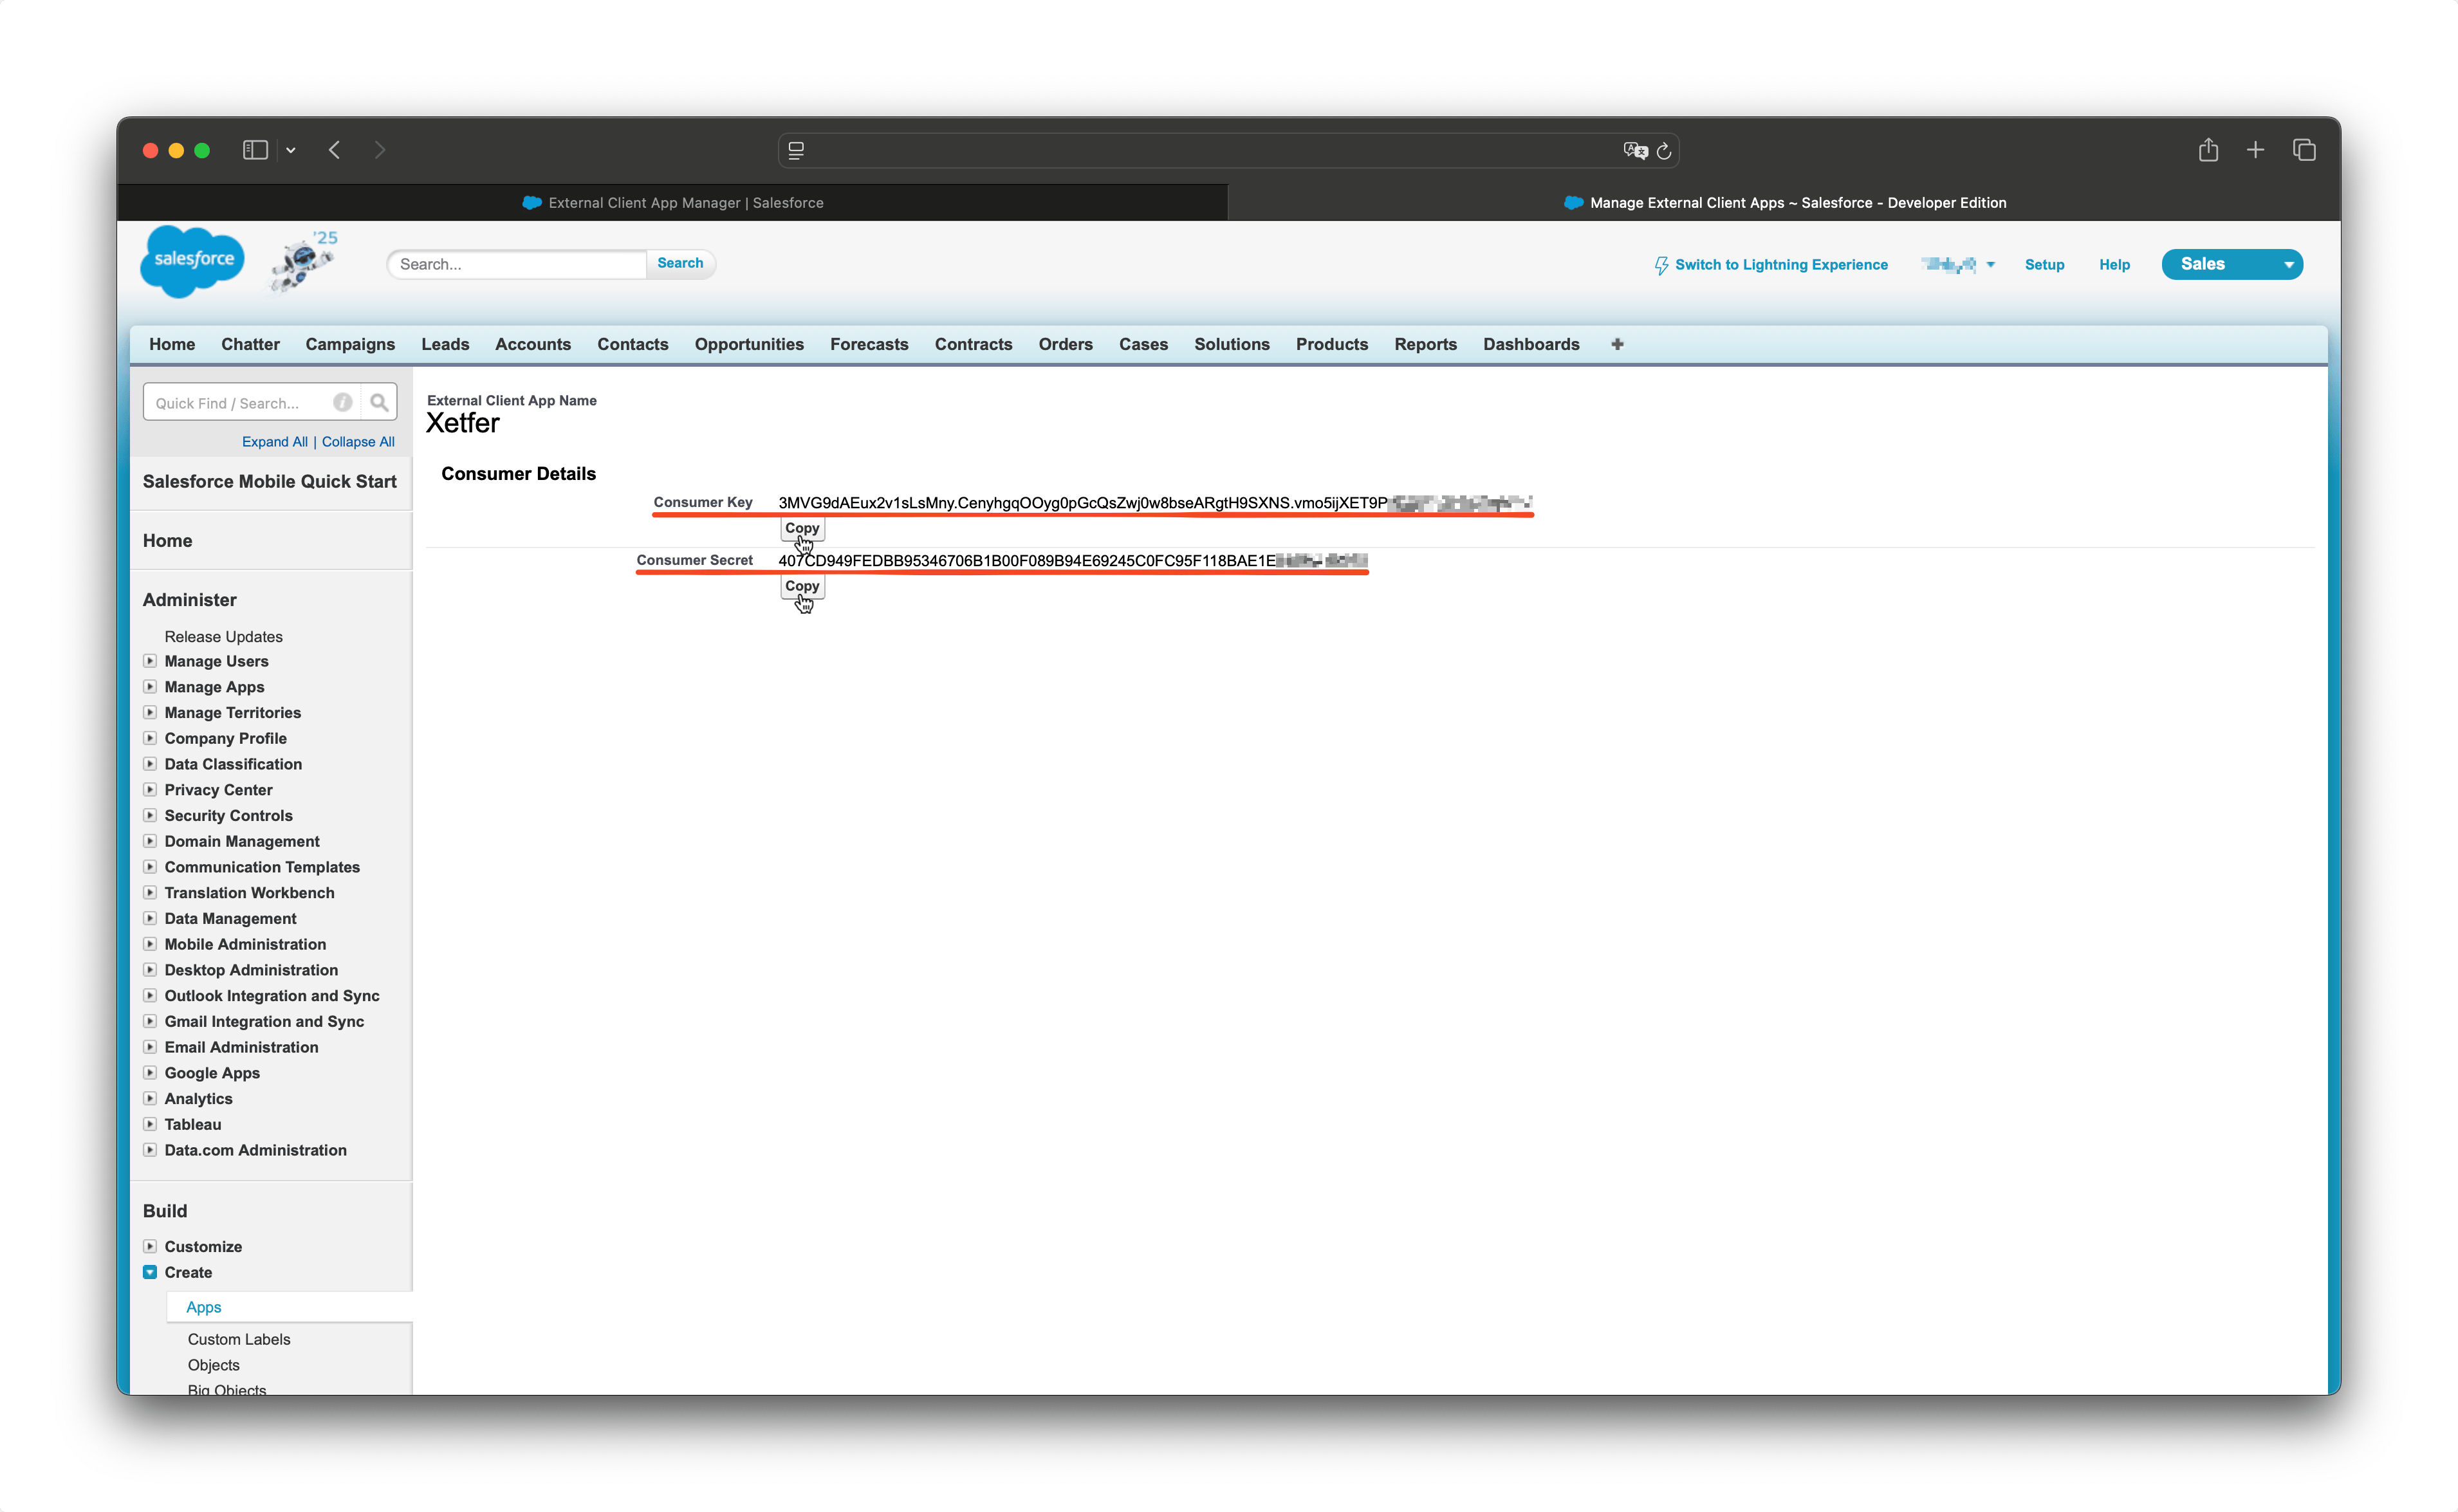
Select Settings Tab on created External Client App and press Edit
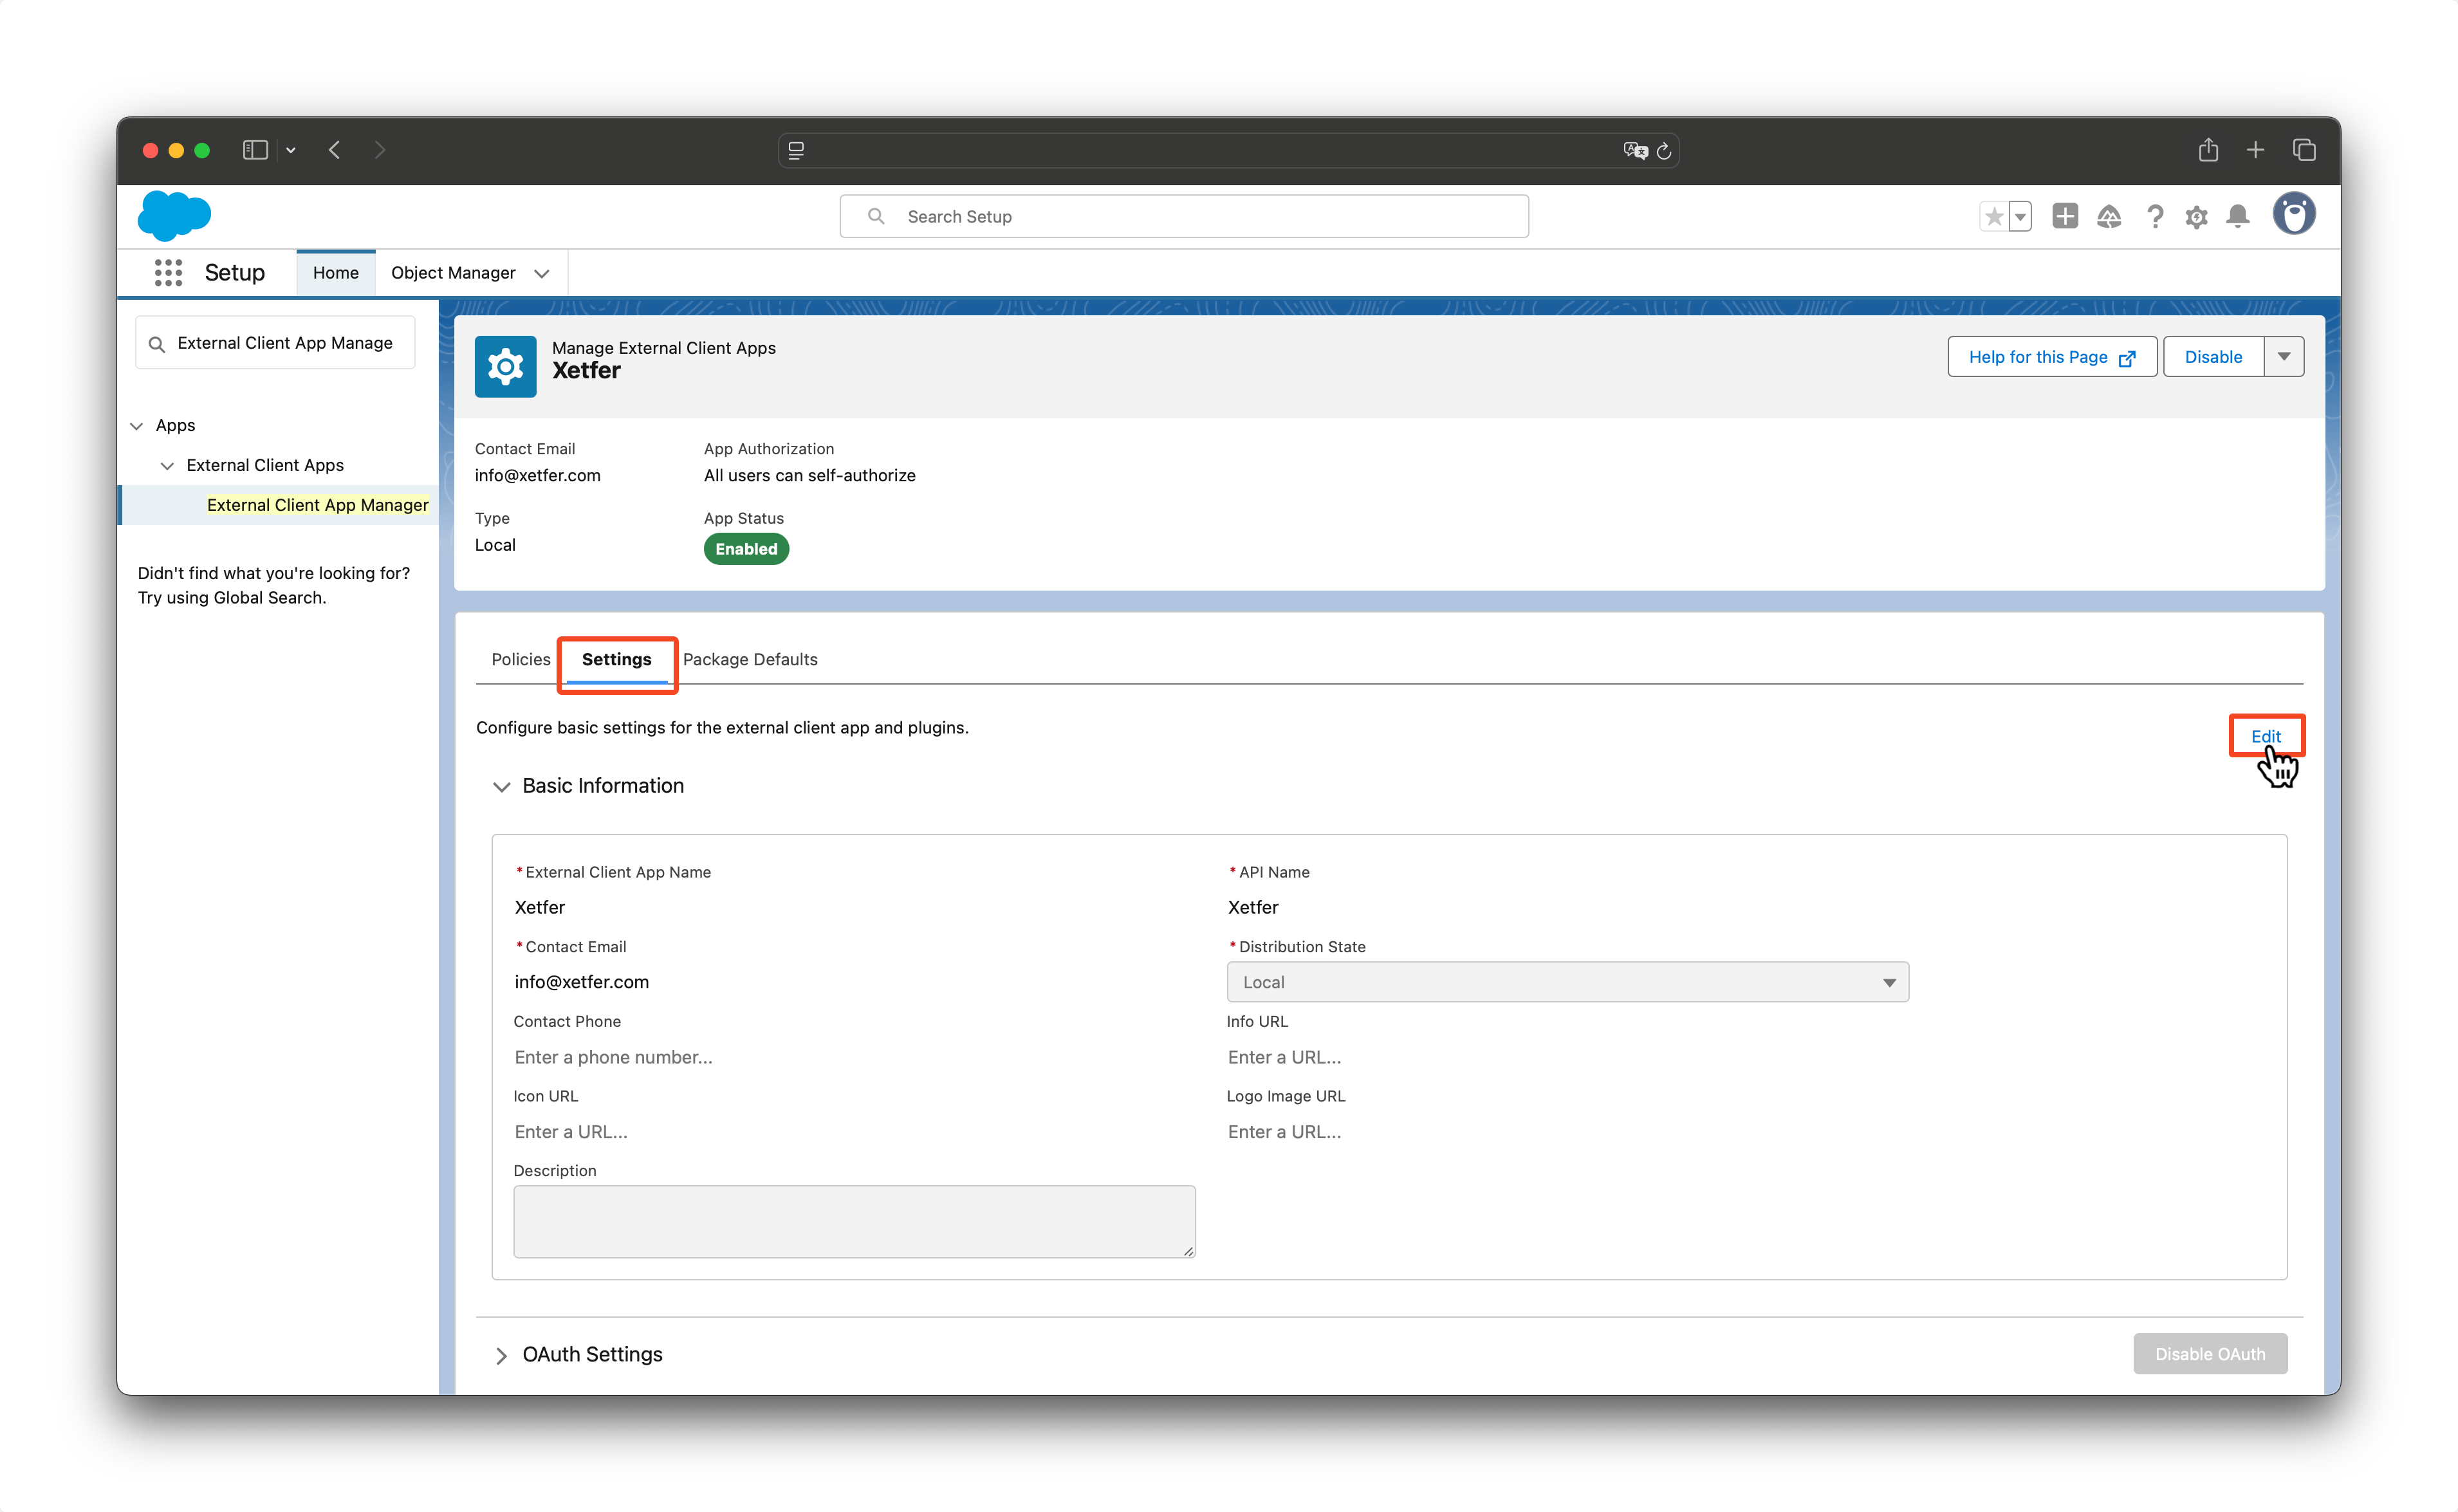
Click Consumer Key and Secret

You can see Consumer Key and Consumer Secret. It will be used in the next steps. Copy it.
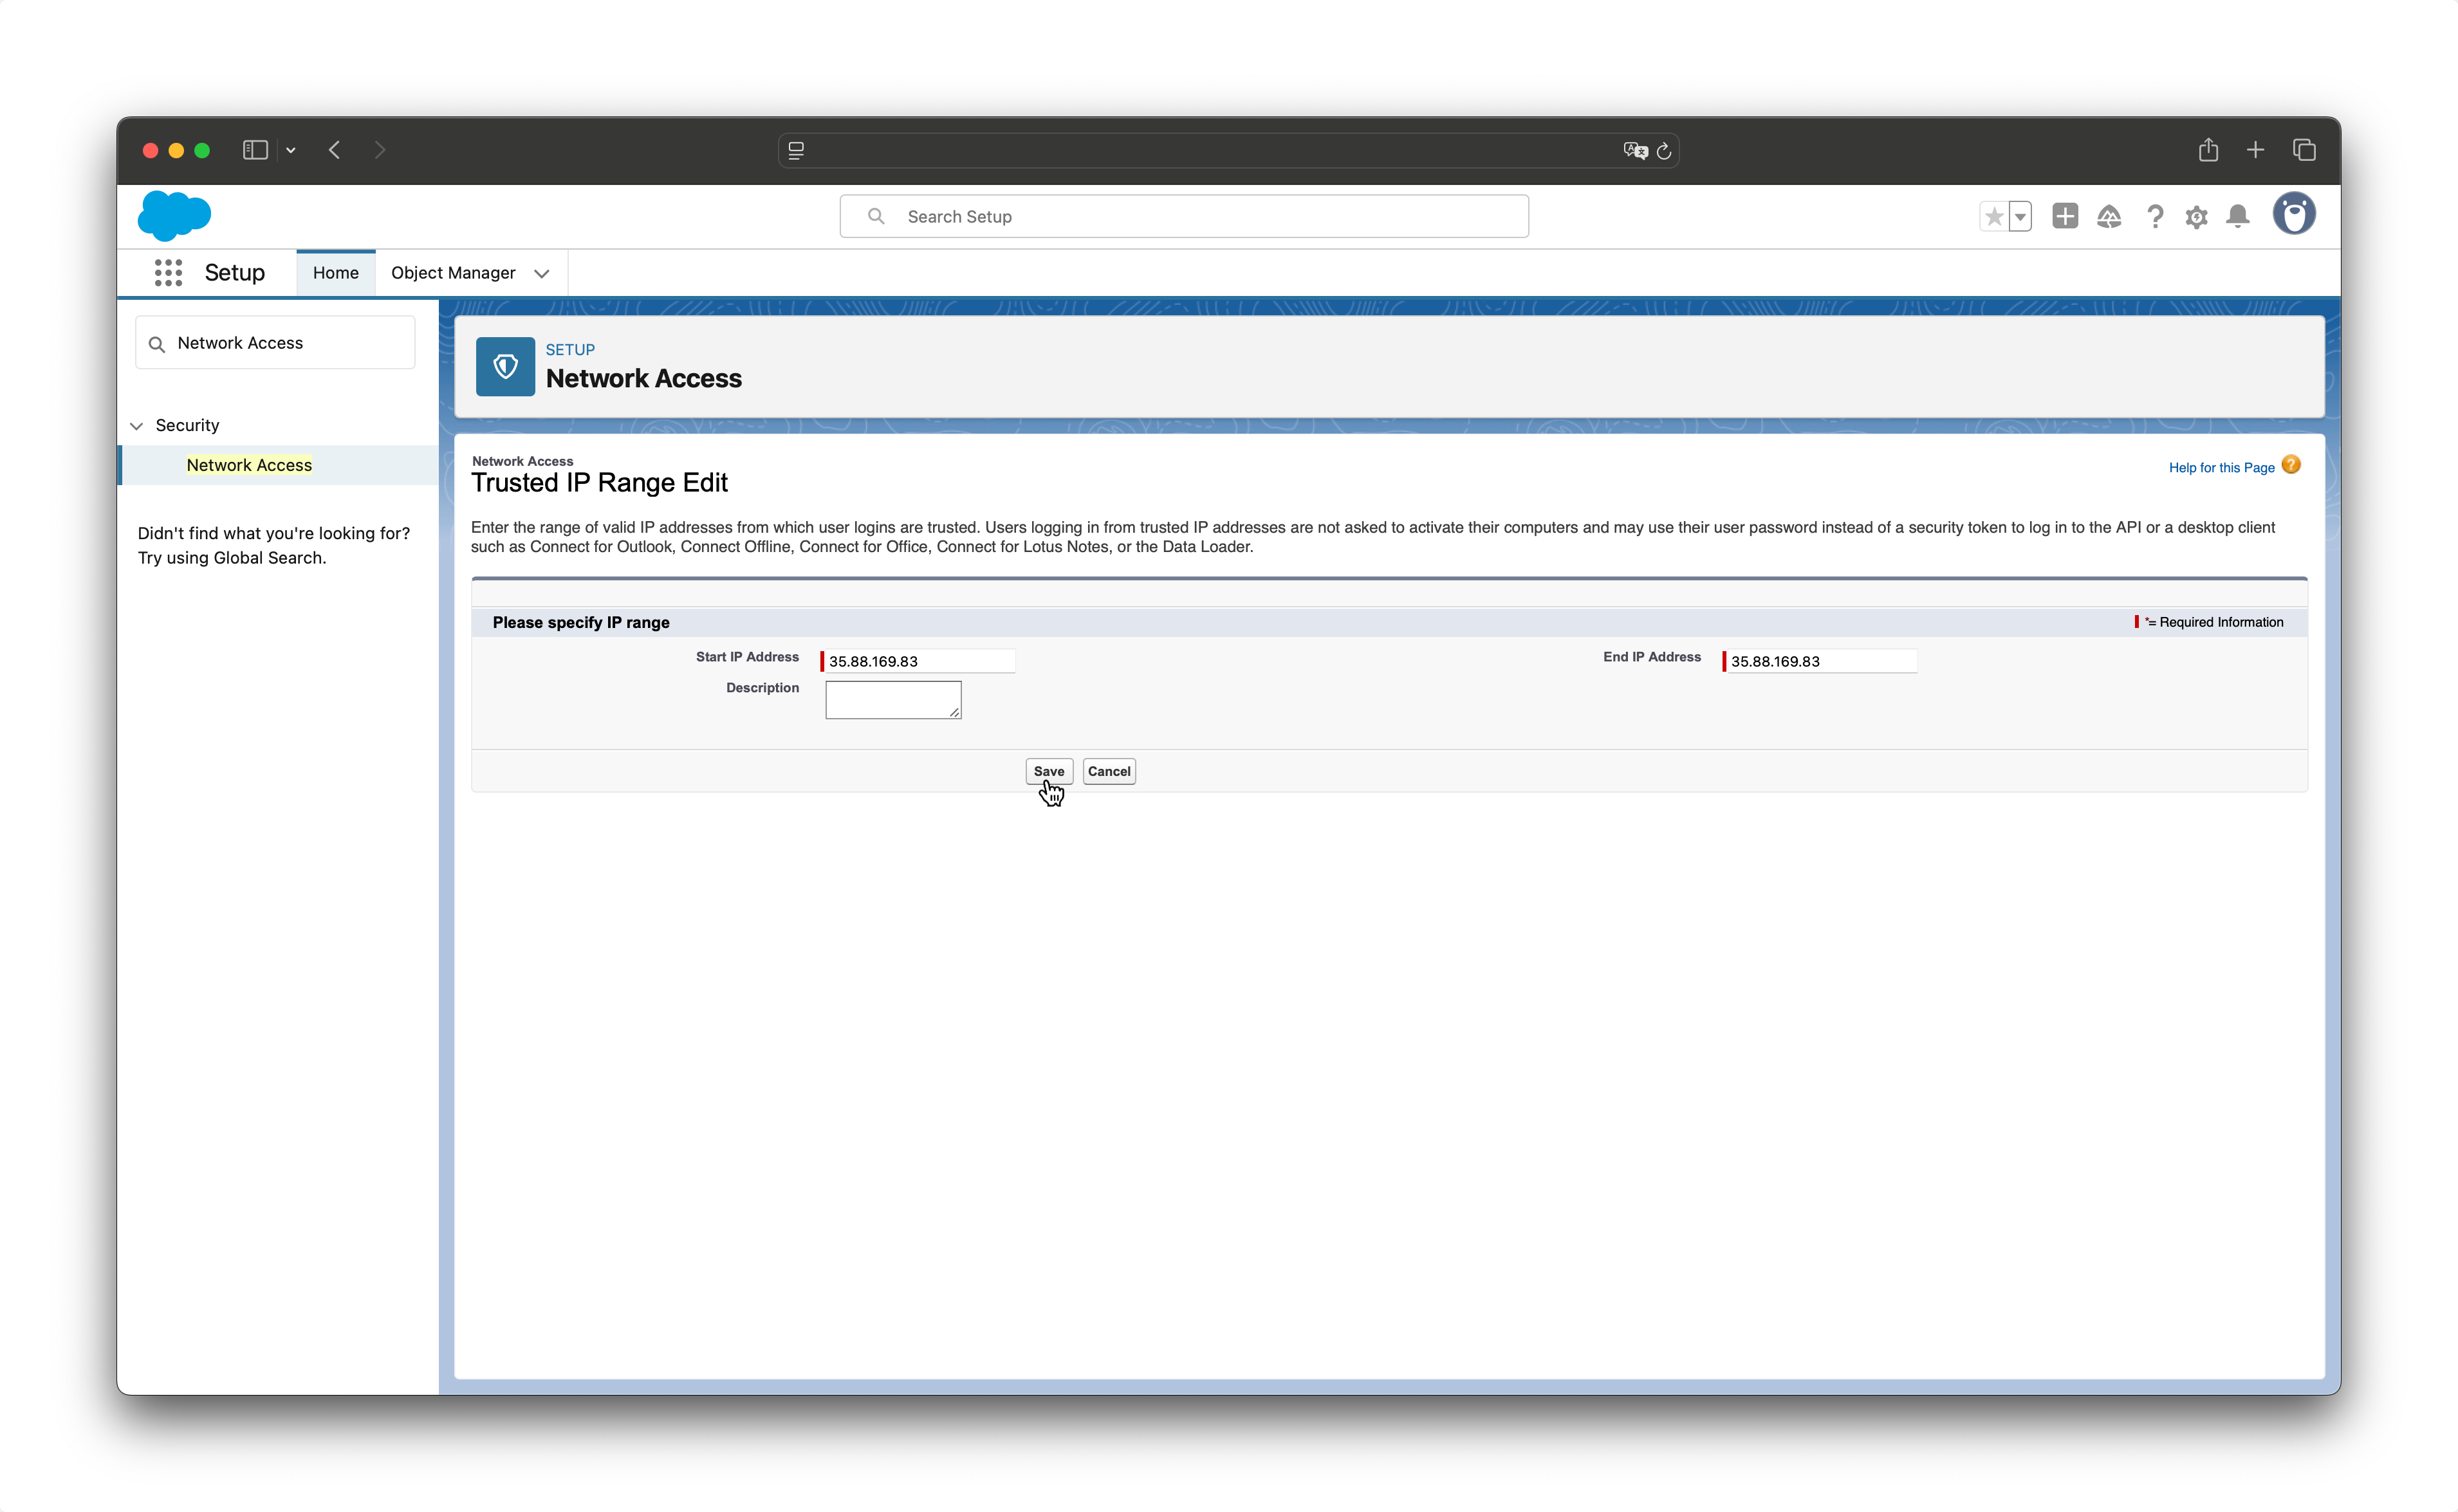
Set Trust IP
- Open Setup → Security → Network Access.
- Press New button.
- Set Start IP Address and End IP Address to
35.88.169.83 - Press Save button.
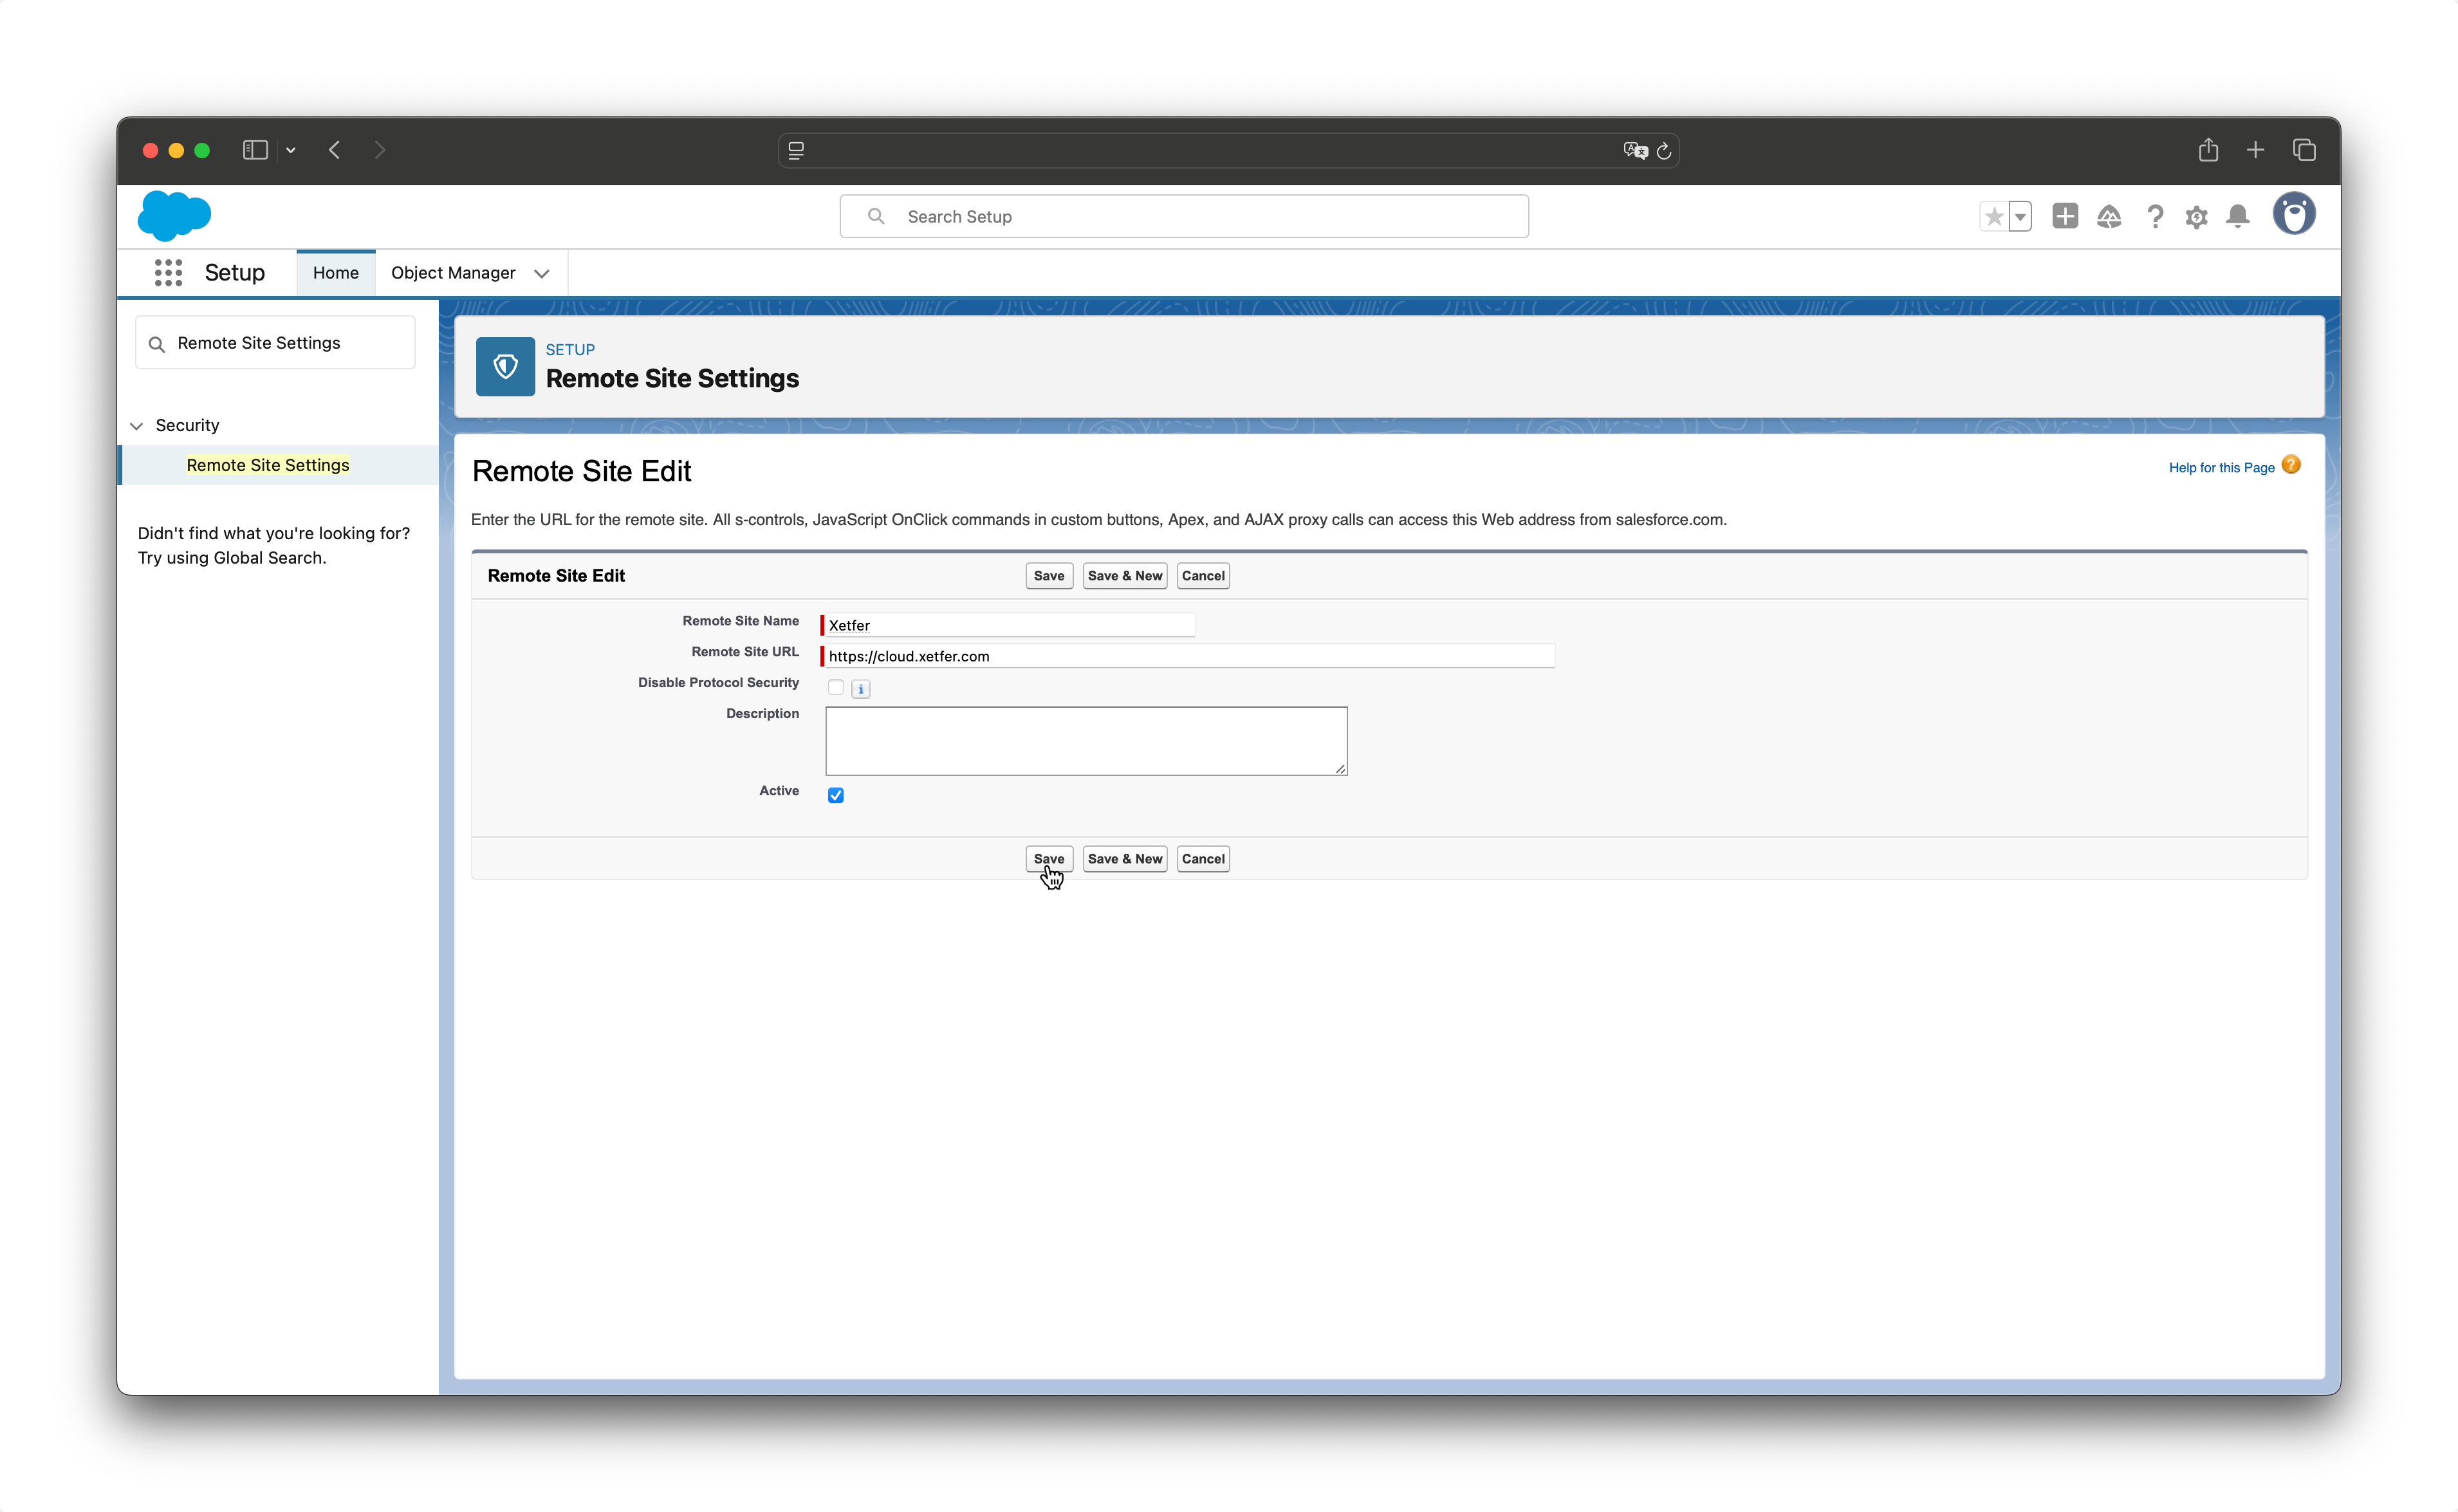
Set Remote Site Settings
- Open Setup → Security → Remote Site Settings.
- Press New Remote Site.
- Set Remote Site Name field to (Example: Xetfer).
- Set Remote Site URL field to
https://cloud.xetfer.com- Make sure that Active checkbox is checked ☑️
- Press Save button.
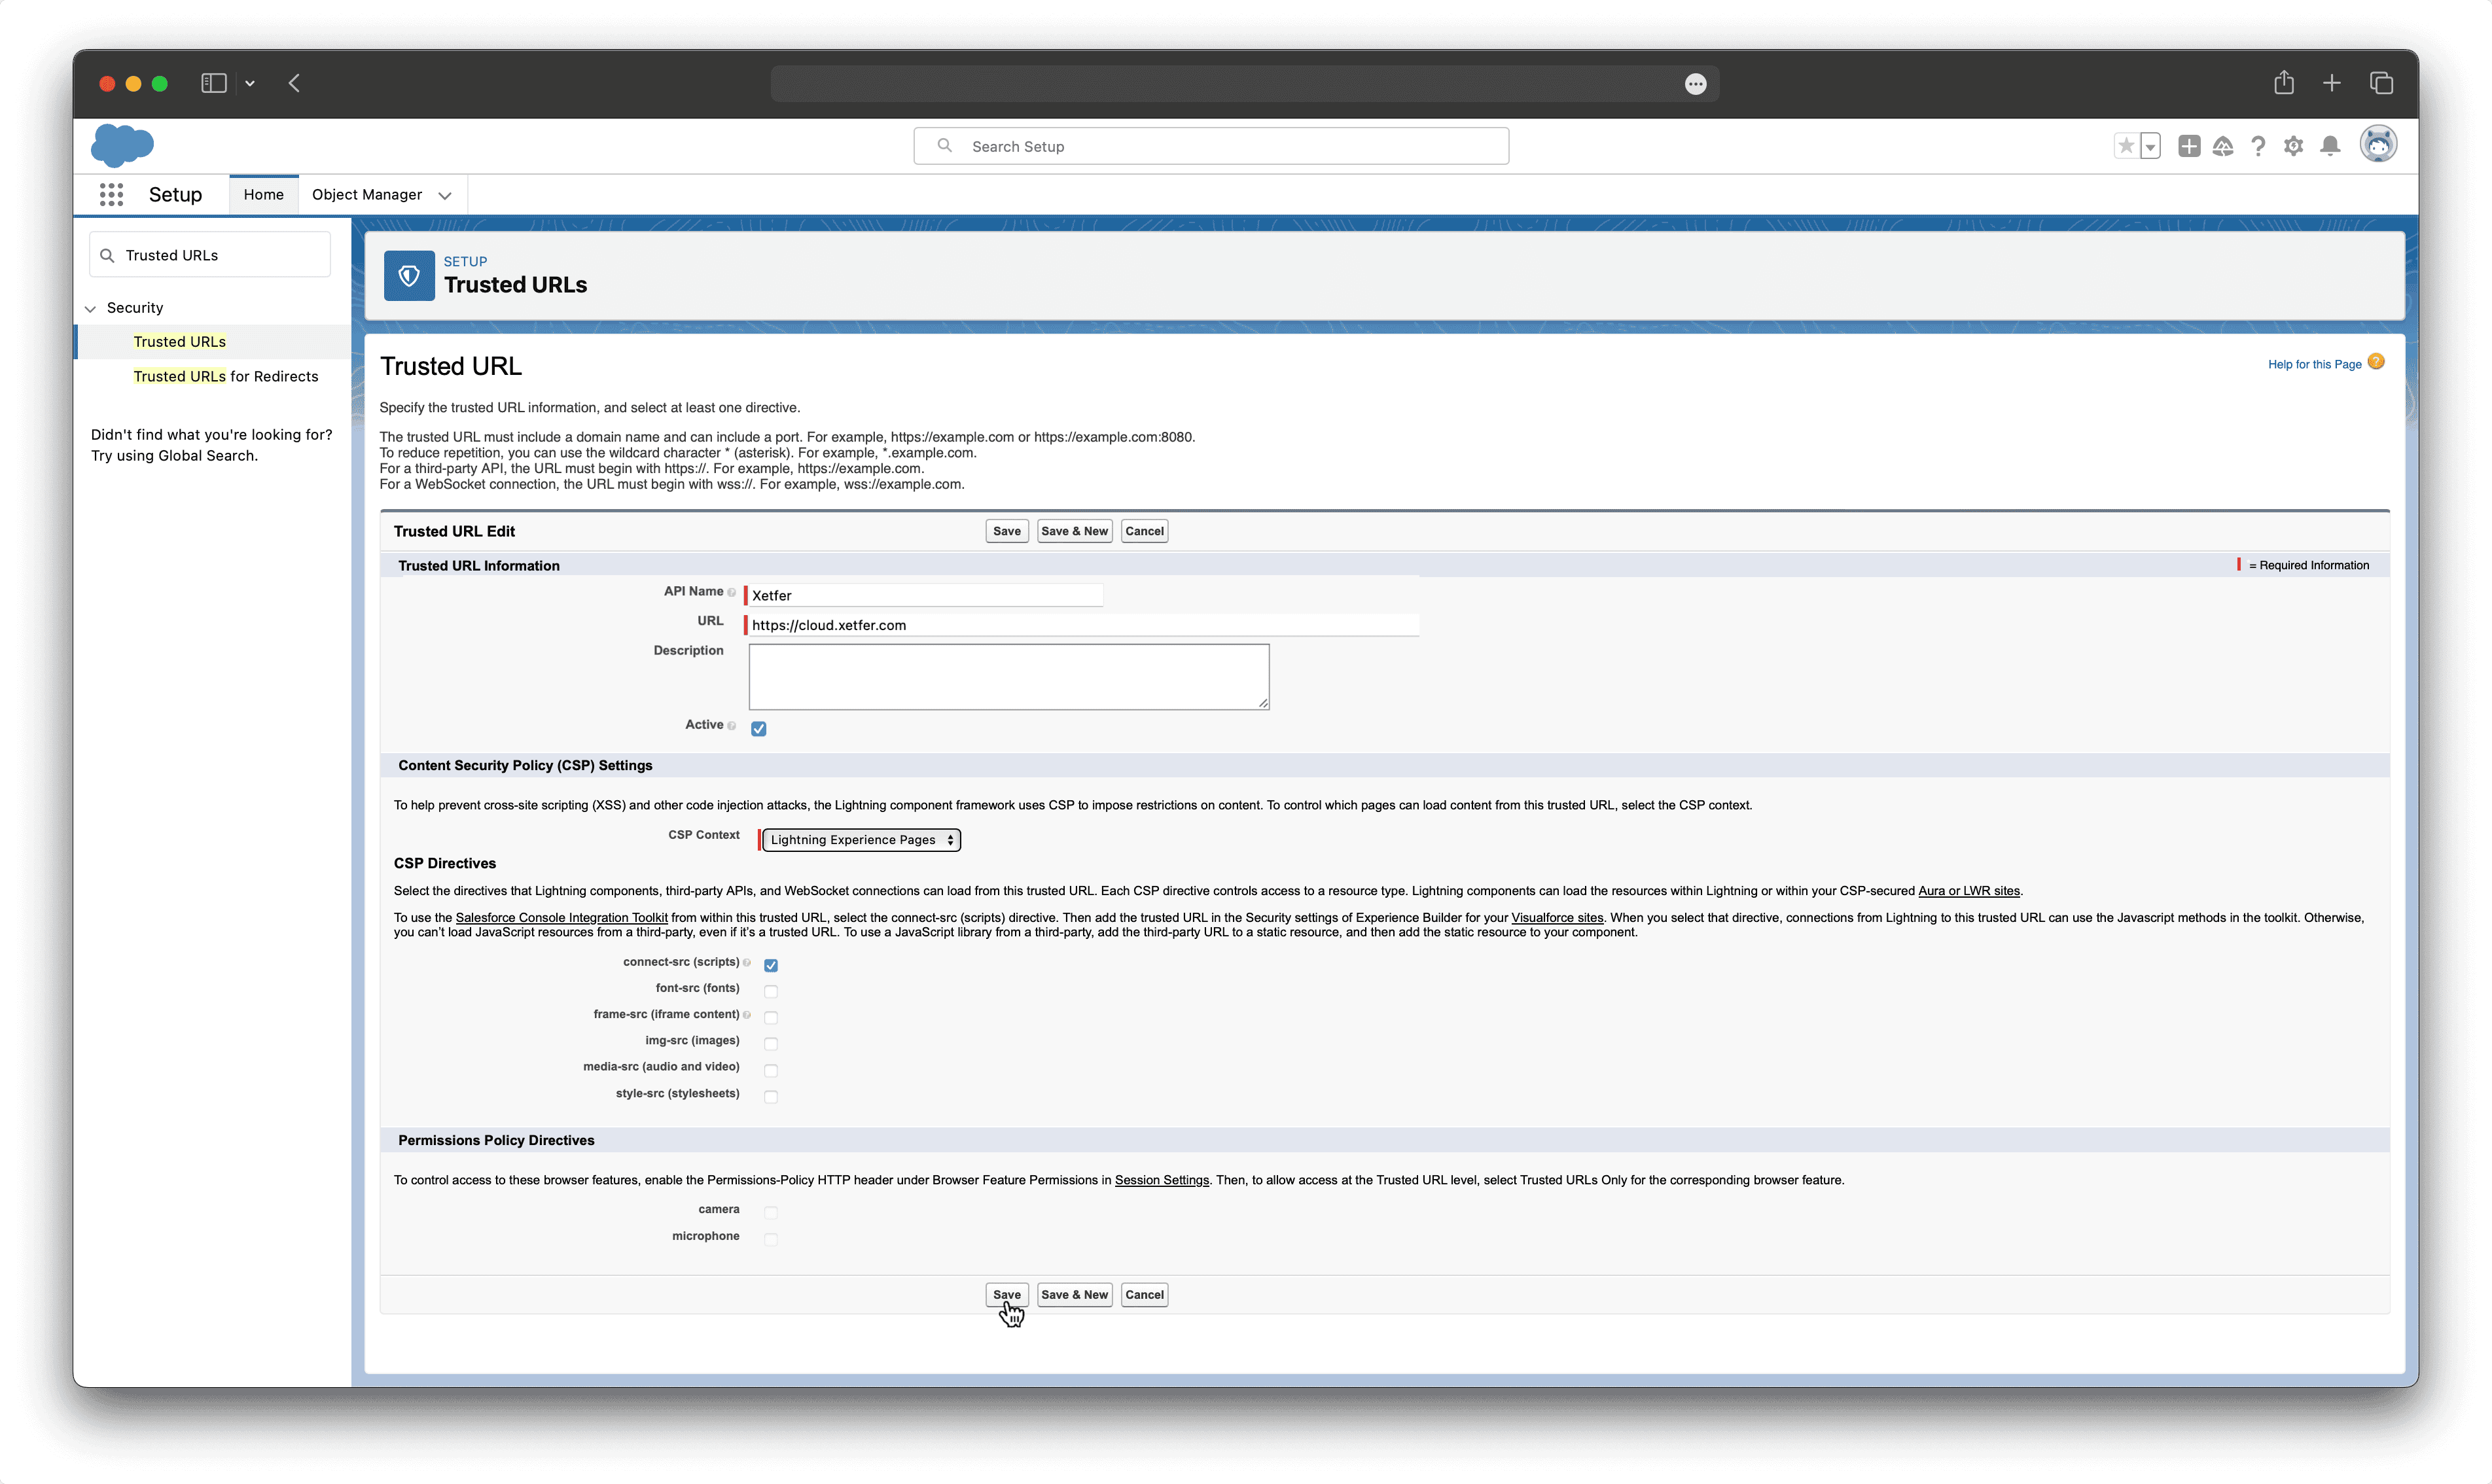
Set Trusted URL
- Open Setup → Security → Trusted URLs.
- Press New Trusted URL.
- Set the API Name field to (Example: Xetfer).
- Set the URL field to
https://cloud.xetfer.com- Check CSP Context to «Lightning Experience Pages»
- Check CSP Directives «content-src (scripts)» ☑️
- Press Save button.
Set the Permission Set to the User with the System Administrator Profile for the Registration Page:
- Open Setup → Users → Permission Sets.
- Choose Xetfer Registration User Access.
- Press Manage Assignments button.
- Press Add Assignments button.
- Check the user.
- Press Assign button.
- Press Done button.
Set the Permission Sets to the other Users for the Access to the Application Depending on Your Needs
Full Access, Access to All Xetfer Records (Connections, Templates, Jobs, Files, Runs, allow to edit Settings):
- Open Setup → Users → Permission Sets.
- Choose Xetfer Admin Access.
- Press Manage Assignments button.
- Press Add Assignments button.
- Check the user.
- Press Assign button.
- Press Done button.
Restricted Access, Access to Only Own Records (Connections, Templates, Jobs, Files, Runs):
- Open Setup → Users → Permission Sets.
- Choose Xetfer User Access.
- Press Manage Assignments button.
- Press Add Assignments button.
- Check the user.
- Press Assign button.
- Press Done button.
Pass Registration
- Open App Launcher → Find and open Xetfer Registration page.
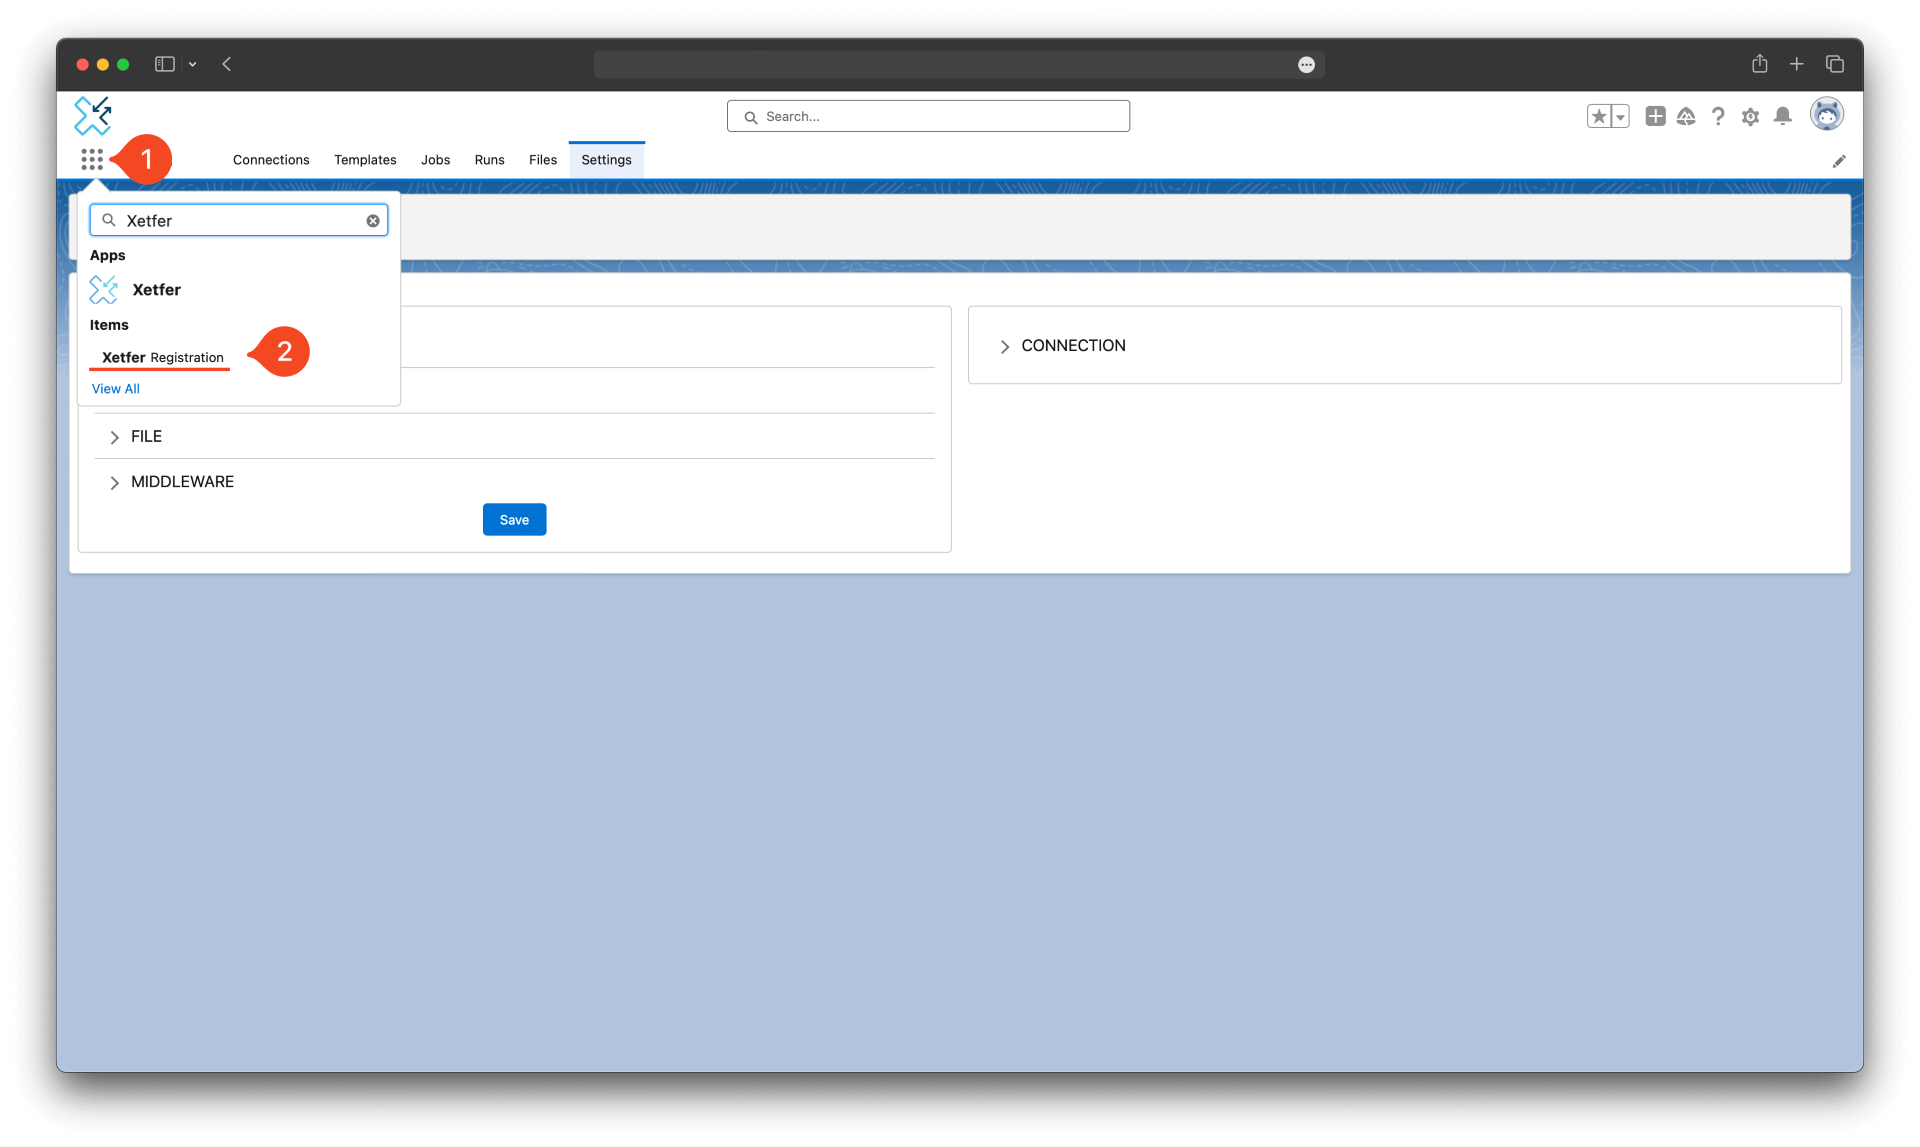
- Click Endpoint Settings button.
- Input your data to the form:
- Set Middleware URL field to
https://cloud.xetfer.com - Set Consumer Key value copied on the previous steps.
- Set Consumer Secret value copied on the previous steps.
- Set Middleware URL field to
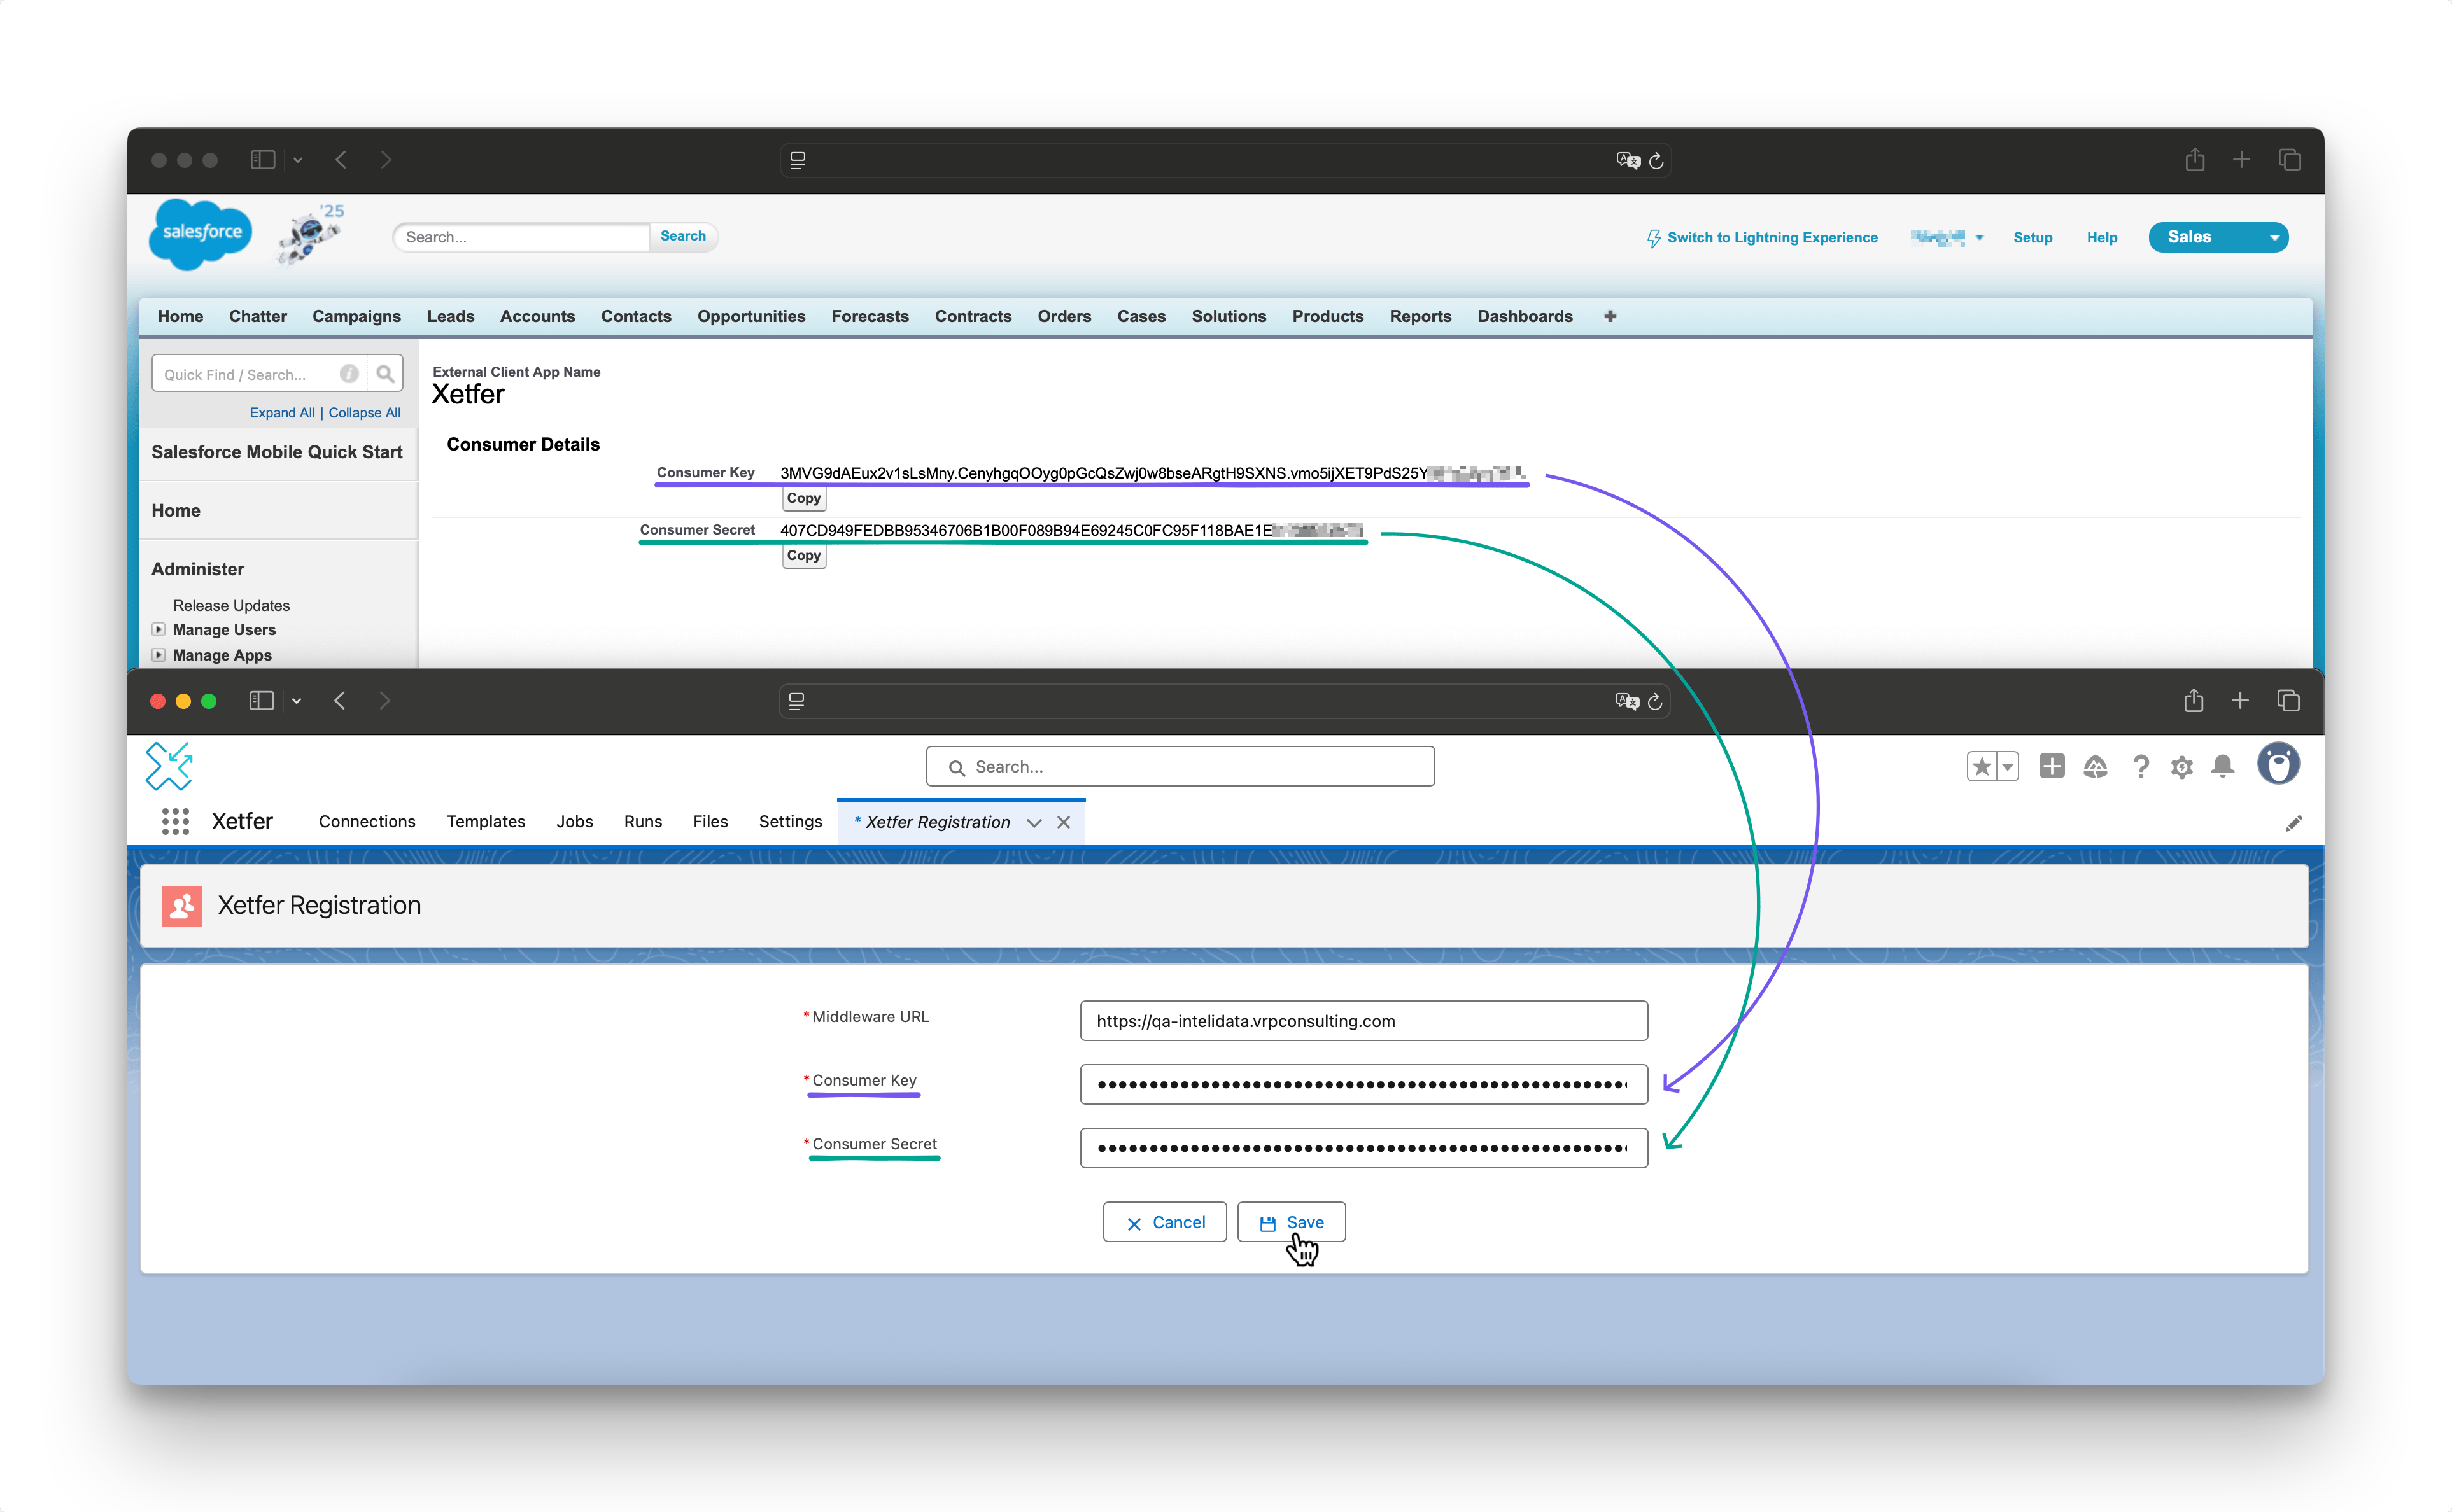
- Press Save button.
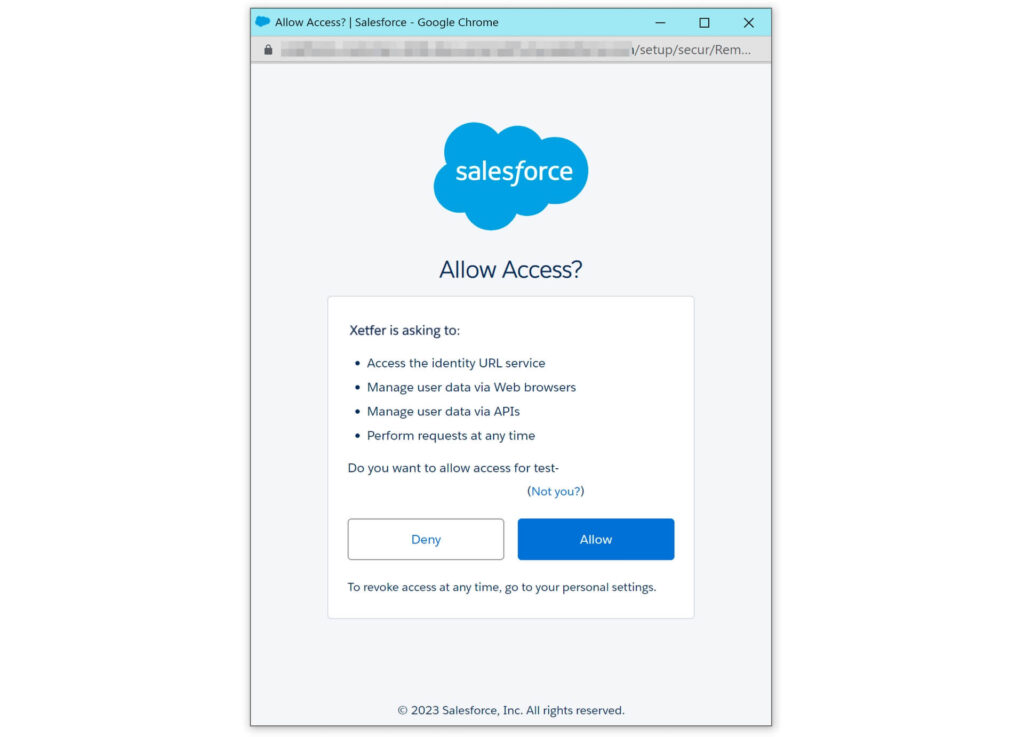
- After the configuring endpoint settings, click Register User button.
Pop-up Instructions
- Should appear a pop up!
- If your browser blocks it, then allow popups.
- Input your current org credentials (where the Xetfer package has been installed) to the form → Press Allow button.
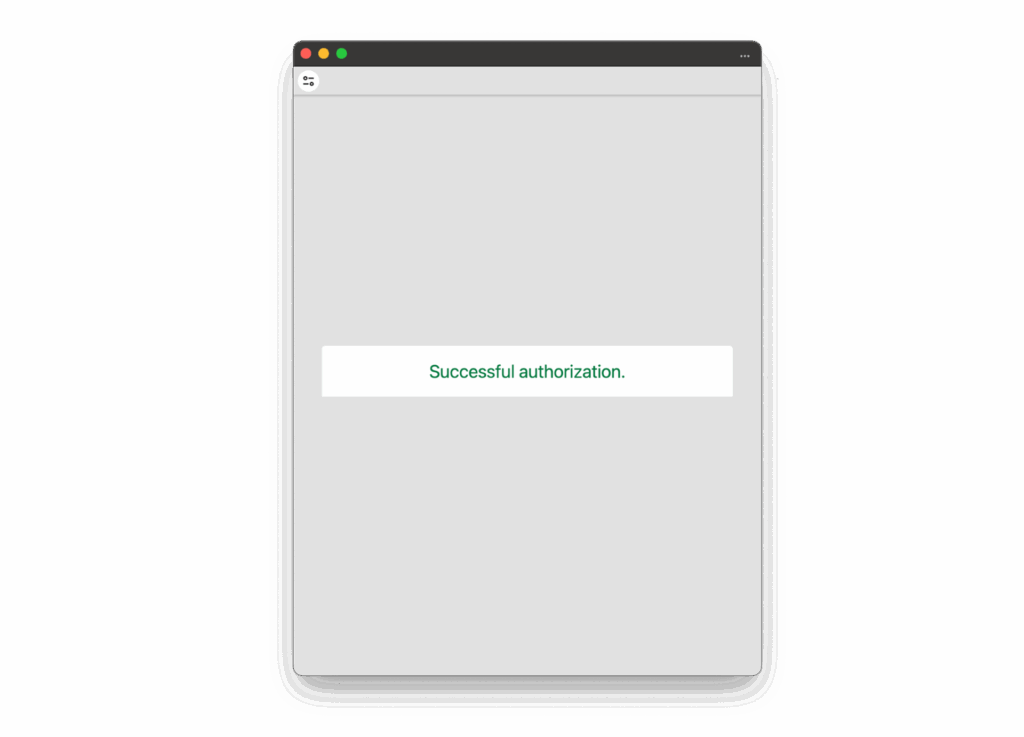
Verification:
- You should see the message «Successful authorization» ?
- Setup is complete.
Note
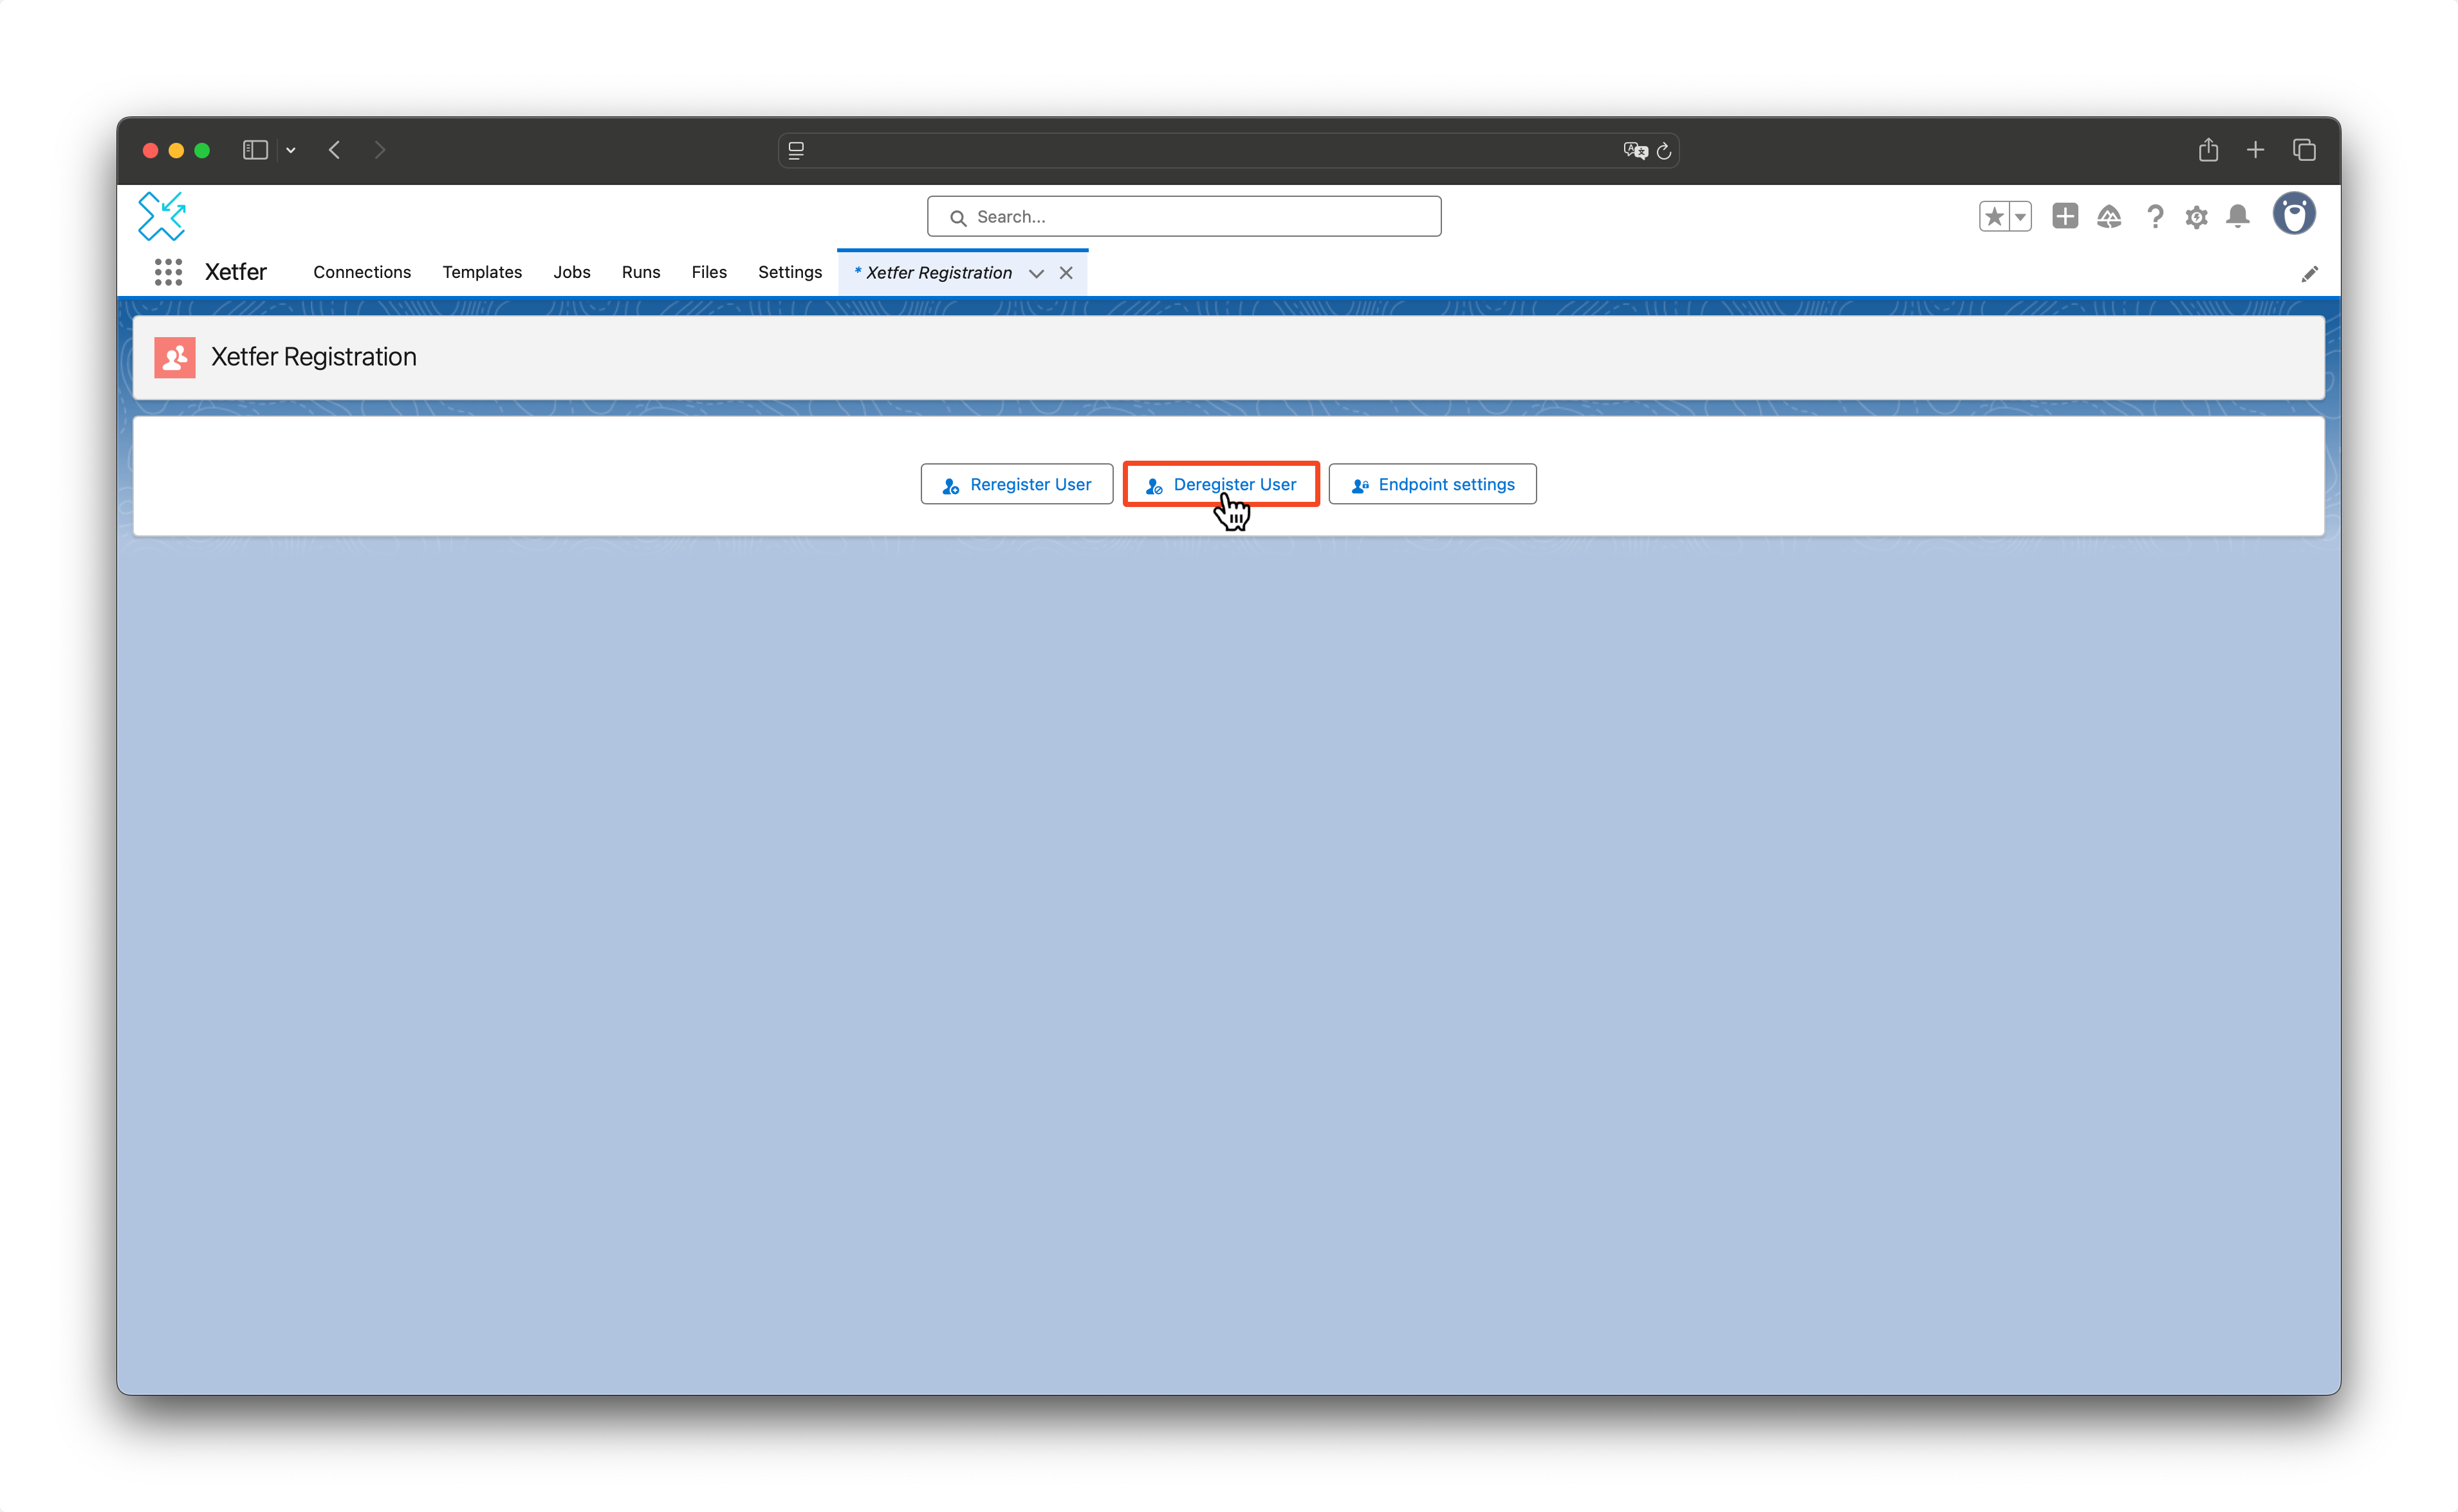
Next time, if you press the Deregister User button on the Registration page, then all application records will be deleted.
- Additionally, please, do not use
xetfer__AppDatain Title field forContentDocumentsObject. This name is used by the Xetfer, and these files will be deleted after deregistration on the «Registration Page».
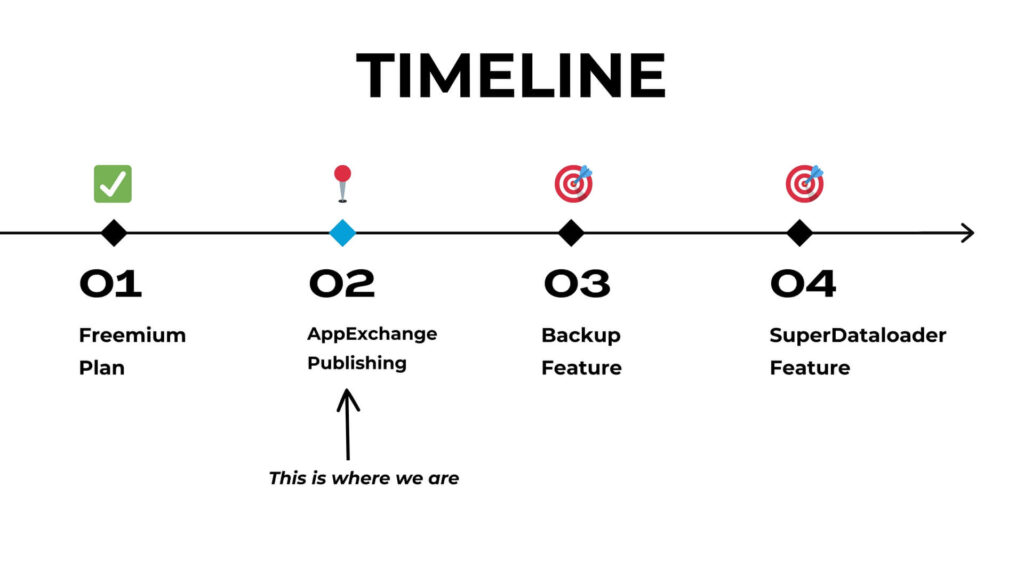
Next step: