Xetfer Plugin Guide
The Xetfer plugin is a tool that allows you to run Xetfer jobs with the Salesforce command line. We have prepared a detailed instruction on how to set up the environment and use the plugin
(Optional) Prepare environment
Xetfer Plugin is available via npm, so you need to install Node.js, npm, and Salesforce CLI first. Follow these steps to install and set up all the required tools:
1. Install Node.js
Node.js is a JavaScript runtime required to run the Xetfer Plugin. To install it:
Visit the official Node.js website to download the installer:
https://nodejs.org/en/download- Choose the recommended version for your operating system (LTS version is recommended).
- After installation, open your terminal or command prompt or with
Windows:Win + Rand typecmd
MacOS/Linux:TerminalapplicationNote: You can use an IDE terminal, preparing and usage steps will be the same
Then check if Node.js was installed successfully by running:node -v
You should see a version number like this:v22.14.0 - Verify the npm version by running the following command:
npm -vYou should see the version number, for example:10.9.2
2. Install Salesforce CLI
Salesforce CLI is necessary to interact with Salesforce and run migration jobs. To install Salesforce CLI, follow the instructions based on your operating system:
For macOS or Linux:
You can install Salesforce CLI via Homebrew (macOS) or the installation script for Linux:
- macOS: Use Homebrew to install Salesforce CLI:
brew install sfdx-cli - Linux: You can download and install Salesforce CLI using the following command:
curl https://developer.salesforce.com/media/salesforce-cli/sfdx-linux-x64.tar.xz | tar xJf - -C ~/.local/bin
For Windows:
To install Salesforce CLI on Windows:
- Visit the official Salesforce CLI download page.
- Download the installer for Windows and run it.
After installation, open your terminal (or Command Prompt) and verify that Salesforce CLI was installed correctly by running:
sf --version@salesforce/cli/2.74.6 win32-x64 node-v22.12.0? Note: Plugin is working on sf node version > 18.0.0, you can update it with sf update command
Install Xetfer Plugin
You can install Xetfer Plugin with npm by running the following command:
sf plugins install xetferYou can see the following message:
"xetfer isn't signed by Salesforce. Only install the plugin if you trust its creator.
Do you want to continue the installation?"
Type Y or Yes to confirm installation
Login to Salesforce Org
To use the plugin correctly you need to authorize an org where Xetfer App is installed, you can perform it with following steps:
Use the following command to authorize an org: sf org login web --alias <ALIAS>
Command example: sf org login web --alias xetferOrg
--alias – Short name for the org (e.g., “Production”, “Sandbox”)
Verify the connected org
Using the following command you can get a list of all authorized orgs: sf org list
Result should be:
| Alias | Username | Org Id | Status |
| prod | user@company.com | 00DgL000000fnsbTAT | Connected |
| dev | test@dev.org | 00DgL0000003bgvYN | Connected |
Make sure you can find your org and its status is Connected
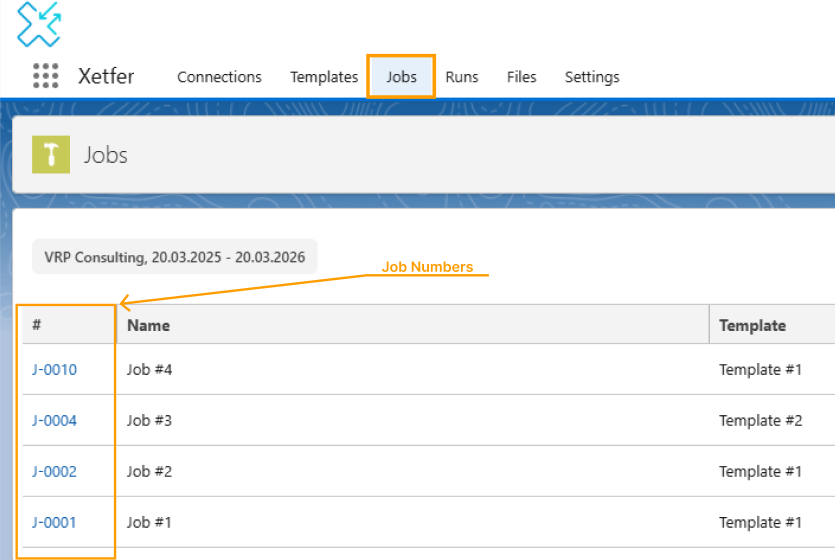
Get Job Number
Job Number is a J-XXXX formatted unique migration number in Xetfer application system
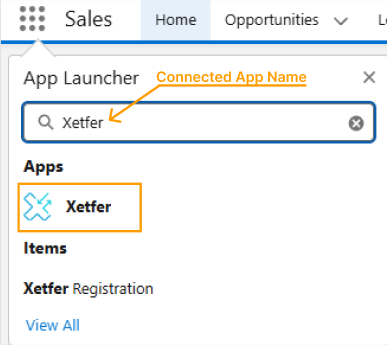
You can find all Jobs by following Salesforce org with installed Xetfer package -> App Launcher -> App Name (e.g. Xetfer -> Jobs)
Open App Launcher:

Find App:
Get your Job Number:
Usage
To run your job you need to use a command below:
$ sf xetfer:runjob -o <value> -j <value> [--json]
Flags
-j, --job-number=<value> (required)
Specifies the job number in the format J-XXXX, where XXXX is a unique job identifier.
You can find job numbers with the following path: Salesforce Org with Xetfer Package - Xetfer App - Jobs - #
-o, --xetfer-org=<value> (default: sf default org)
Specifies the login username or alias for the target Salesforce organization. It will override the default Salesforce organization for the current operation if specified.
Global Flags
--json Format output as json.